Touch panel assembly
NOTE:
Return the entire touch panel assembly, including bezel, to the factory for service.
1.
Prepare the computer for disassembly (see
Preparing to disassemble the HP TouchSmart PC
on page 12
).
2.
Place the computer face down on a soft, flat surface.
3.
Remove the hard drive/memory cover (see
Hard drive/memory cover on page 14
).
4.
Remove the stand (see
Stand on page 17
).
5.
Remove the I/O cover (see
I/O cover on page 15
).
6.
Remove the feet (see
Feet on page 16
).
7.
Remove the hard drive (see
Removing the hard drive on page 21
).
8.
Remove the back cover (see
Back cover on page 22
).
9.
Remove the amp board shield (see
Amp board shield on page 28
).
10.
Remove the system board shield (see
System board shield on page 28
).
11.
Remove the fan sink, thermal kit, and graphics card (as necessary) (see
Graphics card – Discrete
or UMA on page 29
).
12.
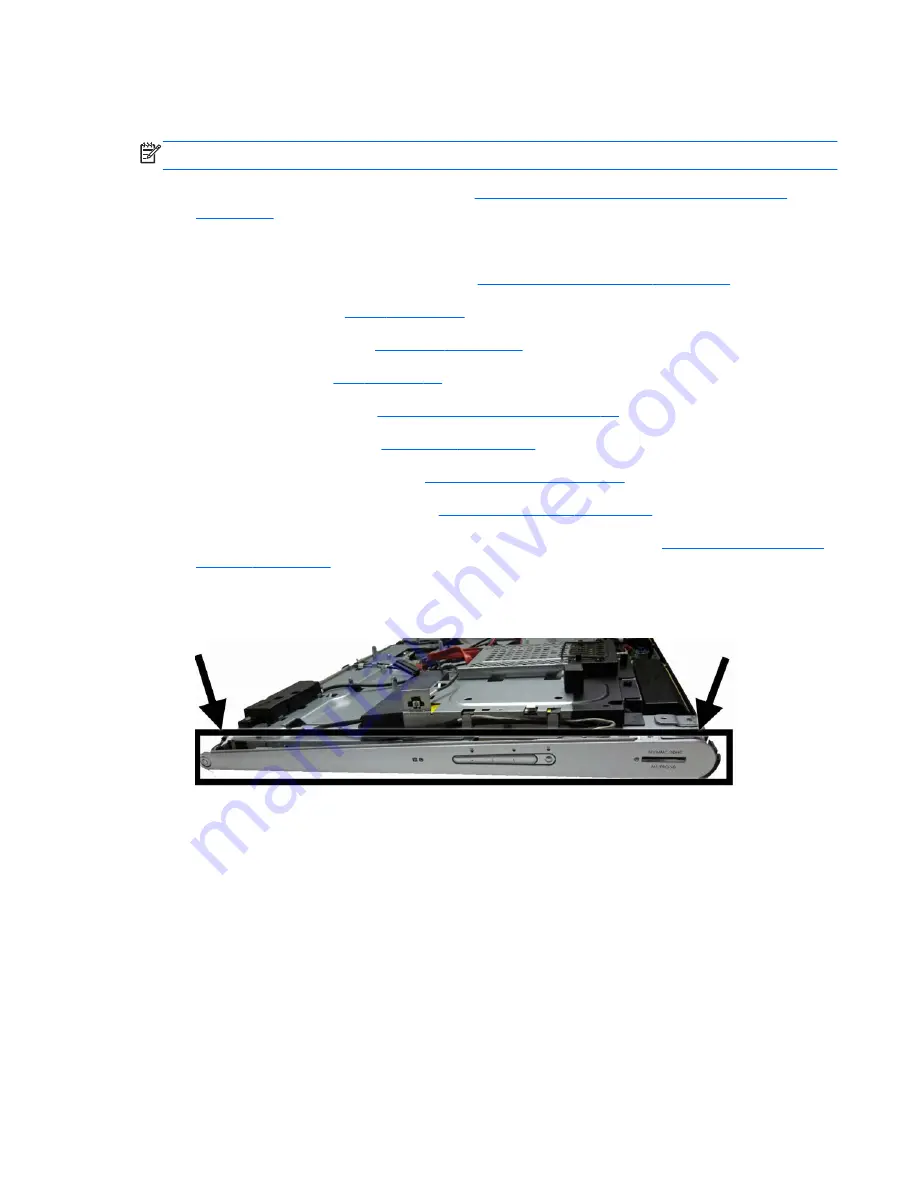
Remove the two side silver caps (only one shown in image below) by pulling them straight off. You
have to disconnect cables from the left side cap.
Touch panel assembly
41
Содержание AZ525AW#ABA
Страница 1: ...Maintenance and Service Guide HP TouchSmart 9100 Business PC ...
Страница 4: ...iv About This Book ...
Страница 7: ...Starting system recovery from recovery discs 65 Index 67 vii ...
Страница 8: ...viii ...


