3-12
Installation and Configuration
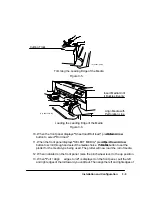
If difficulty in loading sheet media is experienced, an alternate method of loading is possible.
Do the following:
1. Ensure that the pinchwheel lever is down and the roll cover is closed.
2. Raise the window on the plotter.
3. Insert the sheet into the plotter until the leading edge hits the stops inside the platen
area. Align the right side of the sheet with the perforation line on the entry platen.
4. While holding the sheet against the stops and aligned with the perforation line, lower
the window on the plotter. Let go as soon as the plotter begins to pull the media in.
Perform steps 4 through 6 of the sheet loading procedure on the previous page to set the plot-
ter for the media type being used.
UNLOADING SHEET MEDIA
To remove an
unplotted
sheet, press the
Form Feed/Cut
button and remove the sheet when
the plotter is finished feeding it out. Another way to remove unplotted sheet media is to raise
the pinchwheel lever at the right, remove the sheet, and lower the lever.
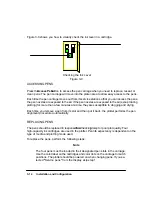
CLEARING MEDIA JAMS
To clear a media jam, first press the
Form Feed/Cut
button to see if the plotter will cut, and
advance the media out. Should the jam remain, turn the plotter OFF and raise the pinchwheel
lever and window to the up position.
W A R N I N G
The steel encoder strip and automatic cutter blade inside the
plotter are very sharp. Use caution when inserting hands
into the plotter to clear media.
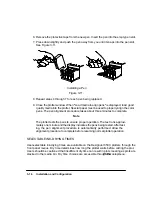
If necessary, push the ink-cartridge carriage and the cutter carriage away from the jammed
media. Handle only the solid plastic part of the ink-cartridge carriage and the extension on the
left end of the cutter carriage. Carefully remove the jammed media from the plotter. When
finished, lower the window and pinchwheel lever before turning the plotter back ON.
Содержание 650c - DesignJet Color Inkjet Printer
Страница 1: ...PrinterFAQ COM HP DesignJet650C User Guide ...
Страница 126: ...7 10 Adjustments Calibrations Notes ...
Страница 156: ...9 4 Product History Notes ...
Страница 161: ...10 5 Parts and Diagrams Illustrated Parts Breakdown Stand Assemblies 1 2 3 4 5 6 7 8 1 3 5 3 3 3 3 3 9 9 C C2858 1 1 ...
Страница 165: ...10 9 Parts and Diagrams Illustrated Parts Breakdown C2859A Electronics Enclosure C C2858 3 1 ...
Страница 167: ...10 11 Parts and Diagrams Illustrated Parts Breakdown C2858A Electronics Enclosure C C2858 4 1 ...
Страница 177: ...10 21 Parts and Diagrams Illustrated Parts Breakdown Service Station Assembly 1 2 3 4 5 6 C C2858 9 1 7 8 9 10 11 12 ...
Страница 181: ...10 25 Parts and Diagrams 1 3 Illustrated Parts Breakdown 5 6 Pen Carriage Assembly C C2858 11 1 7 2 8 9 2 4 5 10 ...
Страница 183: ...10 27 Parts and Diagrams Illustrated Parts Breakdown Paper Drive Assemblies C C2858 12 1 ...
Страница 185: ...10 29 Parts and Diagrams Illustrated Parts Breakdown Bail and Overdrive Support Assemblies C C2858 13 1 ...
Страница 189: ...10 33 Parts and Diagrams Illustrated Parts Breakdown Starwheel Starguard and Chassis Assemblies C C2858 15 1 ...
Страница 199: ......

