


217
The ‘Start’ entry
It is a very good idea to include a “Start” entry, since it will be automatically
run when the user presses
and it thus allows you to enter pre-set
values in variables, or to pre-set axes, so that the aplet runs smoothly.
Additionally, if you terminate the “Start” entry with a view number of 7 then as
soon as the user runs the aplet the
VIEWS
menu will be displayed (it is view
number 7). This makes the aplet more friendly since the controlling menu is
the first thing the user sees. Some aplets tend to opt for first displaying the
Note view because they include instructions there. I usually opt for the
VIEWS
menu and include instructions in a separate file.
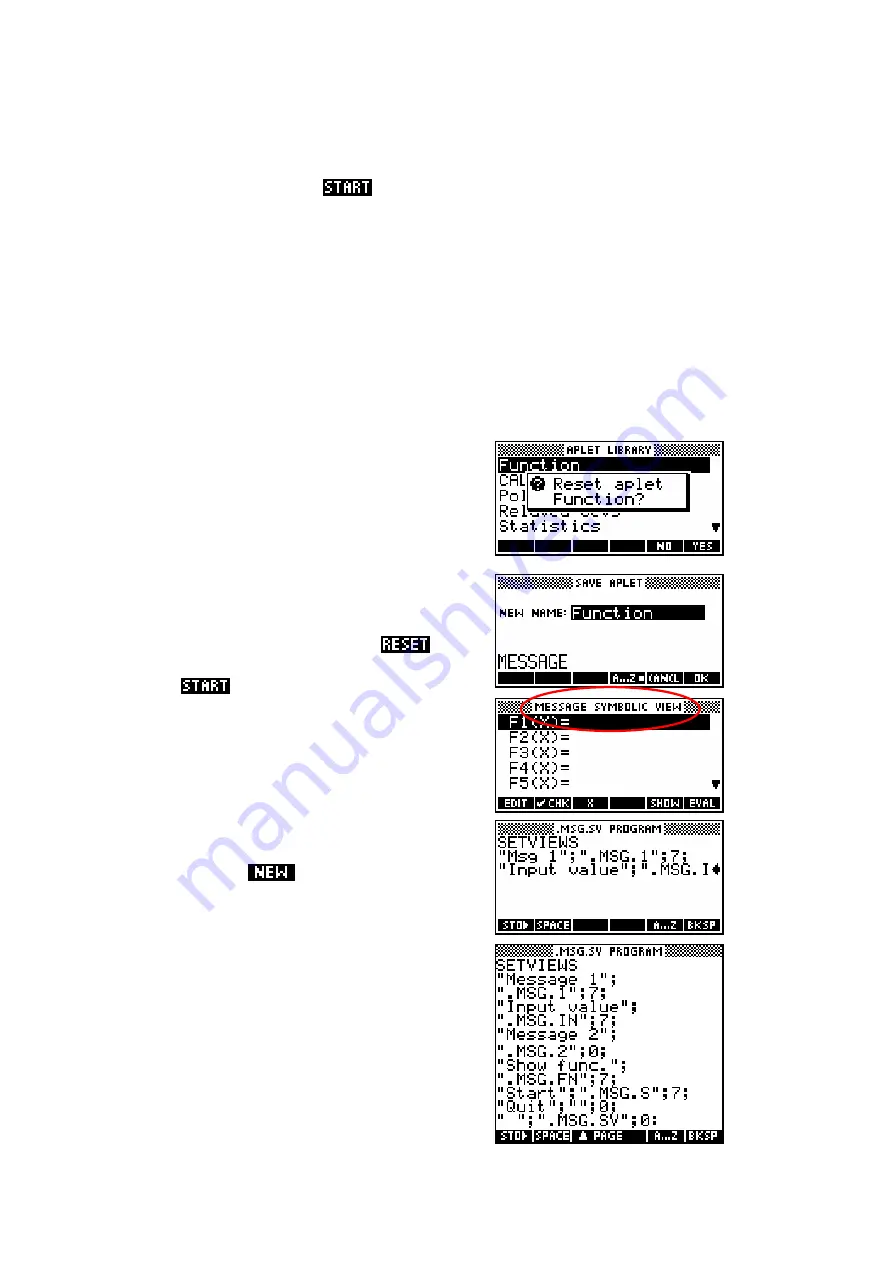
Example aplet #1
This example will use the
SETVIEWS
command to design a very simple (and totally
useless) aplet, which will illustrate a few of the
concepts useful in programming the hp 39g+.
We’ll call it the ‘Message’ aplet and create it as
a descendant of the Function aplet.
Change into the
APLET
view, move the
highlight to the Function aplet and
it.
Now save it under the new name of ‘Message’
and then
this new aplet.
You will find that you are looking at the normal
SYMB
view but for the Message aplet instead of
the Function aplet.
Press
SHIFT
PROGRAM
to view the
Program
Catalog
. Press
to create a new
program and call it
.MSG.SV
(see right, with
part of the new program typed in)
Into this empty program, type the following
code, obtaining the quotes from the
CHARS
view. When you finish typing, just press
SHIFT
PROGRAM
again to exit back to the
Program
Catalog
. There is no need to save as this is
done continuously as you type.


