


208
Saving notes, aplets and sketches via the Connectivity Kit
The following information applies to the HPGComm program for the hp 38g,
hp 39g or hp 40g. If you have an hp 39g+ then the software will be similar in
behavior although the appearance may be significantly different (page 203).
Sending aplets, programs, notes etc back to a
computer is simply the reverse of the process
covered so far. The only difference is that you
need to create a directory to hold them first.
The Connectivity Kit software is capable of
doing this for you. Just browse to the directory
in which you want to create your new folder and click on
‘Ok’. Now add to the path in the directory box by typing at
the end of it. When you do this the middle icon (left) will
activate. Clicking on it will create the new directory.
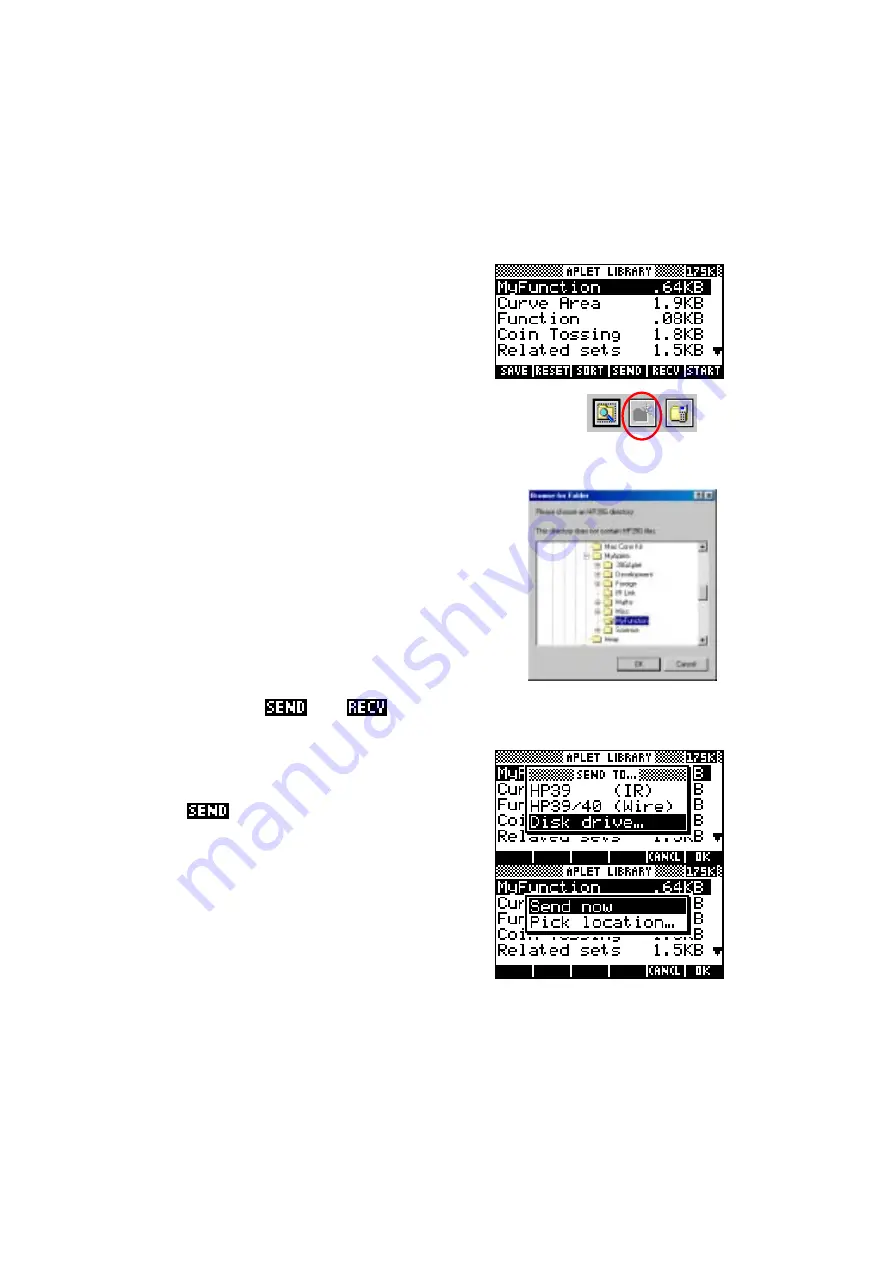
In the example shown right, I have created a
directory called ‘MyFunction’ to hold a copy of the
Function aplet, which I have also called
MyFunction, although it’s certainly not important
that they have the same name.
I now need to change into the view which shows
the object I am trying to save and highlight it. In
this case that’s the
APLET
view. Most of the
storage views have
and
keys, which means that you can also
save programs, lists, matrices, and notes. Sketches can only be saved by
saving the aplet to which they belong.
Press the
key, choose the
Disk drive…
option from the menu and press
ENTER
.
The calculator will respond by asking if you
want to
Send now
. Again, press
ENTER
.
Don’t use the
Pick location…
option.


