


Operating Precautions
16
Connect the clamp-on sensors or connection cords to the instru-
ment first, and then to the active lines to be measured. Observe
the following to avoid electric shock and short circuits.
• To avoid short circuits and potentially life-threatening hazards,
never attach the clamp to a circuit that operates at more than the
maximum rated voltage to earth, or over bare conductors.
• Do not allow the connection cord clips to touch two wires at the
same time. Never touch the edge of the metal clips.
• When the clamp sensor is opened, do not allow the metal part of
the clamp to touch any exposed metal, or to short between two
lines, and do not use over bare conductors.
• Do not leave the Memory HiCorder connected to test objects in
environments where a voltage surge might exceed the dielectric
withstand voltage. Doing so could result in damage to the Mem-
ory HiCorder, bodily injury or fatal accident.
• Do not connect a cable to the instrument while it is connected to
the object to be measured. Otherwise, an electric shock accident
may occur.
• To avoid short-circuit accidents, make certain that connections
are secure.
To prevent damage to the instrument and sensor, never connect or dis-
connect a sensor while the power is on, or while the sensor is clamped
around a conductor.
• Lay the connection cords and various cables away from the power
supply line and ground wire.
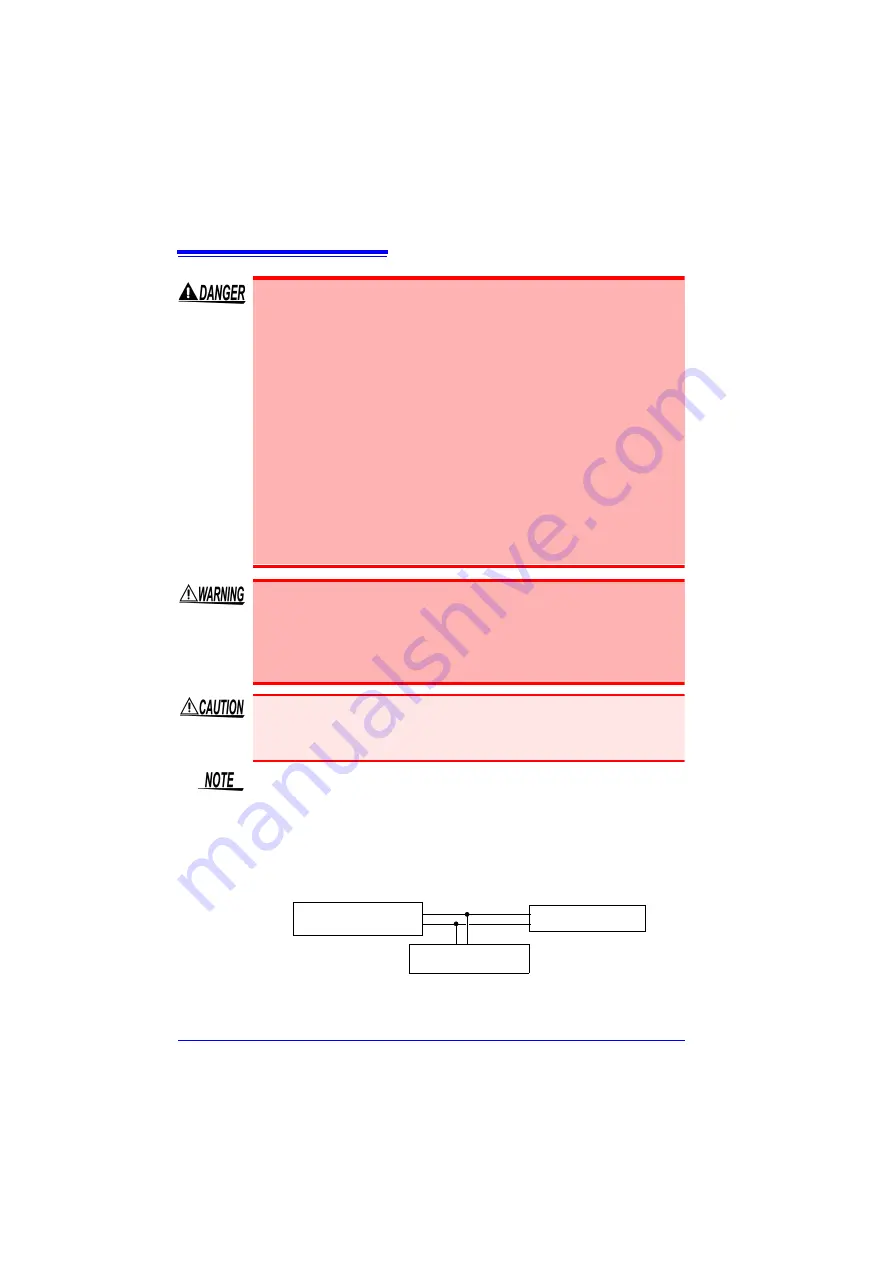
• Connecting the connection cords and various cables in a parallel con-
figuration with the inputs of another device (see the figure below) may
result in variations in measurement values and incorrect operation of
the instrument. When connecting with another device in a parallel
configuration, be sure to verify operation.
Measurement Object
Memory HiCorder
Other instrument
Содержание MR8880-20
Страница 2: ......
Страница 12: ...Procedure 2 ...
Страница 40: ...1 3 Screen Configuration and Display 30 ...
Страница 76: ...3 4 Measurement Using Setting Wizard PRESETS key 66 ...
Страница 174: ...6 4 Data Management 164 ...
Страница 186: ...7 7 Performing a Printer Check 176 ...
Страница 196: ...8 4 Numerical Value Calculation Expressions 186 ...
Страница 216: ...10 4 Making System Settings 206 ...
Страница 222: ...11 3 Communication Using Commands 212 4Click Next to start install ing Installing Click ...
Страница 226: ...11 3 Communication Using Commands 216 ...
Страница 254: ...13 6 Setting Wizard Function PRESETS 244 ...
Страница 292: ...Appendix 10 Installing Waveform Viewer A30 ...
Страница 297: ......
Страница 298: ......
Страница 299: ......
Страница 300: ......


