26
General
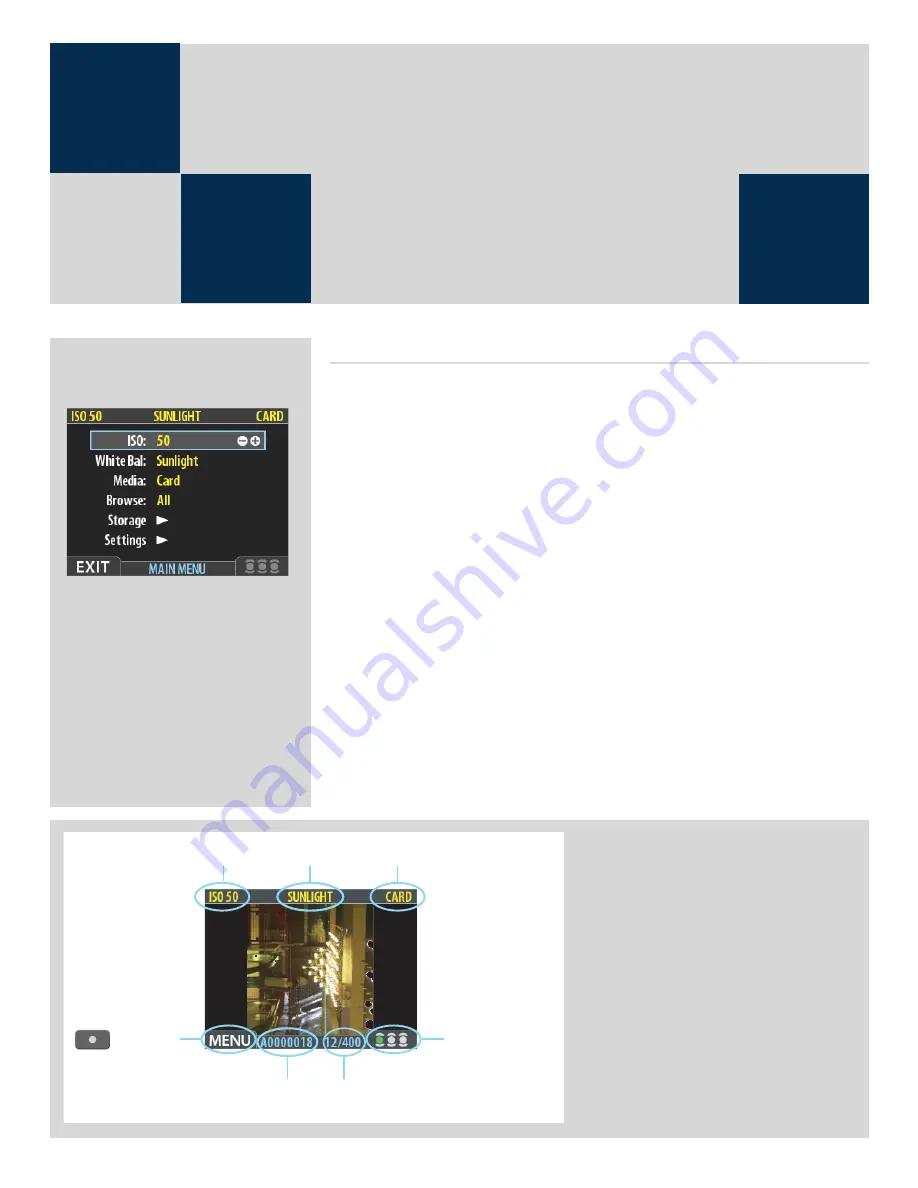
Using the menu on the 503 CWD is very similar to using a menu on a cell phone or similar. When you
first enter the menu you will be see an initial list:
ISO
White Bal.
Media
Browse
Storage
Settings
The first four items are immediately accessible for changes, indicated by the appearance of a plus
and minus sign in the highlight frame meaning the settings can be altered by the Zoom in / Zoom
out buttons. Storage and Settings are more detailed and therefore require further navigation.
It is advisable to quickly skim through this section of the manual initially to see build up a picture of
the menu structure with its various sections
On the following pages you will see an illustration of the philosophy behind the menu, its structure
and how changes in settings are made and stored.
Some of the buttons have a double function wihile others remain single function. For example, the
navigation button always leads you through the menu in the direction that the arrow illustrates.
The Zoom in/out buttons though, for example, act as image enlargers and reducers as well as con-
firmation buttons, according to where you are on the menu.
Initial General Menu
Settings
ISO setting
White balance
Image file name
-Button label
Approval status and
browse filter setting
Storage capacity
(Shots taken / shots remaning)
Current storage medium
The standard preview display is the one
shown when you first turn on the camera
and is probably the view you will use most
often. It features a preview of your most re-
cent shot and basic information about the
sensor unit settings and the image itself.
Several other display modes are also avail-
able, including histogram, capture details,
full-screen and battery saver. Please see
Preview Modes
for details.
The display furthermore enables you to
navigate the menu system and make cam-
era settings; see
Working with the Menus
for details
501
503
CWD


