


Revision F • 3/12
H
A
R
R
I
S
C
O
R
P
O
R
A T
I
O
N
3-8
3 Control Center Software
write a
NewIPAddressInfo.xml file to the
MAC address folder on the flash drive.
If the HDE-200 is directly connected to the
computer, then a warning pop-up box ap-
pears to confirm that you want to upload
the changes to the HDE-200. Click
OK to
write the files and cause the HDE-200 to
reboot. See step 9 for the results. Click
Can-
cel to not upload the new configuration to
the HDE-200.
7.
When using “sneaker net” to transfer the new
settings to the HDE-200 remove the USB
flash drive from the computer and insert it
back into the HDE-200’s USB port.
CAUTION:
Right click on the
Safely
Remove Hardware icon in the Win-
dows system tray to select the USB
device (e.g.,
Safely remove USB Mass
Storage Device) before unplugging it.
8.
With the USB flash drive inserted into the
USB port on the HDE-200, press the
RESET PROCESSOR button on the rear
panel to restart the HDE-200. This causes
the updated files to be read, and stored, in
the HDE-200 flash memory.
9.
As the HDE-200 restarts and reads the up-
dated network configuration information,
START-UP
START-UP
START-UP
START-UP
START-UP
is displayed on the front
panel. When this display goes away, the
HDE-200 has updated its file settings, au-
tomatically overwriting the original configu-
ration
.xml files with the new settings. The
new HDE-200 can now be connected to the
facility LAN.
To view the new HDE-200 on any ECC app,
click
Device > Select Device and double-click on
the desired HDE-200 name in the
Exporter De-
vice Browser
window.
If audio is going through that HDE-200 it will
immediately appear in the meters. The device name
will appear at the top of the ECC window.
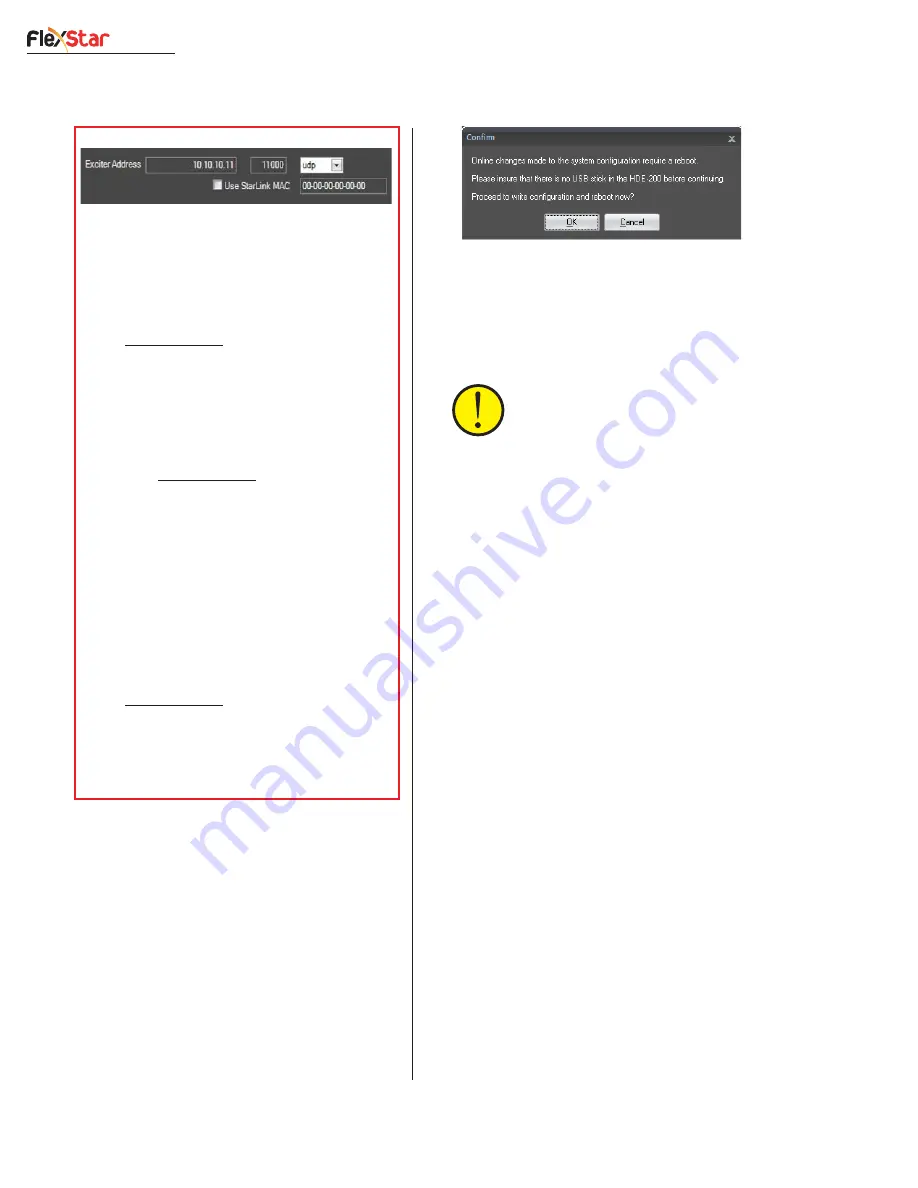
Exciter Link Configuration Details
1. Unicast
(to connect to one Flexstar Exciter using a
local network or a bidirectional TCP/IP-capable STL, e.g.
an Intraplex STL HD or Moseley Starlink 9003T1)
- Enter the Flexstar Exciter’s Exporter Link IP address
(e.g., 10.10.10.11) as the Exciter Address.
- Select port 11000 and UDP protocol. Contact Harris
field service if there is a compelling reason to use TCP.
- Verify Use StarLink MAC is unchecked.
2. Unidirectional Unicast
(to connect to a Flexstar
Exciter, using its MAC address, over a unidirectional
STL path, e.g. Harris HD Link or Moseley StarLink
9003Q)
- Enter the Flexstar Exciter’s Exporter Link IP address
(e.g., 10.10.10.11) as the Exciter Address.
- Select port 11000 and UDP protocol.
- Check mark Use StarLink MAC.
- Enter the MAC address of the FlexStar’s Exporter Link
as shown in the FlexStar GUI, Serial Setup, screen 4/4.
3. Unidirectional Subnet Broadcast
(allows
multiple Exciters to be fed from this HDE-200 over any
type of non-routed path)
-Enter the Exciter Address, but use .255 in the last octet
(e.g., 10.10.10.255). All devices with addresses from
10.10.10.1 to 10.10.254 will then receive the HDE-200
packets. NOTE: All network switches between the HDE-
200 and the FlexStar Exciter or STL must be set to allow
broadcast packets to pass through to the desired desti-
nation ports. Also, consult with your IT group before
implementing this feature.
- Verify Use StarLink MAC is unchecked.
- Select port 11000 and UDP protocol.
Additional Note
: Do not allow the Exporter’s E2X
traffic into the Exciter’s Ethernet 3 port. Also, do not
allow duplicate IP addresses to be set on any Exciter
Ethernet port, leave all unused ports set for DHCP.
Use one of three HDE-200 transmission modes:


