background image

Model 

:-

Owner’s Manual

*#1 

*#1 

*#1 

*#1 

*#1 

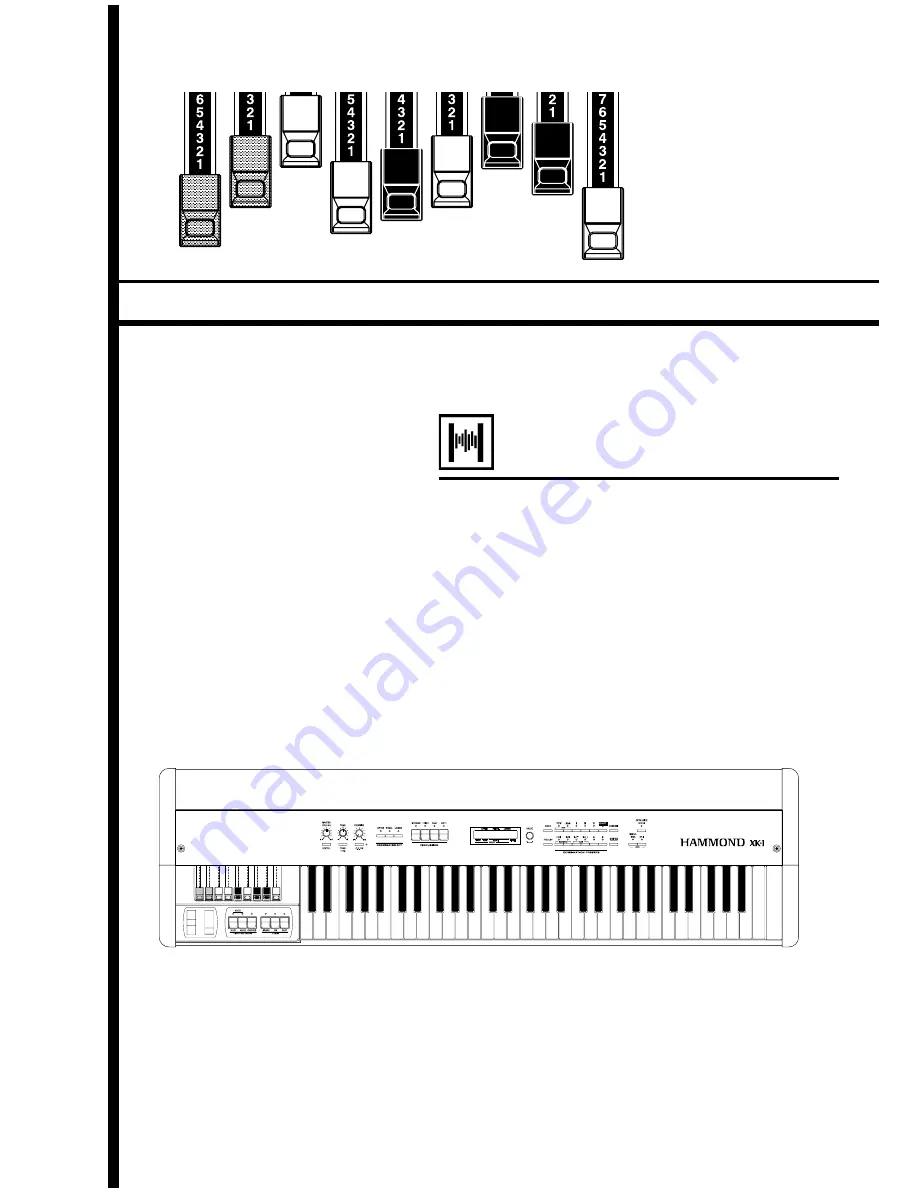
Thank you, and congratulations on your choice of
a Hammond XK-1.
In order to get the most out of this instrument for
many years to come, first take the time to read this
manual in full.

Содержание XK-1

Страница 1: ...Owner s Manual 1 1 1 1 1 Thank you and congratulations on your choice of a Hammond XK 1 In order to get the most out of this instrument for many years to come first take the time to read this manual i...

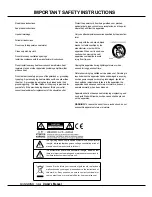
Страница 2: ...NS Protect the power cord from being walked on or pinched particularly at plugs convenience receptacles and the point where they exit from the apparatus Only use attachments accessories specified by t...

Страница 3: ...F SAFELY THERE IS A DANGER OF SEVERE ELECTRICAL SHOCK IF THE CUT OFF PLUG IS IN SERTED INTO ANY 13 AMP SOCKET If a new plug is to be fitted please observe the wiring code as shown below If in any doub...

Страница 4: ...he left of the keyboard front panel For example all functions pertaining to Drawbars are grouped together all Percussion features are treated as a group and so on Also each feature is treated as an ex...

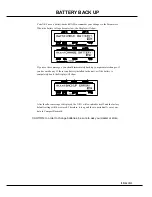
Страница 5: ...your parameter changes if you have made any If there is no battery installed in the unit or if the battery is compeletely dead the Display will show After the above message is displayed the XK 1 will...

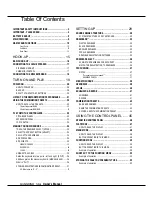
Страница 6: ...parts left and right SPLIT 26 Add bass part on the manual keyboard MANUAL BASS 26 What is Part 26 STORING REGISTRATIONS IN COMBINATION PRESET 27 EX Memorize to 6 3 27 SETTING UP 29 SOUND ENGINE STRUC...

Страница 7: ...ons MIDI 75 MIDI 76 What is MIDI 76 MIDI TERMINALS ON THIS KEYBOARD 76 WHAT THE MIDI CAN DO ON YOUR KEYBOARD 76 MIDI CHANNEL 77 MAJOR MIDI MESSAGE 77 CHANNEL MESSAGE 77 SYSTEM MESSAGE 77 MIDI STRUCTUR...

Страница 8: ...1 Owner s Manual...

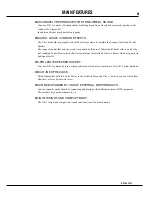
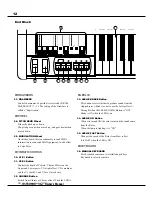
Страница 9: ...ing Leslie effects which effectively simulates the rotation of the two Rotors which are present in traditional Leslie 8 PIN LESLIE SPEAKER SOCKET Your new XK 1 contains a 8 pin Leslie speaker socket f...

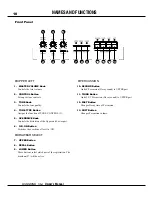
Страница 10: ...rtion of the Upper and Lower part 6 O D ON Button Switches the overdrive effect On Off DRAWBAR SELECT 7 UPPER Button 8 PEDAL Button 9 LOWER Button These buttons select which part of the registration T...

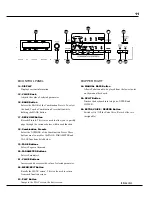
Страница 11: ...lso used for the PAGE PARAMETER and VALUE functions listed below 19 PAGE Buttons Selects Pages in the menu 20 PARAMETER Buttons Selects Parameters 21 VALUE Buttons Increases and decreases the value of...

Страница 12: ...V1 is light effect V2 is medium and the V3 both V1 and V2 are On is heavy 32 CHORUS Button Switch from Vibrato or Chorus effect When the LED is ON the Chorus effect is ON LESLIE 33 LESLIE BRAKE Butto...

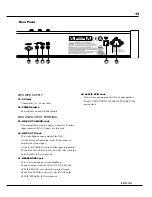
Страница 13: ...Jacks if your mixer or amplifier has stereo input Use only the L MONO terminal if the input is monaural The built in Leslie Effect is only on L the left when the Leslie Speaker 42 is connected 41 HEAD...

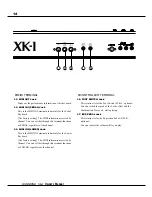
Страница 14: ...IDI IN 2 LOWER Jack This is the MIDI IN Terminal used mainly for the Lower Keyboard The factory setting The MIDI information received by channel You can set that through this terminal functions as LOW...

Страница 15: ...1 Owner s Manual 15 HOOK UP...

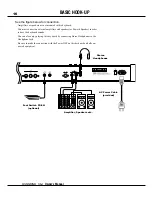
Страница 16: ...lifiers and speakers or Powerd Speaker in order to hear the keyboard sounds You can also enjoy playing this keyboard by connecting Stereo Headphones to the Headphone Jack Be sure to make the connectio...

Страница 17: ...Leslie speakers To control the volume of Leslie Speaker 2101 2102 use ROTARY Knob Set the STATIONARY konb for minimum Because this keyboard has 1 channel rotary audio circuit for the Leslie Speaker P...

Страница 18: ...MIDI Template Seq Record of this keyboard P 84 3 To use Expression Pedal set the parameter EXPRESSION SOURCE for the model of expression pedal that you have connected P 59 The MIDI Keyboard connected...

Страница 19: ...1 Owner s Manual 19 TURN ON AND PLAY...

Страница 20: ...ch off the power Switch off the power of the amplifiers etc first BACK UP Your XK 1 memorizes the setting of the keyboard immediately before it is switched off So The keyboard will start with these se...

Страница 21: ...elect page E and touch the 2 DEMO Press the PAGE Button and select a desired song The performance starts when the 4 X Button is pressed NOTE After the song is over the next one starts auto matically T...

Страница 22: ...utton touch the Preset Button 6 NOTE The LED for the Preset Button indicates the BANK while the BANK Button is pressed EX Select 6 8 HOW TO RECALL THE PRESETS 2 Selecting preset NUMBER Touch the Prese...

Страница 23: ...nt P 83 or to add effect to Extra Voice P 74 EXPRESSION PEDAL Generally organs can not express dynamics or the velocity of the key touch However if you connect the Expression Pedal to the organ you ca...

Страница 24: ...totally pushed in The tones of the Drawbars gradually get higher in frequency from left to right The most popular patterns or registrations are 1 to pull out only all the three left side Draw bars to...

Страница 25: ...rive effect gets maximum when it turned to MAX clockwise LESLIE The bass rotor and the rotating horns produce the effect of the spatial dynamic and lively theater stage performance LESLIE ON Button To...

Страница 26: ...ch on the LED Not to interfere with the Melody performance this function is limited only upto B2 in the center when it leaves the factory NOTE You can move the upper limit of the Manual Bass P 82 NOTE...

Страница 27: ...sing the REC JUMP Button touch the Preset Button 3 The Preset is stored and Recording Preset appears on the display for a while When the recording is completed the LED on the Preset Button 3 flashes f...

Страница 28: ...1 Owner s Manual 28...

Страница 29: ...1 Owner s Manual 29 SETTING UP...

Страница 30: ...1 Owner s Manual 30 SOUND ENGINE STRUCTURE SYSTEM STRUCTURE OF XK 1 KEYBOARD...

Страница 31: ...as an example 9 harmonics for the manual keyboard PERCUSSION The Percussion makes decay sound synchronizing with the key touch of the UPPER part VIBRATO CHORUS Vibrato gives vibration to the pitch By...

Страница 32: ...th of the pipes of the pipe organ The numbers 1 8 on each Drawbar indicate the volume of the sound to be produced as well as the guide to simply set the Drawbar For example when you blow clarinet the...

Страница 33: ...he role to give depth and richness to the sound The left 16 is one 1 octave lower than the 8 and 5 1 3 is the third harmonic of the 16 fundamental Normally the tones are built on the 8 fundamental but...

Страница 34: ...ue of each Drawbar as shown below on right side of Drawbar settings name However it is rather reasonable to remember the typical combinations of the 9 Drawbars by their forms shapes Flute family 2 ste...

Страница 35: ...321 00 4434 210 85 8524 100 00 8877 760 00 0606 045 00 8887 480 01 8866 430 01 8855 331 00 7754 321 Cello 8 Dulciana 8 Gamba 8 I Gemshorn 8 Orchestral String 8 Salicional 8 Solo Viola 8 Solo Violin 8...

Страница 36: ...lling Drawbars This means that you can make the new resistration while playing and change it To match the registration use the function below ASSIGN THE DRAWBARS FOR EACH PART On this keyboard there a...

Страница 37: ...he LED will light SOFT BUTTON This reduces the volume of Percussion When the LED is OFF it is NORMAL If you press the SOFT button the percussion level is soft and the LED will light NOTE You can fine...

Страница 38: ...R Part To get this effect touch the button and the LED will light V 1 Comparatively slight Vibrato on only V1 C1 V 2 Standard depth Vibrato on only V2 C2 V 3 Deepest Vibrato on both V1 C1 and V2 C2 CH...

Страница 39: ...fuzzy raspy Overdrive sound O D ON BUTTON This button switches on off the Overdrive Effect Press this button to switch on the LED and get the Overdrive Effct OVERDRIVE KNOB This is for adjusting the d...

Страница 40: ...the best effect when connected stereophonic ON BUTTON If you touch this button the LED will light and the rotor starts turning Also the voice is heard thru the rotary channel FAST BUTTON This switches...

Страница 41: ...you turn it to the right the treble is emphasized and to the left the trebel is reduced TONE TYPE BUTTON This assigns the settings to the TONE KNOB At every touch the assignment changes in the order...

Страница 42: ...special Preset called Adjust Preset Here the Drawbar Registration on the panel always matches the internal registration NOTE The setting of the Preset Buttons C to A on the B 3 C 3 is fixed and the A...

Страница 43: ...can store names up to 10 letters PARAMETER Button moves the cursor VALUE Button selects letters You can use all the Alphabet letters large and small signs symbols and digits To jump to the beginning...

Страница 44: ...ded Preset Number will be automatically selected The display will return to the previous screen You can not record to the Preset Button ADJUST by using this procedure NOTE The Preset data recorded wil...

Страница 45: ...1 Owner s Manual 45 USING THE CONTROL PANEL...

Страница 46: ...n your keyboard You can do even finer settings like the delicate speed of the Leslie Effect or the MIDI equipment using the display buttons on the Control Panel There are PLAY MENU and FUNCTION modes...

Страница 47: ...splay and the digital display will be switched every time you touch the PLAY button In the bar display the Combination Preset name is shown but another Preset Key if assigned to the LOWER Part is not...

Страница 48: ...d find the item where you want to go and touch the numbered button to see the desired display HOW TO READ THE DISPLAY BUTTON OPERATION IN THIS MENU PAGE FUNCTION ITEM If none blank Moves from a page t...

Страница 49: ...or on the left Returns to the PLAY mode This button is used to move the CURSOR right or left for selecting the PARAMETER to change The CURSOR moves to the edge of the display and on to the next page...

Страница 50: ...CURSOR to the Parameter you want to change DECAY TIME is on the DECAY PAGE Move to that page using the PAGE button FAST is on the right end Move the CURSOR flashing value to underneath FAST using the...

Страница 51: ...am eters Change the value 5 7 Touch and Hold Touch Decrease the value using the VALUE button or the VALUE knob on the left NOTE Repeat the operation 1 5 if you want to change other parameters too Reco...

Страница 52: ...few seconds This enables the SHORT CUT mode Short cut buttons will be explained in the next Chapter SETTING THE PARAMETER NOTE You can change the time for holding down the button for SHORT CUT P 61 ST...

Страница 53: ...1 Owner s Manual 53 SETTING THE PARAMETERS...

Страница 54: ...ttack Rate will be changed to its suitable value automatically 3 CLICK LPF This allows you to set the tone of the Key Click The setting range is 0 127 The larger the value the brighter it gets 4 ENVEL...

Страница 55: ...y time No decay at C 12 SUSTAIN ON This allows you to set whether or not to use the Sustain function 13 SUSTAIN LENGTH This allows you to set the Release Rate the decay time after you release the key...

Страница 56: ...ether or not to recall the Parameters relating to the Drawbars of each Part such as the Tonewheel Set 5 PRESET LOAD PERCUSSION B This allows you to determine whether or not to select PER CUSSION by th...

Страница 57: ...e Appendix for the details on Program Change and Keys The recording to the Combination Preset is made to all the UPPER LOWER and PEDAL on this keyboard It is made only to the LOWER on the Lower Keyboa...

Страница 58: ...P P 3 BEND PEDAL DOWN P 4 BEND PEDAL UP P These are for setting the changing range of the PITCH BEND WHEEL by the semi tone Both the LOWER and the UPPER PARTS change at the same time as they use the s...

Страница 59: ...find the causes for such troubles as no sound non function of the Expression Pedal by checking if the Expression Value changes normally Also this can be a guide when you want to play the fade in from...

Страница 60: ...the function on the RING side if you use the FOOT SWITCH equipped with the Stereo plug DAMPER The word Damper comes from the damper pedal of the piano The piano stops sounding when you release your f...

Страница 61: ...PEDAL EX ZONE Switches On Off the External Zone transmission LOWER OCT Switches 0 1 of the LOWER Octave LES BRAKE Means the LESLIE BRAKE Button LES ON Means the LESLIE ON Button LES FAST Means the LES...

Страница 62: ...st the 14 Expression Gain to the minimum value that the 10 Monitor displays 127 Set the Master Volume knob for maximum level that step on the Expression Pedal to the toe side and set the 11 Expression...

Страница 63: ...is 6 to 6 Transpose effects between the manual keyboard and the built in sound engine and between MIDI IN and the built in sound engine The Master Course Tune of RPN is sent to the External Zone If yo...

Страница 64: ...as parameters that wheel by wheel Level Cut Off Fre quency etc For example to the B type Real B 3 simulating the well preserved B 3 C 3 and 80 s Clean with less leakage noise rough sound Noisy and Noi...

Страница 65: ...OARD VELOCITY Controls the Volume of Percussion with key Velocity ON The faster a key is pressed the louder the sound OF It sounds at a certain volume regardless of how fast a key is pressed 7 KEYBOAR...

Страница 66: ...this mode CABINET NUMBERS 1 LESLIE CABINETS Here you select the CABINET NUMBER to use in the Combination Presets The setting range is 1 8 The will displayed when the Leslie Parameters are changed fro...

Страница 67: ...t state to Break The setting range for the Horn Rotor is 0 2 5 0s and that for the Bass Rotor is 0 5 12 5s 9 HORN CHARACTER Here the Tone of the Horn Rotor is set FLAT is a flat tone and the others ar...

Страница 68: ...ation Preset 1 2 3 4 Enter the name for the Cabinet as you want Touch the REC JUMP button in the setting mode of the Leslie Parameter The Cabinet Selection mode is displayed Select the Cabinet Number...

Страница 69: ...t only the volume but also the distortion will be changed ODJEX The Expression pedal affects only the volume and not the distortion value OD ONLY The Expression pedal affects only the distortion value...

Страница 70: ...5 TONE ASSIGN This function allows you to assign any of the EQ bands Bass Middle or Treble to the TONE knob You can change this while playing NOTE These parameters are Preset Parameters and are record...

Страница 71: ...ME When the Type 3 is set at Room 1 to Plate it sets the Time for Reverb to fade out The setting range is 0 31 The higher the value the greater the impression of large building 5 DELAY TIME When the T...

Страница 72: ...s at UPPER A B the content of A is also initialized If you do this operation before you start a new setting you can start from the factory setting 2 PRESET Initializes the content of all Combination P...

Страница 73: ...o display the MENU select PAGE D by the PAGE button and then touch the 4 SYSTEM button 1 VERSION MAIN PROGRAM 2 VERSION TONE INFORMATION 3 VERSION DEMO SONG 4 VERSION KEY SCAN PROGRAM 5 VERSION BOOT P...

Страница 74: ...nd instead the Extra Voice sounds 3 OCTAVE Sets the Pitch of the Extra Voice The setting range is 2 2 Octave 4 MODULATION EXTRA VOICE Assigns the Modulation Wheel to Extra Voice ON By moving back the...

Страница 75: ...1 Owner s Manual 75 MIDI...

Страница 76: ...er pedal being pressed released MIDI TERMINALS ON THIS KEYBOARD MIDI OUT Sends Performance Informations MIDI IN 1 PEDAL MIDI IN 2 LOWER These receives the MIDI Signal Each MIDI terminal is set to do t...

Страница 77: ...ich key Note Number at what Speed Velocity and Play Note ON The sound engine of this keyboard receives velocity only for Percussion and Pedal Manual Drawbars play at a certain volume regardless of the...

Страница 78: ...n switching the Combination Presets and sending receiving Expression LOWER This is for the LOWER Part performance informaiton not only for controlling but switching data of the Preset for the LOWER Pa...

Страница 79: ...cted Expression Pedal P 59 When you play the MIDI keyboard connected to the MIDI IN LOWER terminal of the XK 1 LOWER keyboard the LOWER Part will sound and when you play the MIDI pedal keyboard connec...

Страница 80: ...his keyboard these perfor mance information will be transmitted to each MIDI channel and sent out of the MIDI OUT terminal 1 Hook up as illustrated above If a MIDI keyboard is connected unplug it and...

Страница 81: ...the MIDI template Use EX Zone By this the transmission of the Keyboard Channel stops and the infos of the External Zone is sent from MIDI OUT 3 Set the Zone and the data is recorded to the Combination...

Страница 82: ...AP LOW 8 MAP HIGH This is for setting the playing range of this zone on the keyboard NOTE For 7 and 8 you can set the value by touching the REC JUMP button while holding down a note on the keyboard 9...

Страница 83: ...ION CONTROL NUMBER This is for setting the Control Number of the Expression Pedal There are various methods for controlling volume depending on the connected equipment you can here set the number to c...

Страница 84: ...d if touched You can treat this module as if it is a two different equipment a MIDI keyboad and a Sound Module 4 NRPN This is for switching ON OFF the transmission of send and return of NRPN Non Regis...

Страница 85: ...s is for determining whether or not to receive the MEMORY DUMP On this module you can transmit receive the current settings by the System Exclusive Message as the MEMORY DUMP but you must switch this...

Страница 86: ...1 Owner s Manual 86...

Страница 87: ...1 Owner s Manual 87 TROUBLE SHOOTING...

Страница 88: ...distorted not as the OVERDRIVE knob screen shows If you are playing this keyboard using the Combination Preset the actual value of the drive is different from the position of the knob Turn the OVERDR...

Страница 89: ...APPENDIX...

Страница 90: ...full motor hum and leakage noise Mellow Full Flats This template simulates the most ideal tone wheel set Their values are same at each wheel Husky This template has the characteristic of dropped midd...

Страница 91: ...dal Kbd 3 3 Off Off 1 16 Upper Kbd 1 1 Off Off 1 16 Lower Kbd 2 2 Off Off 1 16 Pedal Kbd 3 3 Off Off 1 16 Use this template for connecting the organ to an external MIDI sequencer without the Echo Back...

Страница 92: ...ld 1 80 81 82 O O Drawbar Reg U L P 98 99 O O NRPN LSB MSB 100 101 O X RPN LSB MSB 120 X O All Sound Off 121 O O Reset All Controllers O 0 127 O 0 127 True O 0 127 System Exclusive O O Song Position X...

Страница 93: ...Reg X CC 80 CC 81 CC 82 Spring Shock 16 X O X X RPN 100 101 O 4 X X X NRPN 98 99 X O X X All Notes Off 123 O O O O All Sounds Off 120 X O 5 O 5 O 5 Reset All Ctrl 121 O O O O After Touch X X X X Bank...

Страница 94: ...Channel Number 0 F Ch 1 16 vv Volume 00 7F 0 127 Default Value 64 100 the received message The volume message is used to set the volume balance of each Ex zone Pan Status 2nd Byte 3rd Byte Bn 0A vv n...

Страница 95: ...to the same channel after that is regarded as the change of the value of the the same channel after that is regarded as the change of the value of the parameter To avoid any mis operation we suggest y...

Страница 96: ...r receiving Lower 7 bits of XOR DATA the music data for the this device correctly F7 End of Exclusive It takes about 50ms to process this message Take an interval before the next message 2 Acknowledge...

Страница 97: ...st 08 Leslie On Reverb 00 Extra Voice B Type 03 00 00 03 00 Real B 3 Mellow 03 01 00 02 00 Full Flats Brite 03 02 00 02 00 Classic X 5 Tune Expression NRPN Global Parameters Tone Wheel set 00 09 00 Of...

Страница 98: ...Mod Wheel 30 05 00 01 Off On EXV Category DATA Parameter LSB 62 MSB 63 MSB 06 P load Name 10 Characters always Drawbar Leslie On 09 00 00 01 Off On Effect Leslie Fast 09 01 00 01 Slow Fast Leslie Brak...

Страница 99: ...09 1 9 C Decay Slow 08 07 00 09 1 9 C Touch 08 08 00 01 Off On Velocity 08 09 00 01 Off On Key Track 08 0A 00 01 Off On Drawbar 1 Cancel 08 0B 00 01 Off On Drawbar Level 08 0C 00 01 0 3dB Upper 16 Dr...

Страница 100: ...Brake Time Bass 06 09 7F 09 00 18 0 5 12 5s 13 10s Volume Horn 06 0A 00 0C 12 0dB 0C 0dB Volume Bass 06 0B 00 0C 12 0dB 0C 0dB Mic Angle 06 0C 7F 0A 00 06 0 180deg 04 120deg Mic Distance 06 0D 7F 0B 0...

Страница 101: ...ogram Messages 12 AD 11 11 10 10 9 9 8 8 7 7 6 6 5 5 4 4 3 3 2 2 1 1 1 2 3 4 5 6 7 8 9 10 11 12 0 1 2 3 4 5 6 7 8 9 10 11 Adjust Program Change Bx 00 04 Cx 01 x Upper Channel ex Change to Bank 5 Numbe...

Страница 102: ...rato and Chorus V1 V2 V3 C1 C2 C3 Upper Lower On Off Speed 5 6 10 7 25Hz Overdrive Digital Overdrive Equalizer 3 Bands Reverb 10 Programs Sustain 5 Lengths Pedal Internal Zone Tabs Split Manual Bass A...

Страница 103: ...ited Tony to come play with him at his club in Woodland Hills LA California An experience Tony would never for get In April 2000 Tony met jazz Organist Joey DeFrancesco while Joey was playing in Colum...

Страница 104: ...re F Tibia 16 8 Rohr Flute M3 Low Man Surf Coast Le Femme AcidWash 2 Flutes 8 4 5 5 Groove Burner Gospel 4 Booker Theatre E Tibia 8 4 2 Princ Chrs Odd Harm Funk Bass Tea Lounge AcidWash 1 Salicional 4...

Страница 105: ...wer battery leakage use on improper voltage or current failure to follow normal procedures outlined in the User s Manual use with other products not manufactured or approved by HAMMOND alteration dama...

Страница 106: ...purchased for additional warranty details PRODUCT NAME XK 1 PART NO __________________________________ SERIAL NO _______________________________ DATE OF PURCHASE ________________________ PURCHASE FRO...

Страница 107: ...following addresses In the United States contact HAMMOND SUZUKI USA Inc 733 Annoreno Dr Addison IL 60101 UNITED STATES In Europe contact HAMMOND SUZUKI EUROPE B V IR D S Tuynmanweg 4A 4131 PN Vianen T...

Страница 108: ...HAMMOND SUZUKI LTD Hamamatsu Japan Printed in China 00457 40113 V1 00 051222...

Отзывы: