


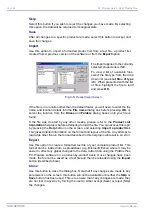


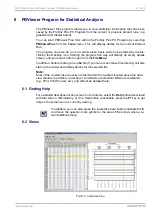


3624 ProBrix Plus - Calibrations
Operator Manual
ORBISPHERE
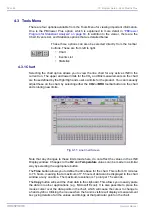
the flow chamber, a needle valve to control the gas flow on exit, and a beaker of water to
monitor the gas flow.
Before carrying out the calibration, shut off the sample flow to the sampling module, then
open the front panel and remove the CO
2
sensor from its flow chamber. Do not
disconnect the cables or purge gas connections from the sensor.
Before calibrating, make sure that the grill in the front of the CO
2
sensor is clean and dry.
Insert the sensor in the optional model 32001 flow chamber, and tighten with its collar.
To carry out the calibration, open the valve on the CO
2
gas cylinder. Adjust the needle
valve until gas is flowing through the chamber at a rate of about 1 bubble per second
indicated by the beaker of water.
Adjust both the valve on the CO
2
gas cylinder and the needle valve until your desired
calibration pressure is indicated on the accurate pressure gauge at the exit to the flow
chamber and the flow rate is approximately 1 bubble per second.
To expose the sensor to the CO
2
gas and to stabilize the reading, operate in
Measurement Mode for about 30 minutes.
After this time, press
ESC
and select
CALIBRATE
from the main menu, followed by
SENSOR CO2
and
PARTIAL PRESSURE
. Select your preferred unit of measurement
from the
CO2 UNITS
menu, to bring up the menu for specifying the gas pressure.
Note:
If this is the first calibration then the message indicates a percentage of the expected
value (
EXPT VAL
), rather than the last calibration (
LAST CAL
).
This percentage must be between 50% and 150% in order to calibrate. If the percentage
is outside the limits, you will see the
Calibration Out Of Bounds
message briefly, before
the instrument returns to the Calibration menu.
Check that the membrane does not need to be replaced and that no leaks are evident.
If the percentage is within the limits press
ENTER
to accept and complete the calibration
process (message
Calibration Complete
appears briefly) or
ESC
to abort.
Enter the absolute CO
2
gas pressure, taken from the
pressure gauge at the exit of the flow chamber. Start the
c a l i b r a t i o n p r o c e s s b y p r e s s i n g
E N T E R
. T h e
Calibrating... Please Wait
message appears for a few
seconds, and then the instrument starts three calibration
cycles.
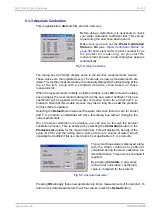
With each calibration cycle, two information screens are
displayed. The first showing the O
2
value...
...and the second the partial pressure and temperature
measurements. On this second display, the current cycle
number (
cal:n
) is displayed in the bottom right-hand
corner.
On completion of the three cycles, the instrument then
shows the sensitivity of the sensor as a percentage of the
sensitivity determined when calibration was last
performed.
Содержание ORBISPHERE 3624
Страница 1: ...Operator Manual ORBISPHERE 3624 Revision F 03 10 2008 ...
Страница 2: ......
Страница 14: ...8 of 96 Manual Overview 3624 ProBrix Plus Operator Manual ORBISPHERE ...
Страница 32: ...26 of 96 Installation 3624 ProBrix Plus Operator Manual ORBISPHERE ...
Страница 60: ...54 of 96 PC Program Setup 3624 ProBrix Plus Operator Manual ORBISPHERE ...
Страница 68: ...62 of 96 Calibrations 3624 ProBrix Plus Operator Manual ORBISPHERE ...
Страница 82: ...76 of 96 Accessories and Attachments 3624 ProBrix Plus Operator Manual ORBISPHERE ...
Страница 98: ...92 of 96 Glossary 3624 ProBrix Plus Operator Manual ORBISPHERE ...
Страница 101: ...3624 ProBrix Plus User Notes 95 of 96 Operator Manual ORBISPHERE User Notes ...
Страница 102: ......


