


Model G0812 (Mfd. Since 2/16)
-33-
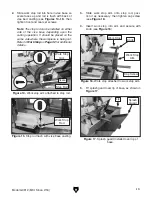
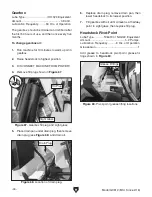
6. Loosen cap screw shown in Figure 37 on
Page 32, and align front of work stop arm
with "0" mark on stop rod scale, as shown in
Figure 39.
7. Adjust hex bolt on work stop to just touch
blade, then tighten jam nut against work stop
(see
Figure 39).
Note: The work stop rod will need to be re-
calibrated any time it is removed or reposi-
tioned on the opposite side of the machine.
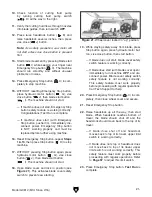
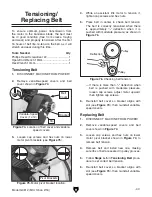
1. Loosen cap screw shown in Figure 40, and
adjust work stop arm relative to depth of cut
indicated on stop rod scale.
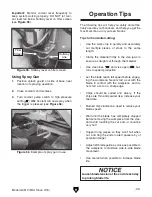
Using Work Stop
2. Loosen work stop knob (see Figure 40), and
adjust horizontal position of hex bolt relative
to end of workpiece, then tighten cap screw
and knob.
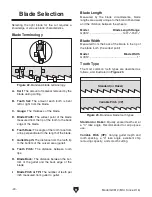
Repositioning Work Stop
1. To use work stop on opposite side of machine
for straight or angle cuts (see
Figure 41),
remove work stop arm from stop rod, then
remove stop rod.
Figure 39. Top view of work stop rod aligned
with "0" on scale and hex bolt touching blade.
Scale
Work
Stop
Work Stop Arm
Jam Nut
Blade
Hex Bolt
0 Mark
Figure 40. Work stop set for repetitive cutting
operation.
Knob
Cap
Screw
Scale
Work Stop
Arm
Hex Bolt
Figure 41. Work stop repositioned.
Work Stop
Prior Position
2. Reposition vise as necessary for operation
(refer to
Vise on Page 36).
3. Follow Steps 1–4 in Setting Work Stop on
Page 32 to properly re-install stop rod.
4. Re-install work stop onto work stop arm so
hex bolt and jam nut face blade, re-install
work stop arm onto stop rod, then follow
Steps 5–6 in Setting Work Stop.
Содержание G0812
Страница 84: ......


