2-33
5
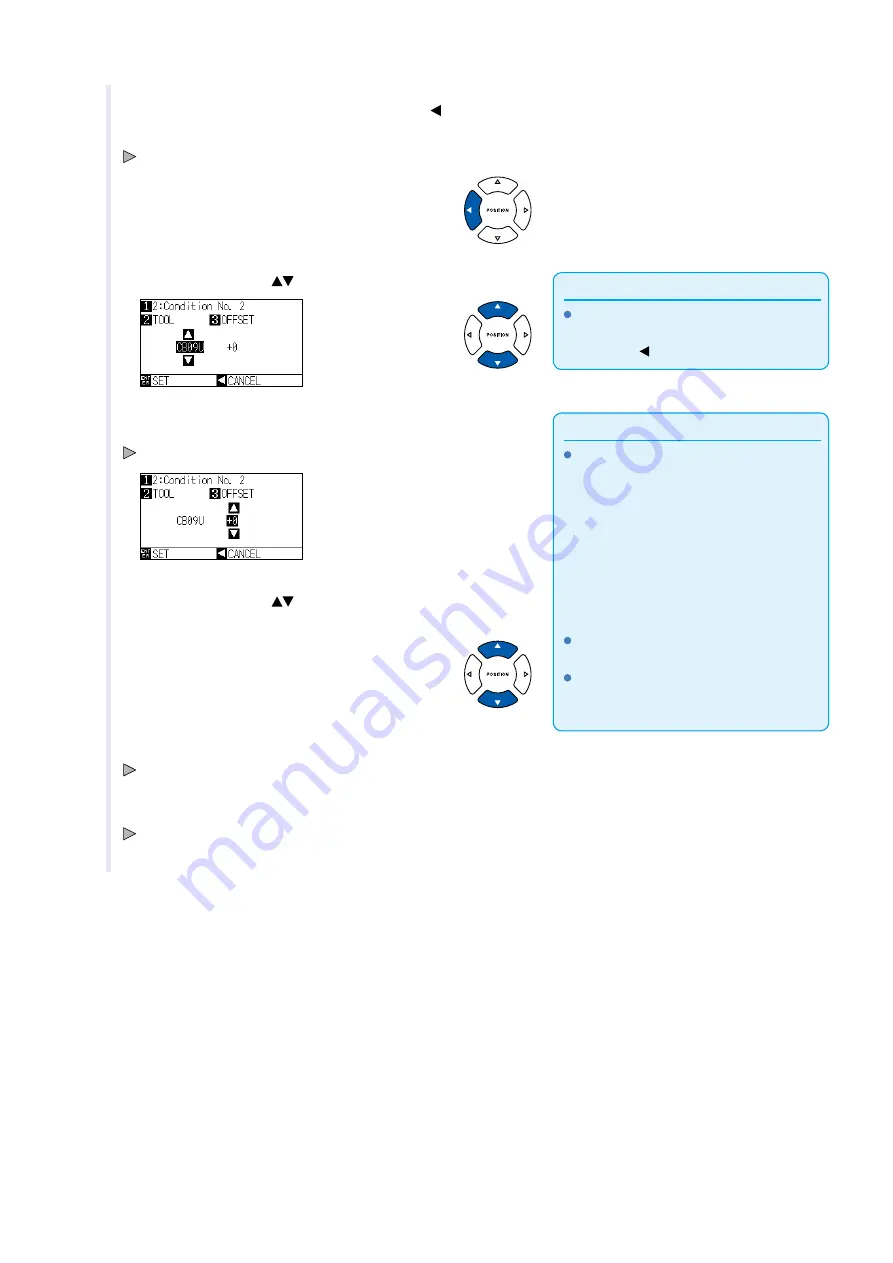
Confirm the setting and press the POSITION (
) key
(PREVIOUS) .
CONDITION No. wll get set and return to TOOL settng screen.
6
Press the POSITION (
) key, and set the tool.
Supplement
It wll return to CONDITION screen wthout
changng the settngs when you press the
POSITION ( ) key (CANCEL) .
Supplement
What s Offset
It wll adjust the dfference between the tp
of the blade n the plunger and the center of
the plunger. There are standard adjustment
values for each cutter blades. Fne
adjustment wll be made to that standard
values here. (Adjustment wll be made wth
standard value as 0.)
It s not necessary to set the offset f "PEN",
was selected n the tool settngs. (not
dsplayed)
Gudelne to Set Offset
Refer to the Cutter Blade Manual.
To return to contnue the settngs of other
tool condton number, return to step 3 by
pressng the [1] key.
7
Press the [3] key (OFFSET).
OFFSET settng screen s dsplayed.
8
Press the POSITION (
) key and ncrease or decrease the
settng value.
9
Confirm the setting and press the [ENTER] key (SET).
Settng wll be set, and t wll return to CONDITION screen (1/3).
10
Press the [COND/TEST] key.
It wll return to default screen.
Содержание CE6000-120AP
Страница 1: ...USER S MANUAL MANUAL NO CE60AP UM 153 CUTTING PLOTTER CE6000 120AP...
Страница 200: ...12 12 Caution Message Symptom LCD Display Description W06002 When panel cutting is on copy cannot be changed...
Страница 214: ...A 4 CE6000 120AP 1575 1250 1200 Unit mm Dimensional accuracy 5mm A 3 External Dimensions...
Страница 218: ...A 8 Default screen Continued MENU screen 4 PAUSE MENU MEDIA SETTING 1 3 MEDIA SETTING 2 3 MEDIA SETTING 3 3 Continued...
Страница 219: ...A 9 INTERFACE 1 3 INTERFACE 2 3 MENU screen PAUSE MENU Continued Default screen Continued INTERFACE 3 3...
Страница 227: ......


