5-4
4
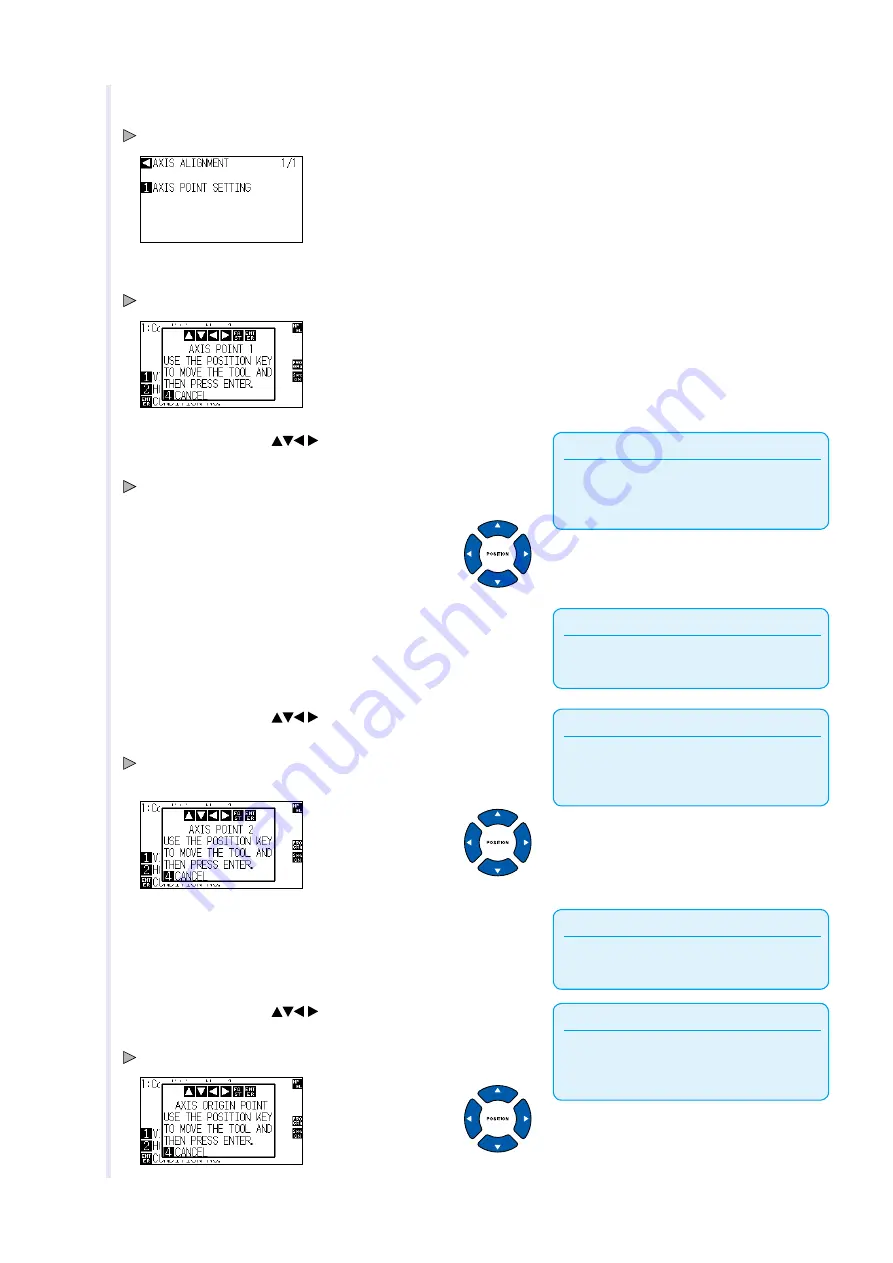
Press the [2] key (AXIS).
AXIS ALIGNMENT screen (1/1) s dsplayed.
5
Press [1] key (AXIS POINT SETTING).
The followng message s dsplayed.
Supplement
Tool carrage wll move faster when the
[FAST] key s pressed smultaneously wth the
POSITION key.
6
Press the POSITION (
) keys to move the tp of the tool
to the algnment regstraton mark poston.
Move the tool to adjustment pont 1 (any pont that s already plotted on
the X axs).
Supplement
Press the [4] key (CANCEL) to return to the
default screen wthout readng.
7
Press [ENTER] key to check the tool poston.
Supplement
Tool carrage wll move faster when the
[FAST] key s pressed smultaneously wth the
POSITION key.
8
Press the POSITION (
) keys to move the tp of the tool
to the algnment regstraton mark poston.
Move the tool to adjustment pont 2 (any pont that s already plotted on
the X axs).
Supplement
PPress the [4] key (CANCEL) to return to the
default screen wthout readng.
9
Confirm the position of tool and then press [ENTER] key.
Supplement
Tool carrage wll move faster when the
[FAST] key s pressed smultaneously wth the
POSITION key.
10
Press the POSITION (
) keys to move the tp of the tool
to the algnment regstraton mark poston.
Move the tool to a new orgn (the desred orgn pont).
Содержание CE6000-120AP
Страница 1: ...USER S MANUAL MANUAL NO CE60AP UM 153 CUTTING PLOTTER CE6000 120AP...
Страница 200: ...12 12 Caution Message Symptom LCD Display Description W06002 When panel cutting is on copy cannot be changed...
Страница 214: ...A 4 CE6000 120AP 1575 1250 1200 Unit mm Dimensional accuracy 5mm A 3 External Dimensions...
Страница 218: ...A 8 Default screen Continued MENU screen 4 PAUSE MENU MEDIA SETTING 1 3 MEDIA SETTING 2 3 MEDIA SETTING 3 3 Continued...
Страница 219: ...A 9 INTERFACE 1 3 INTERFACE 2 3 MENU screen PAUSE MENU Continued Default screen Continued INTERFACE 3 3...
Страница 227: ......


