Preparing for a Biopsy
LOGIQ V2/LOGIQ V1
–
User Guide
5-33
Direction 5610736-100
Rev. 9
Installing the sheath
To install the sheath:
1. Remove the sheath from its package. Do not unroll the
sheath.
NOTE:
Remember to rinse all sanitary probe sheaths of powder
before placing on the probe. Powder can degrade the
displayed image.
2. Place an adequate amount of ultrasound gel inside the
sheath tip (the gel is between the sheath inner surface and
the probe aperture).
NOTE:
Ensure that only acoustic coupling gel is used for this
purpose.
3. Place the sheath tip over the probe aperture and then pull
the sheath end toward the probe handle.
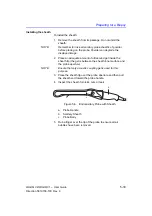
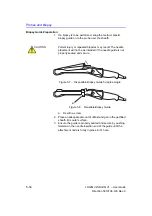
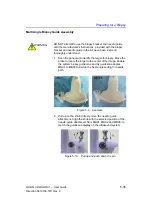
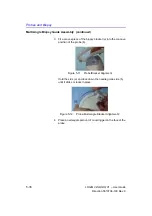
4. Inspect the sheath for nicks, cuts or tears.
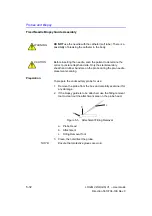
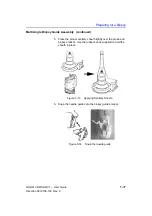
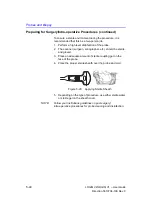
Figure 5-6. Endocavitary Probe with Sheath
a. Probe
Handle
b. Sanitary
Sheath
c. Probe
Body
5. Rub a finger over the tip of the probe to ensure all air
bubbles have been removed.
a
b
c
Содержание LOGIQ V2
Страница 4: ...i 2 LOGIQ V2 LOGIQ V1 User Guide Direction 5610736 100 Rev 9 This page intentionally left blank...
Страница 8: ...i 6 LOGIQ V2 LOGIQ V1 User Guide Direction 5610736 100 Rev 9...
Страница 92: ...Getting Started 1 80 LOGIQ V2 LOGIQ V1 User Guide Direction 5610736 100 Rev 9...
Страница 170: ...After the Exam is Over 3 8 LOGIQ V2 LOGIQ V1 User Guide Direction 5610736 100 Rev 9 Figure 3 10 Formats selection...
Страница 242: ...After the Exam is Over 3 80 LOGIQ V2 LOGIQ V1 User Guide Direction 5610736 100 Rev 9...
Страница 288: ...Safety 4 46 LOGIQ V2 LOGIQ V1 User Guide Direction 5610736 100 Rev 9...
Страница 380: ...Index 4 LOGIQ V2 LOGIQ V1 User Guide Direction 5610736 100 Rev 9...
Страница 381: ......

