Using ScanSnap with the Quick Menu (for Mac OS Users)
291
Procedures
1.
Load a document in the ScanSnap.
"How to Load Documents" (page 50)
2.
Press the [Scan] button on the ScanSnap to start a scan.
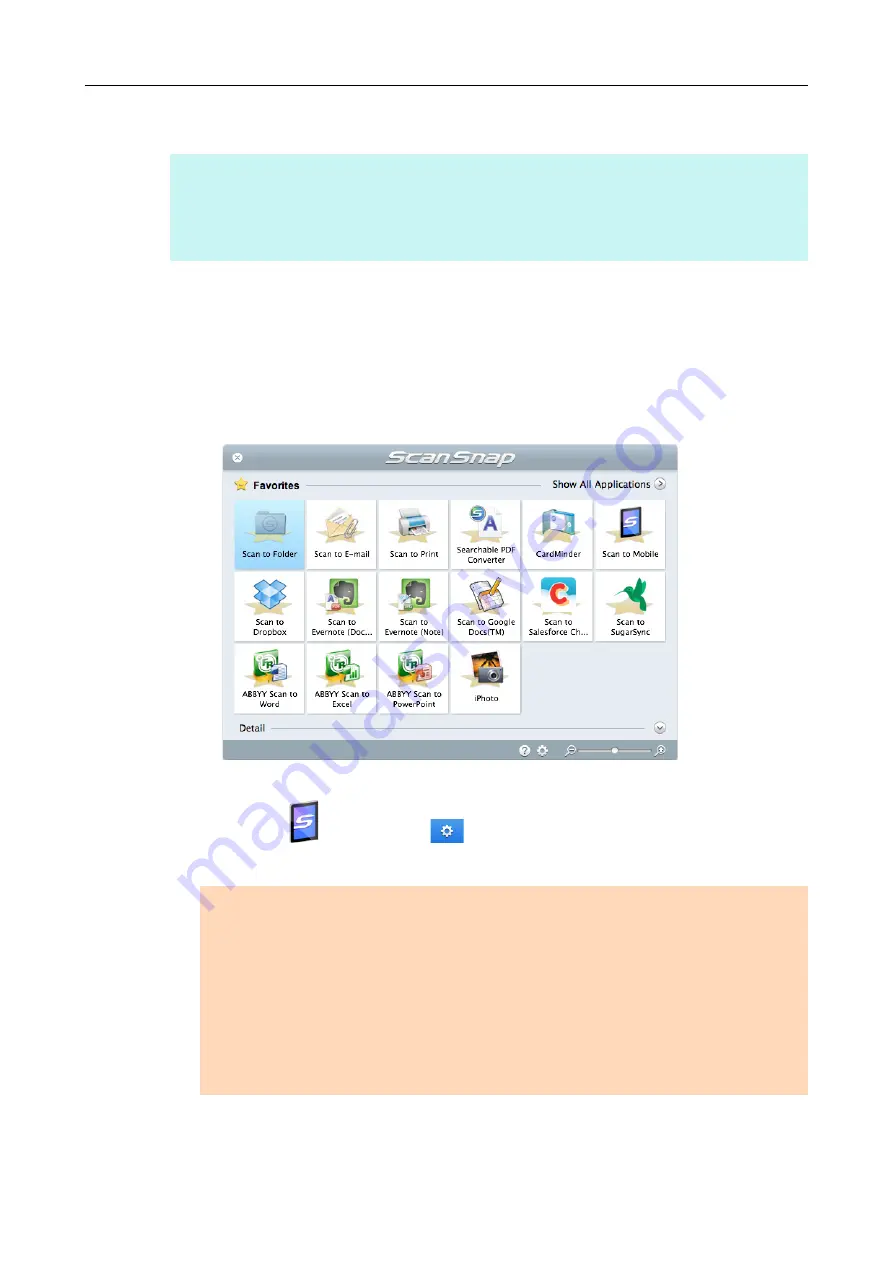
The Quick Menu appears when the scanning is completed.
To change the settings for [Scan to Mobile], move the mouse cursor to the [Scan to
Mobile] icon
, and then click
. For details about how to change the settings,
.
HINT
To use the Quick Menu, you need to select the [Use Quick Menu] checkbox in the ScanSnap setup
window.
For details about how to perform scanning by using the Quick Menu, refer to
ATTENTION
When [Scan to Mobile] has already started and is active (with the Scan to Mobile menu
appearing in the menu bar), ScanSnap Manager links with [Scan to Mobile] automatically and the
Quick Menu does not appear.
To display the Quick Menu, change the menu bar menu to an application other than Scan to
Mobile, and then try scanning again.
You cannot start scanning when the Quick Menu is displayed. Wait until ScanSnap Manager links
with [Scan to Mobile] before scanning another document.
Do not move, delete or rename the scanned image in other applications when the Quick Menu is
displayed.


