Creating Scanned Images Depending on Intended Use (for Windows Users)
213
3.
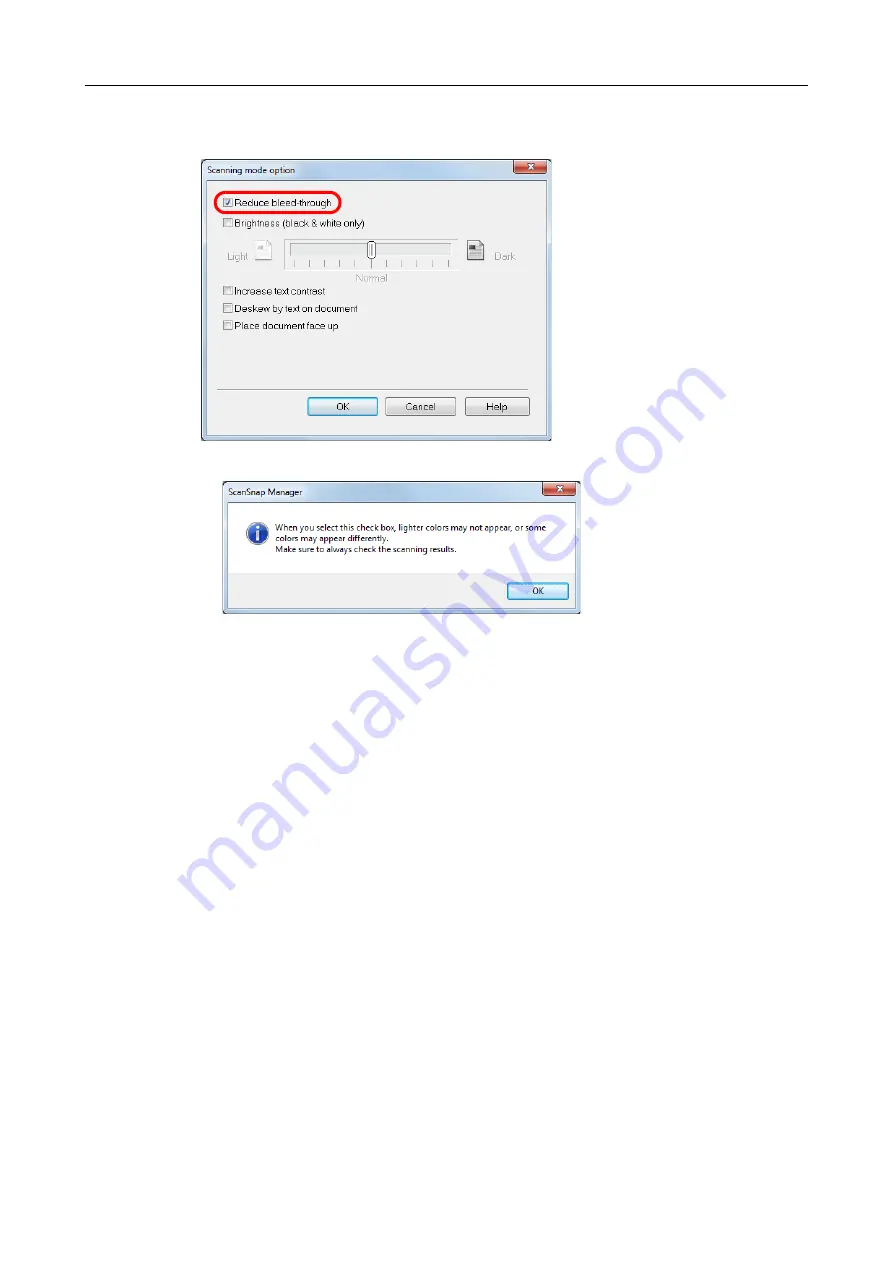
Select the [Reduce bleed-through] check box.
The following message appears.
4.
Click the [OK] button to close all open dialog boxes.
5.
Load a document in the ScanSnap.
"How to Load Documents" (page 50)
6.
Press the [Scan] button on the ScanSnap to start a scan.
The scanned image is saved with reduced bleed-through.


