


322
Upgrade and Maintenance Manual
TX140
S1
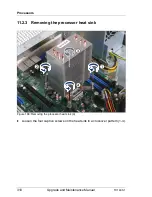
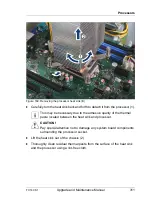
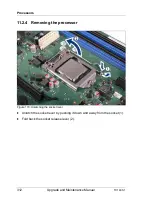
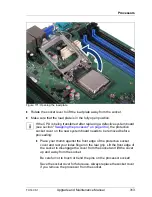
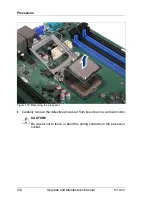
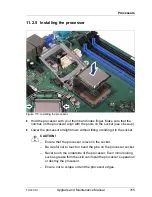
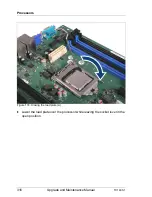
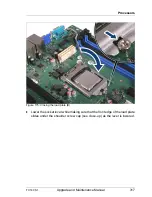
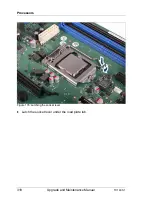
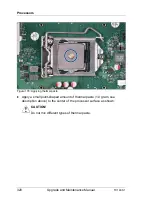
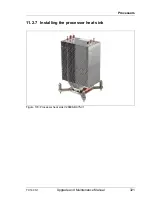
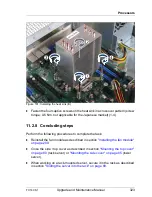
Processors
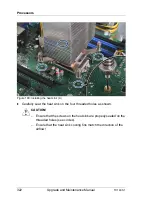
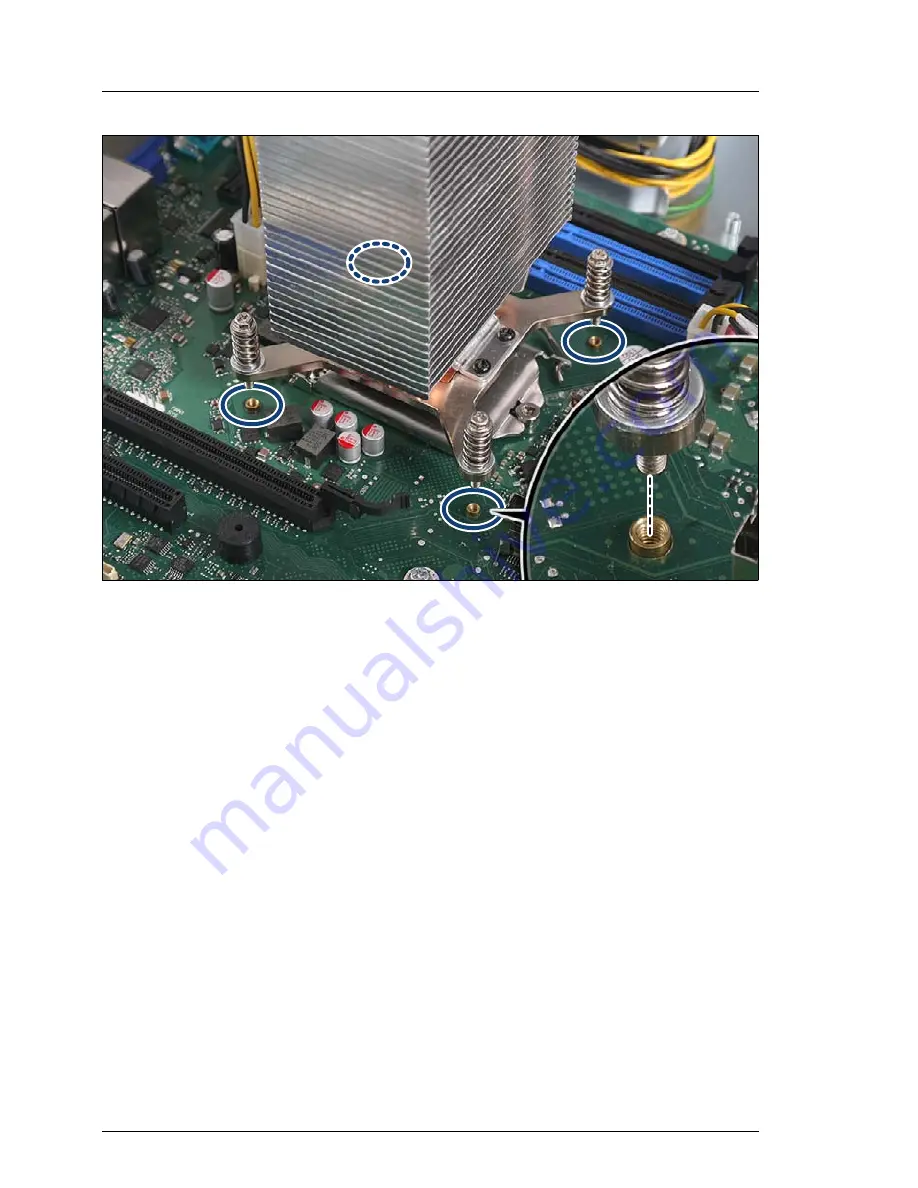
Figure 180: Installing the heat sink (A)
Ê
Carefully seat the heat sink on the four threaded holes as shown.
V
CAUTION!
– Ensure that the screws on the heat sink are properly seated on the
threaded holes (see circles).
– Ensure that the heat sink cooling fins match the direction of the
airflow!
Содержание PRIMERGY TX140 S1
Страница 6: ...Upgrade and Maintenance Manual TX140 S1 ...
Страница 22: ...Upgrade and Maintenance Manual TX140 S1 Contents ...
Страница 24: ...24 Upgrade and Maintenance Manual TX140 S1 ...
Страница 40: ...40 Upgrade and Maintenance Manual TX140 S1 Before you start ...
Страница 204: ...204 Upgrade and Maintenance Manual TX140 S1 Hard disk drives solid state drives ...
Страница 292: ...292 Upgrade and Maintenance Manual TX140 S1 Expansion cards and backup units ...
Страница 306: ...306 Upgrade and Maintenance Manual TX140 S1 Main memory ...
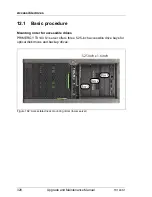
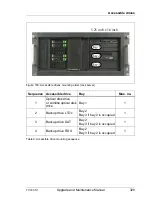
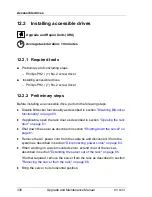
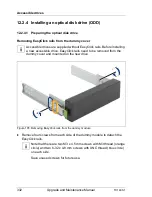
Страница 370: ...370 Upgrade and Maintenance Manual TX140 S1 Accessible drives ...
Страница 414: ...414 Upgrade and Maintenance Manual TX140 S1 Front panel and external connectors ...
Страница 472: ...472 Upgrade and Maintenance Manual TX140 S1 System board and components ...
Страница 568: ...568 Upgrade and Maintenance Manual TX140 S1 Cabling ...