


150
Upgrade and Maintenance Manual
TX140
S1
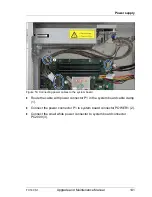
Power supply
6.3.2.2
Preliminary steps
Before replacing the PSU module, perform the following steps:
Ê
Only when replacing a power supply module in a non-redundant
configuration: Disable BitLocker functionality as described in section
"Disabling BitLocker functionality" on page 93
.
Ê
If applicable, open the rack door as described in section
"Opening the rack
door" on page 61
.
Ê
Locate the desired server as described in section
"Locating the defective
server" on page 54
.
Ê
Only when replacing a power supply module in a non-redundant
configuration: Shut down the server as described in section
"Shutting down
the server" on page 61
.
Ê
Remove the AC power cord from the cable tie and disconnect it from the
system as described in section
"Disconnecting power cords" on page 63
.
6.3.2.3
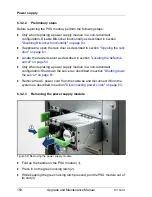
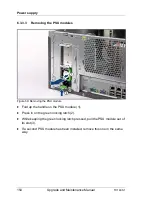
Removing the power supply module
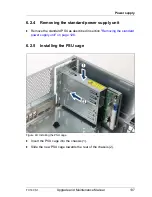
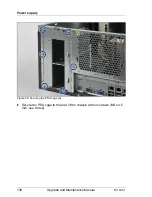
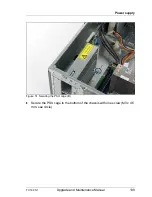
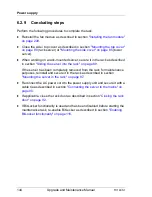
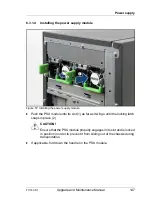
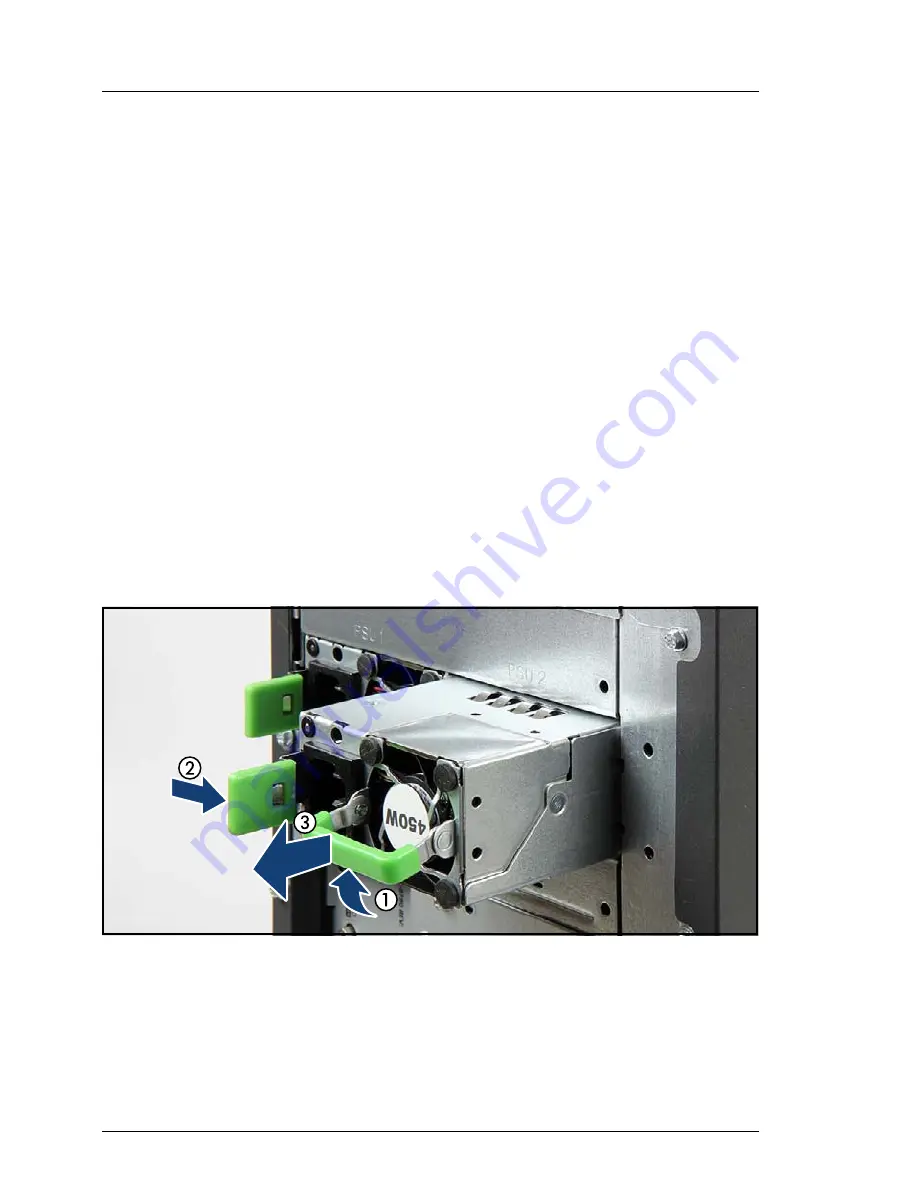
Figure 58: Removing the power supply module
Ê
Fold up the handle on the PSU module (1).
Ê
Press in on the green locking latch (2).
Ê
While keeping the green locking latch pressed, pull the PSU module out of
its slot (3).
Содержание PRIMERGY TX140 S1
Страница 6: ...Upgrade and Maintenance Manual TX140 S1 ...
Страница 22: ...Upgrade and Maintenance Manual TX140 S1 Contents ...
Страница 24: ...24 Upgrade and Maintenance Manual TX140 S1 ...
Страница 40: ...40 Upgrade and Maintenance Manual TX140 S1 Before you start ...
Страница 204: ...204 Upgrade and Maintenance Manual TX140 S1 Hard disk drives solid state drives ...
Страница 292: ...292 Upgrade and Maintenance Manual TX140 S1 Expansion cards and backup units ...
Страница 306: ...306 Upgrade and Maintenance Manual TX140 S1 Main memory ...
Страница 370: ...370 Upgrade and Maintenance Manual TX140 S1 Accessible drives ...
Страница 414: ...414 Upgrade and Maintenance Manual TX140 S1 Front panel and external connectors ...
Страница 472: ...472 Upgrade and Maintenance Manual TX140 S1 System board and components ...
Страница 568: ...568 Upgrade and Maintenance Manual TX140 S1 Cabling ...