4. Adjustment
FinePix S602 ZOOM SERVICE MANUAL
52
4-4-3.AF Sensor Adjustment
Cautions During Adjustment
Irrespective of whether or not components have been replaced, the AF sensor must be adjusted if the two
screws (M1.7 x 5.5) holding the AF sensor in place are removed.
As the accuracy of AF distance measurement with the AF sensor unit changes with temperature, this adjust-
ment should be performed immediately after the camera power supply is switched ON.
Errors will occur, and adjustment will become impossible, if adjustment is performed after the internal
temperature of the camera has increased to 35°C or more.
If an adjustment error is displayed when the 900mm conversion lens is used, switch camera power OFF,
wait, and perform the adjustment again.
Purpose : Mechanical adjustment in the horizontal and vertical directions of the AF sensor (passive) in relation to
the optical axis of the lens assembly.
Procedure
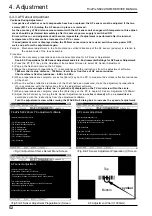
1) Make the necessary preparations and environmental setup for AF Sensor Adjustment.
See 4-2-5. Preparations for AF Sensor Adjustment and 4-2-6. Environmental Settings for AF Sensor Adjustment.
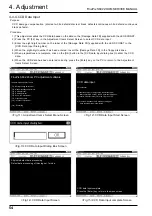
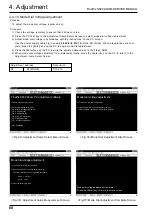
2) Press the PC [F11] key in the Adjustment Items Select Screen to select AF Sensor Adjustment.
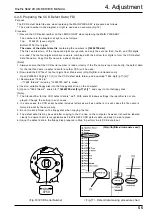
3) Pop-up the flash and remove the AF plate.
4) Make the adjustment preparations (1) in accordance with the instructions from the adjustment software.
1000mm chart setup distance : /-5mm from front face of AF sensor window.
Chart surface reflective luminance : 8.0Ev to 9.0Ev
5) When preparations are complete, press the [Enter] key on the PC to measure the surface reflective luminance
of the chart.
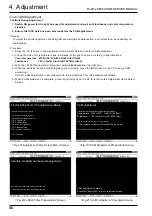
6) When the surface reflective luminance of the chart has been measured, make the adjustment preparations
(2) in accordance with the instructions from the adjustment software.
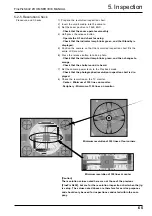
Adjust the screen angle so that the '+' symbol (red) displayed on the TV monitor is within the circle.
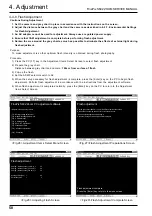
7) When preparations are complete, press the [Enter] key on the PC to begin AF Sensor Adjustment (1000mm).
8) Adjust the AF sensor by turning the AF Sensor Adjustment screw
(silver colored)
with a
+ screwdriver
in
accordance with the instructions from the adjustment software.
Turn the adjustment screw while viewing the WAVE No.0 dialog box to increase the speed of adjustment.
<Fig.5>AF Sensor Adjustment Preparation (2) Screen
<Fig.4>AF Sensor Adjustment Preparation (1) Screen
<Fig.3>Adjustment Items Select Menu Screen
AF Adjustment Chart (1000mm)
+
Top
Bottom
+
symbol
FxS602Z.ff
AF sensor adjustment
<Adjustment preparation (2)>
Prepare the AF sensor chart for 1000mm.
* Note it in the top and bottom of the AF sensor chart.
* The distance is /-5mm from the AF sensor window.
Turn on the fluorescent lamp,
and measure the reflection brightness of the AF sensor chart.
* Reflection brightness : 8.0-9.0Ev
Press the [Enter] key when it is possible to prepare.
FxS602Z.ff
AF sensor adjustment
<Adjustment preparation (1)>
Complete the preparation for the AF sensor adjustment.
* Refer to the service manual for details.
Pop-up the flash.
Remove AF PLATE.
* Refer to the service manual for remove.[F7] : Flash adjustment
Press the [Enter] key when it is possible to prepare.
FxS602Z.ff
FinePix S602 Zoom PC adjustment software
<Adjustment items select menu>
[F1] : Battery voltage adjustment
[F2] : Mode dial voltage adjustment
[F4] : CCD data input
[F5] : CAM adjustment
[F6] : Zoom / AF adjustment
[F7] : Flash adjustment
[F11] : AF sensor adjustment
[F12] : End setting


