PAG. 34
rev 1.2
EN
GL
ISH
SYSTEM SETUP
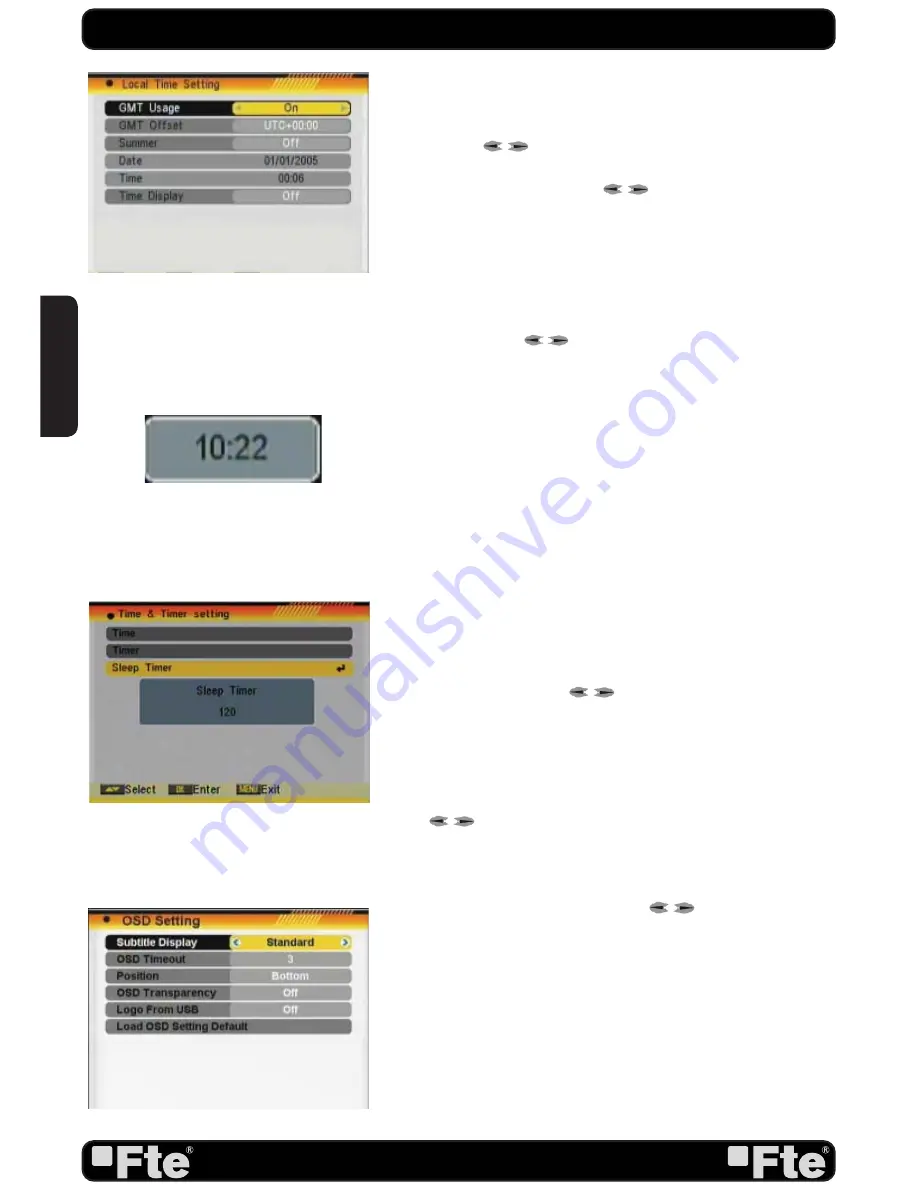
With every time you press the button the time offset will be
increased / decreased by half an hour.
3. Summer: this option is only available when “USE GMT” is
enabled. Use [
] to switch on/off the summer timetable.
4. “Date” and “Time” items are only available when the “GMT
Usage” is set to “Off”. Press [
] to select one item and
use number buttons to input time and date directly.
NOTE: If the current channel provides the correct time
information, you will see the current time after you entered
“Time” menu. If the channel doesn’t provide time information,
you have to input the date and time information manually. The
most channels support the time signal.
5. Show time: Use [
] to switch on/off this option. When
the option is enabled, the time will be displayed at the TV in a
frame in the top right margin (OSD 75).
6. Press [Exit] to exit the menu.
5.3.3. SLEEP TIMER
Press [OK] button in this option to set the sleep timer. You will
see “OFF,10, 20, 30, 40, 50, 60, 70, 80, 90, 100, 110 120.
(OSD 76)
If you set a sleep time, the system will change to Standby mode
after the chosen time period.
5.4. OSD SETTING
When you select “OSD Setting” you will see a screen like
beside (OSD 77):
1. Subtitle Display: Press [
] to select “On” or “Off”. If the
current channel has subtitle information, it will be displayed if
this function is “On”. If this function is “Off” subtitles won’t be
displayed.
2. OSD Timeout: This setting determines the duration the info
window is displayed on the screen when you change channels.
Press [
] to set the time between 1 to 10 seconds.
3. Position: To define the position of the information’s bar (top/
bottom).
4. OSD Transparency: With this parameter you can set the
transparency of the menus. Press [
] select the value
between 10%, 20%, 30%, and 40% and “NO” (means no
transparency function).
5.Logo from USB: This option allows showing the logo from
USB. If this option is activated and the receiver detects the
image that is predetermined as logo in the USB, it will import
the image.
6. Load OSD Setting Default: If you want to reset your OSD
settings to the default settings then select this item and press
[OK].
7. Press [Exit] button to leave the “OSD Setting” menu.
OSD 76
OSD 75
OSD 77
OSD 74
Содержание MAX S405 HD PLUS
Страница 1: ...MAX S405 HD PLUS...


