PAG. 32
rev 1.2
EN
GL
ISH
SYSTEM SETUP
5.2. TV SYSTEM
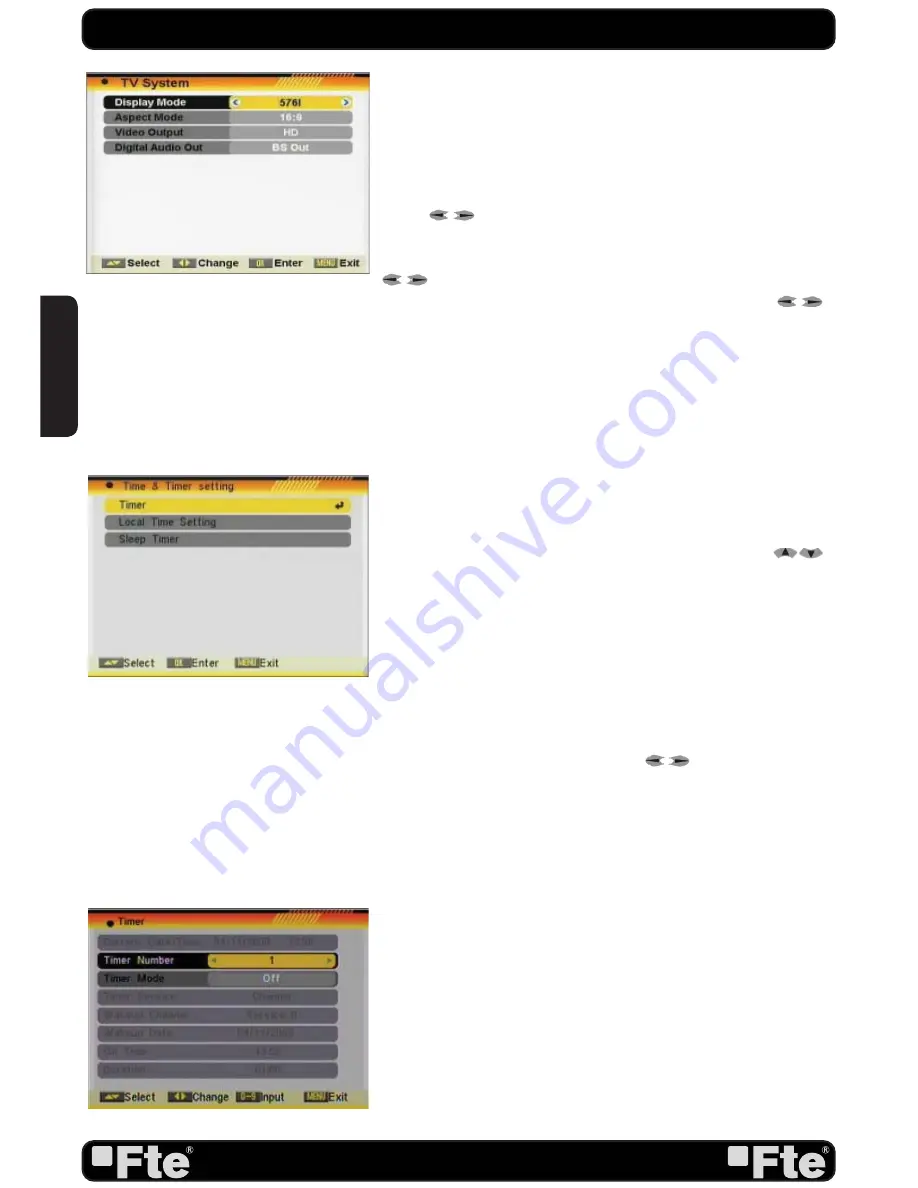
When you enter the “TV System” menu you will see the screen
like below (OSD 68):
1. Display Mode is used to switch the display mode. You can
select from
480I, 576I, 576P, 720P_50, 720P_60, 1080I_25,
1080I_30, 1080P_50, 1080P_60 or AUTO
in HD mode.
Press [
] to select the desired mode.
2. Aspect Mode is used to switch the screen aspect ratio mode.
You can select from Auto / 4:3 PS / 4:3 LB / 16:9. Press
[
] to select the needed mode.
3. In video output you can choose, by the means of [
]
keys, the video output mode: SD / HD. We recommend selec-
ting HD mode when the connection is made by HDMI.
4. Digital Audio Out: It will allow you to select the type of audio
digital output. Options: LPCM Out / BitStream Out. If you con-
nect this output to a device with Dolby digital, select BitStream
Out option.
5. Press [Exit] to close the “TV System” menu.
5.3. TIME & TIMER SETTING
When you enter “Time” “Local Time Setting” or “Sleep Timer” a
menu with three items will be opened (OSD 69). Use [
]
to select between the three options and confirm with [OK].
5.3.1. TIMER
Select “Timer” item and press [OK] to enter the “Timer list”
menu (OSD 70).
The current time will be displayed in the first column. If the
current time is incorrect, please modify it with the [Number]
buttons at the “Time” menu.
1. Timer Number: You can press [
] to set the Timer
number. There are totally 8 timers.
2. Timer Mode: Select how often the timer is running: Once,
Daily, Weekly, Monthly and Yearly. Or switch the timer off.
3. Timer Service: You can choose between “DVR Recorder”
*
/
“Radio Recorder”
*
(so you can program a recording of a TV or
a Radio channel) / “Reproduce Channel” / “Reproduce Radio”
(that way, you will assign the alarm function to a concrete TV
or Radio channel) , “Message mode” (creating a text message
that will appear on the screen) or Auto OTA Config (It will make
software updates by OTA at the date and time programmed).
4. “DVR Recorder”
*
/ “Radio Recorder”
*
/ “Channel
reproduction” / “Radio reproduction” option: if you select this
option, the following fields of the image will be shown in order
to be configured (OSD 71).
- Start channel: Press [OK] to open the channel list and select
the channel you want to watch.
- Start date: Introduce using the numerical keys on the remote
OSD 69
OSD 70
OSD 68
Содержание MAX S405 HD PLUS
Страница 1: ...MAX S405 HD PLUS...


