background image

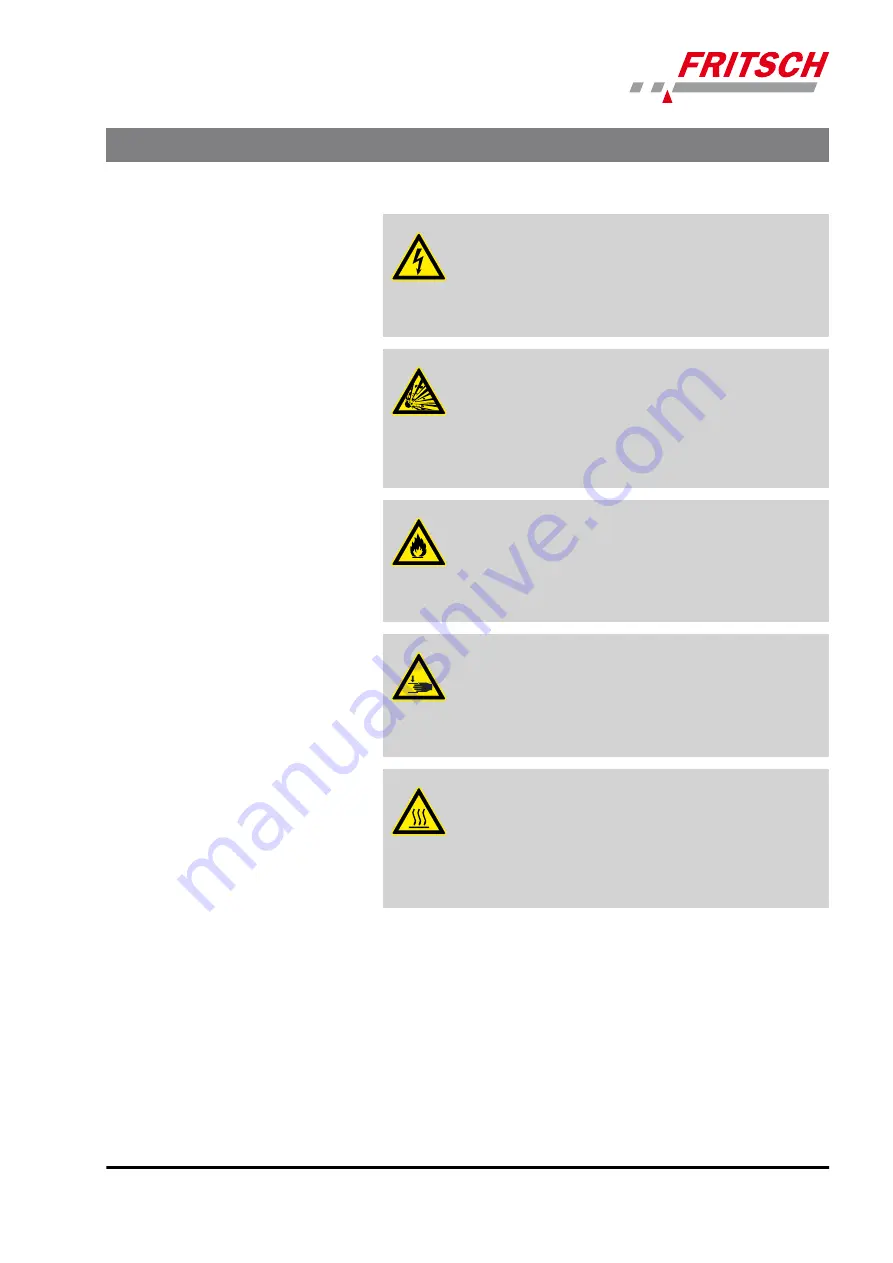
DANGER!
This symbol and keyword combination points out a

directly hazardous situation due to electrical current.

Ignoring information with this designation will result in

serious or fatal injury.

DANGER!
This symbol and keyword combination designates con-

tents and instructions for proper use of the machine in

explosive areas or with explosive substances. Ignoring

information with this designation will result in serious

or fatal injury.

DANGER!
This symbol and keyword combination designates con-

tents and instructions for proper use of the machine

with combustible substances. Ignoring information with

this designation will result in serious or fatal injury.

WARNING!
This symbol and keyword combination points out a

directly hazardous situation due to movable parts.

Ignoring information with this designation can result in

hand injuries.

WARNING!
This symbol and keyword combination points out a

directly hazardous situation due to hot surfaces.

Ignoring information with this designation can result in

serious burn injuries due to skin contact with hot sur-

faces.

Safety information can refer to specific, individual procedure instructions.

Such safety information is embedded in the procedure instructions so

that the text can be read without interruption as the procedure is being

carried out. The keywords described above are used.

Safety information in the procedure

instructions


Safety information and use


- 11 -


Содержание PULVERISETTE 1 premium Series

Страница 1: ...JAW CRUSHER PULVERISETTE 1 premium line Operating instructions Valid starting with 01 20XX 0001 Read the instructions prior to performing any task Translation of the original operating instructions ...

Страница 2: ...Version 02 2019 Index 001 Fritsch GmbH Milling and Sizing Industriestrasse 8 D 55743 Idar Oberstein Telephone 49 0 6784 70 0 Fax 49 0 6784 70 11 Email info fritsch de Internet www fritsch de ...

Страница 3: ... GmbH An audit certified that Fritsch GmbH conforms to the requirements of the DIN EN ISO 9001 2015 The enclosed Conformity Declaration lists the guidelines the FRITSCH instrument conforms to to be able to bear the CE mark Certification CE Conformity Certifications and CE conformity 3 ...

Страница 4: ...ons 16 3 2 Weight 16 3 3 Operating noise 16 3 4 Voltage current consumption power consumption 16 3 5 Electrical fuses 16 3 6 Material 16 3 7 Final fineness 16 3 8 Protection class 17 4 Installation 18 4 1 Transport 18 4 2 Unpacking 18 4 3 Setting up 19 4 4 Ambient conditions 20 4 5 Attaching the funnel 21 4 6 Electrical connection 22 4 6 1 Detection of the direction of rotation 22 5 Initial start ...

Страница 5: ...tem 38 7 2 Conversion kit for metal free pre crushing 39 7 2 1 Converting the funnel 40 7 2 2 Converting the crushing plates and support walls 40 7 2 3 Converting the grinding opening blocks 40 7 3 Crushing and grinding in combination with the Disk Mill PULVERISETTE 13 premium line 42 8 Cleaning 43 8 1 Grinding chamber 43 9 Maintenance 45 9 1 Crushing plates 45 9 2 V belt 45 9 2 1 Replacing the V ...

Страница 6: ...ations mentioned below are used together with the corresponding numbers 1 Funnel 2 Guide pin fixed crushing jaw 3 Guide pin guide plate 4 Crank gap adjustment 5 Crank for kinematics 6 External belt guard 7 Lid 8 Source material container 9 Main switch Basic structure 6 ...

Страница 7: ...ics 10 Block grinding aperture 11 Support wall both sides 12 Crushing jaw movable compl 13 Crushing jaw fixed compl 14 Pressure plate 15 Crushing jaw fixed 16 Clamping strip 17 Crushing plate fixed 18 Guide plate 19 Crushing jaw movable 20 Clamping strip 21 Crushing plate movable Basic structure 7 ...

Страница 8: ...ence and training as well as their knowledge of relevant standards regulations accident prevention guidelines and oper ating conditions are authorised by those responsible for the safety of the machine to carry out the required work and are able to recognize and avoid possible hazards as defined for skilled workers in IEC 364 In order to prevent hazards to users follow the instructions in this man...

Страница 9: ...he operator Before using the PULVERISETTE 1 premium line this manual is to be care fully read and understood The use of the PULVERISETTE 1 premium line requires technical knowledge only commercial use is permitted The operating personnel must be familiar with the content of the oper ating manual For this reason it is very important that these persons actually receive the present operating manual E...

Страница 10: ...ds and symbols used in this manual Safety information in this manual is designated by symbols Safety infor mation is introduced by keywords that express the extent of the hazard DANGER This symbol and keyword combination points out a directly hazardous situation that can result in death or serious injury if not avoided WARNING This symbol and keyword combination points out a pos sibly hazardous si...

Страница 11: ...his designation will result in serious or fatal injury WARNING This symbol and keyword combination points out a directly hazardous situation due to movable parts Ignoring information with this designation can result in hand injuries WARNING This symbol and keyword combination points out a directly hazardous situation due to hot surfaces Ignoring information with this designation can result in seri...

Страница 12: ... References to sections in this manual and rele vant documentation Lists without a specific order Button Operating elements e g push button switch display elements e g signal lamps Display Screen elements e g buttons function key assignment 2 5 Device safety information n Only use original accessories and original spare parts Failure to observe this instruction can compromise the safety of the mac...

Страница 13: ...d the work must be supervised from a specialist The jaw crusher is not explosion protected and is not designed to grind explosive materials n Do not remove the information signs NOTICE Immediately replace damaged or illegible information signs n Unauthorised alteration of the PULVERISETTE 1 premium line will void Fritsch s declaration of conformity to European directives and void the guarantee n O...

Страница 14: ...ral information n The jaw crusher is switched on and off using the main switch 9 Push the main switch 9 to the start position à the jaw crusher is ready for operation within a few seconds After stopping the crushing process with the Stop button the jaw crusher can be switched off with the main switch 9 in the stop position n The jaw crusher has a motor protection switch adapted to the mains voltag...

Страница 15: ...n The jaw crusher is secured against restarting n Press the Start button to continue the crushing process Safety information and use 15 ...

Страница 16: ...wer consumption The device can be operated with the following mains voltages n Three phase alternating current 230V 10 10A 3 49kW n Three phase alternating current 400V 10 5A 3 49kW Transient overvoltage according to overvoltage category II permitted 3 5 Electrical fuses n The electrical fuse is integrated in the main switch 9 3 6 Material Feed size approx 95 mm Throughput 250 kg h Depending on th...

Страница 17: ...3 8 Protection class IP 44 Technical data 17 ...

Страница 18: ...ead to personal injury or property damage The machine is only to be lifted with suitable equipment and by qualified personnel The guarantee excludes all claims for damage due to improper transport 4 2 Unpacking n Pull out the nails that fasten the cover to the transport pallet The cover is the wooden box that has been placed over the transport pallet n Lift the cover off of the transport pallet CA...

Страница 19: ... still mounted on the jaw crusher 1 The jaw crusher is attached to the transport pallet from below using 3 hexagon screws Undo the screws with the size 17 mm box wrench m 2 Guide the carrying strap F through the holes of the carrying links G 3 Attach the carrying strap F to a crane or a similar device 4 You can now move the jaw crusher to the desired location Set down the jaw crusher on a flat and...

Страница 20: ... air may not carry any electrically conductive dust Maximum relative humidity 80 for temperatures up to 31 C linearly decreasing down to 50 rela tive humidity at 40 C n The room temperature has to stay between 5 40 C n Altitudes up to 2000 m n Degree of pollution 2 according to IEC 664 Installation 20 ...

Страница 21: ...g out of the packaging 2 Lift the rubber seal E off the funnel opening of the jaw crusher To do this remove the 4 countersunk head screws D using the hex agon socket wrench g 3 Fit the rubber seal E on the funnel neck Pay attention to the position of the holes in the funnel 1 and the rubber seal E They must lie on top of each other 1 Funnel g Hex wrench size 4 Installation 21 ...

Страница 22: ... Electrical connection Before establishing the connection compare the voltage and current values given on the type plate with the values of the available electrical system The electrical system should meet the following requirements n 3 1 connection n Fuse protection of at least 16A for the socket connection n or automatic circuit breaker with 16A and C characteristic n Functioning protective eart...

Страница 23: ... Ä Chapter 9 Maintenance on page 45 After a few hours of operation the grease will have been distributed evenly in the anti friction bearing chamber and no more grease emerges 5 1 Switching on Switch main switch 9 to I 5 2 Function check Once the grinding chamber is closed and the grinding stock container is inserted the device can be started by the START button 26 The labora tory jaw crusher star...

Страница 24: ...the gap pull out the knurled knob on the crank 4 and move the crank 4 to the desired position Allow the knob to engage again cor rectly this locks the fixed crushing plate in place You should pre crush material that is difficult to crush e g metallic alloys in a first cycle with a wider gap In the second cycle set the gap width for the desired fineness If you do not have any experience in the crus...

Страница 25: ...Comminution of certain materials e g coal lumps of rock stones may result in the development of dust which accumulates in the crushing chamber B To prevent it from spreading the jaw crusher can be equipped with a dust exhaust system See Ä Further information on page 38 6 1 4 Final fineness The final fineness achieved depends on the material properties and the gap setting between the two crushing p...

Страница 26: ...he guide pin 3 by pushing it into the upper hole small and turning it 5 To increase the opening angle again the guide plate must be switched back to Normal This is done as described above Small setting In the Small position the opening angle of the movable crushing plate is reduced which reduces the distribution range of particle sizes and the size of the particles is more consistent However this ...

Страница 27: ...ir of support walls 43 4020 10 Tungsten carbide WC Co Fixed crushing plate 43 3050 08 Movable crushing plate 43 3060 08 1 pair of support walls 43 4030 08 Zirconium oxide Fixed crushing plate 43 3100 27 Movable crushing plate 43 3110 27 1 pair of support walls 43 4050 27 Manganese steel Fixed crushing plate 43 3130 23 Movable crushing plate 43 3140 23 Aluminium 1 pair of support walls 43 4040 13 P...

Страница 28: ... are subject to wear and may need to be turned and replaced at a later stage NOTICE Make sure the crushing plates on the right and left sides protrude somewhat beyond the crushing jaws If it is noticed during an inspection or while cleaning that only the lower parts of the crushing jaws are worn the symmetrical jaws can be simply turned over The fixed and movable crushing jaws have different forms...

Страница 29: ...pin 2 out of its guide 6 Lift out the crushing jaw 13 to the front CAUTION Hold the crushing jaw 13 firmly while doing this The part weighs about 6 2 kg 7 Then place the crushing jaw 13 on a firm surface and undo the cylinder head screws of the clamping strip 16 using the hex wrench size 6 8 Lift off the crushing plate 17 9 Clean all parts in order that the crushing plate has even contact during t...

Страница 30: ...nstalled and prevents the crushing plates from being destroyed for example if ZrO2 crushing plates are used To remove the zero point setting see Chapter Ä Chapter 6 3 3 Checking the gap width on page 33 11 Re install the crushing jaw 13 insert the guide pin 2 and lock it in place 12 Close the lid 7 13 Push in the source material container 8 Using the device 30 ...

Страница 31: ...ng the crushing plate of the fixed crushing jaw on page 29 4 Turn the guide pin of the guide plate 3 in such a way that its groove is above the position screw and provides access to the guide pin 3 See also Ä Chapter 6 1 5 Adjusting the guide plate on page 26 5 Then pull the guide pin 3 out of its guide The guide plate is now no longer locked and the crushing jaw 13 can be pulled up using the spec...

Страница 32: ...t the crushing plate has even contact during the installation 13 Insert the replacement crushing plate or the old turned crushing plate 21 and screw the clamping strip 20 back on again 14 Then turn the crank to move the crushing jaw 12 back into the lower position 15 Refit the guide pin 3 See also Ä Chapter 6 1 5 Adjusting the guide plate on page 26 16 Remove the crank a and re attach the pull pla...

Страница 33: ...isconnect the mains plug and protect the device against being unintentionally switched back on Indicate maintenance and assembly work with warning signs NOTICE During operation of the jaw crusher the crushing plates must not touch when the smallest gap width is set Tools c Hex wrench size 6 d Feeler gauge strip e Open ended wrench size 19 n Cross head screwdriver After mounting the crushing plates...

Страница 34: ...nding gap of 0 3mm See Ä Chapter 6 1 1 Setting the gap width on page 24 5 Turn the flywheel 22 to position 1 6 Undo the 3 cylinder head screws for adjusting the grinding gap using the hex wrench c 7 Now guide the feeler gauge strip d provided 0 3 mm thick between the two crushing jaws 12 13 8 Use the open ended wrench e to set the eccentric for adjusting the grinding gap in such a way that the fee...

Страница 35: ...ial container 8 6 3 4 Attaching the support walls It is practically only necessary to replace the support walls 11 when the crushing plates 17 21 are replaced because their material needs to be changed and even minimal amounts of abrasion on the support walls are to be avoided Tool c Hex wrench size 6 f Socket wrench size 13 g Hex wrench size 4 h Open ended wrench size 13 i Hex wrench size 5 n Cro...

Страница 36: ...elt guard 6 The fly wheel 22 can be seen 3 The support wall is attached to the left hand side wall with 5 hex agon screws These only need to be loosened and not removed completely 4 To access the two screws behind the flywheel 22 it must be turned until the screw heads can be accessed through the hole in the flywheel 5 Undo the two screws with the socket wrench f 6 You will find two more hexagon s...

Страница 37: ... the belt guard 6 back in place It is important for your safety Replacing the right hand support wall 1 First if not already done lift the fixed crushing jaw 13 as described in Ä Chapter 6 3 1 1 Replacing the crushing plate of the fixed crushing jaw on page 29 out of the jaw crusher 2 The 5 fastening screws for the right hand support wall can be accessed directly on the right hand side wall 3 Undo...

Страница 38: ...stem DANGER Mains voltage The device has to be disconnected from the mains before beginning assembly work by pulling the mains plug out of the socket Assembly work may be only be carried out by a trained electrician 1 After removing the dust insert one end of the exhaust hole in the connecting hole at the back of the jaw crusher Connect the other end to the dust exhaust system 2 Connect the contro...

Страница 39: ... control panel C when the Jaw Crusher is ready for operation 7 2 Conversion kit for metal free pre crushing Tab 1 Conversion kit for iron free pre crushing 01 2090 00 consisting of Quan tity Article number Article designation Material 1 01 3501 00 Coated source mate rial container Proco PA 11 Rilsan 1 01 2101 00 Coated funnel com plete Proco PA 11 Rilsan 1 43 4045 16 One pair of support walls POM ...

Страница 40: ... The conversion is carried out as described in Ä Chapter 4 5 Attaching the funnel on page 21 7 2 2 Converting the crushing plates and support walls The conversion is carried out as described in Ä Chapter 4 5 Attaching the funnel on page 21 7 2 3 Converting the grinding opening blocks Tools i Hex wrench size 5 k Plastic mallet Conversion 1 The blocks 10 are each attached to the lid 1 with one cylin...

Страница 41: ...knock the hex wrench i which is inserted in the cylinder head screw The block is pushed by the dowel pins and is suspended from the cylinder head screw 4 Open the lid 1 5 Hold the released block firmly and unscrew the cylinder head screw completely and replace the block 6 To install the block simply insert it with the dowel pins in the holes of the lid 1 7 Then re attach the blocks with the cylind...

Страница 42: ... the Disk Mill PULVERISETTE 13 pre mium line Crushing with this combination takes place in a single cycle with a feed size of 95 mm or 65 mm up to an average particle size d50 of 0 1 mm The jaw crusher is placed on a mounting rack order no 43 6000 00 above the disk mill The material pre crushed in the jaw crusher slides along a special chute directly into the funnel of the disk mill Accessories 42...

Страница 43: ...he guide lines of the Accident Prevention Regulation BGV A3 especially when the device has been set up in a dusty environment or when the grinding stock processed pro duces dust 8 1 Grinding chamber To access the grinding chamber the fixed crushing jaw 12 must first be removed 1 Pull out the source material container 8 2 Open the lid 7 3 Set the gap width to the biggest distance 4 Turn the guide p...

Страница 44: ...brush or by blowing it clear with compressed air pay attention to crushed material flying around Stubborn deposits can be removed using a steel brush Then wipe the grinding chamber with a damp cloth and rub it down with alcohol protection against corrosion 8 After cleaning re insert the crushing jaw 13 insert the guide pin 2 and lock it in place 9 Close the lid 7 10 Push in the source material con...

Страница 45: ...d on the device is entered 9 1 Crushing plates The crushing plates will get worn after a certain time depending on the material to be crushed Check their surfaces at regular intervals To turn or change the plates observe the instructions at Ä Chapter 6 3 Replacing the crushing plates and support walls on page 28 9 2 V belt It is normally not necessary to re tension the V belt However if you detect...

Страница 46: ...ening screws from the belt guard 6 using the screwdriver n lift it off and place it to the side 2 Remove the 6 fastening screws from the belt guard 6 using the screwdriver n lift it off and place it to the side 3 Use the hex wrench to undo the 4 cylinder head screws H on the motor s adapter plate 24 Tools Maintenance 46 ...

Страница 47: ...ards again and turning the lock nuts I against the belt tensioner 25 The V belts K must be tensioned evenly This is done by alternately tightening the lock nuts I against the belt tensioner 25 8 If the belt tension is sufficient re tighten the 4 cylinder head screws H on the motor s adapter plate 24 9 Refit the belt guard 6 9 3 Lubricating the bearings You should clean the guide pins 2 3 roughly a...

Страница 48: ...sen sample n Remove guide pin of fixed crushing jaw and remove fixed crushing jaw n If neither option is possible you can loosen the sample from below using a screwdriver for example Final fineness becoming larger Gap width becoming larger due to abra sion or use Check gap width after several grinding processes and read just if necessary See Ä Chapter 6 3 3 Checking the gap width on page 33 Checkl...

Страница 49: ... Analytical devices have been registered under category 9 monitoring and control instruments It has been accepted that FRITSCH is operating only in the business to business area The German registration number for FRITSCH is WEEE reg no DE 60198769 FRITSCH WEEE coverage Since the registration of FRITSCH is classified for bilateral transactions no legal recycling or disposal process is described FRI...

Страница 50: ...receipt of the device and be received by us within three weeks or alternatively online registration must be car ried out with the above mentioned information The guarantee will not be granted in cases where n Damage has arisen due to normal wear and tear especially for wear parts such as Crushing jaws support walls grinding bowls grinding balls sieve plates brush strips grinding sets grinding disk...

Страница 51: ...nt to remedy all recognisable errors or faults including those not covered by the guarantee Errors or faults not covered by the guarantee shall in this case be rectified at cost We recommend reading the operating manual before contacting us or your dealer in order to avoid unnecessary inconvenience Ownership of defective parts is transferred to us with the delivery of the replacement part the defe...

Страница 52: ... is expressly prescribed by applicable laws or jurisprudence FRITSCH GMBH expressly reserves the right to modify and or update this operating manual without prior notice The same applies to modifica tions and improvements to the products described in this operating manual It is the responsibility of the user to ensure that they have the current version of this operating manual For more information...

Страница 53: ...sons including fatal injuries or similar The above exclusion of liability is limited by mandatory liability as prescribed by laws or jurisprudence Lia bility for negligence is excluded in all cases No permission is given expressly implicitly or otherwise for the use of patents brands or other copyrights We also assume no liability for copy right infringements or infringements of the rights of thir...

Страница 54: ...14 Safety logbook Date Maintenance Repair Name Signature Safety logbook 54 ...

Страница 55: ...ion of liability 52 Explanation of signs 10 Explanation of symbols 10 F Feeding material 24 Final fineness 16 25 Function check 23 G Guarantee terms 50 I Installing the funnel 21 L Lubricating the bearings 47 M Maintenance 45 Material 16 O Operating noise 16 P Power consumption 16 R Replacing the crushing plates 28 Replacing the support walls 28 35 Replacing the V belt 46 Requirements for the user...

Страница 56: ...V Voltage 16 W Warning information 10 WEEE 49 Weight 16 Index 56 ...

Страница 57: ......

Страница 58: ... 2013 Fritsch GmbH Milling and Sizing Industriestrasse 8 D 55743 Idar Oberstein Telephone 49 0 6784 70 0 Fax 49 0 6784 70 11 Email info fritsch de Internet www fritsch de ...

Отзывы: