17
The Work Area
The work area in the Design Wizard consists of several options that help you edit and
view the labels you create. The main components of the Design Wizard work area are
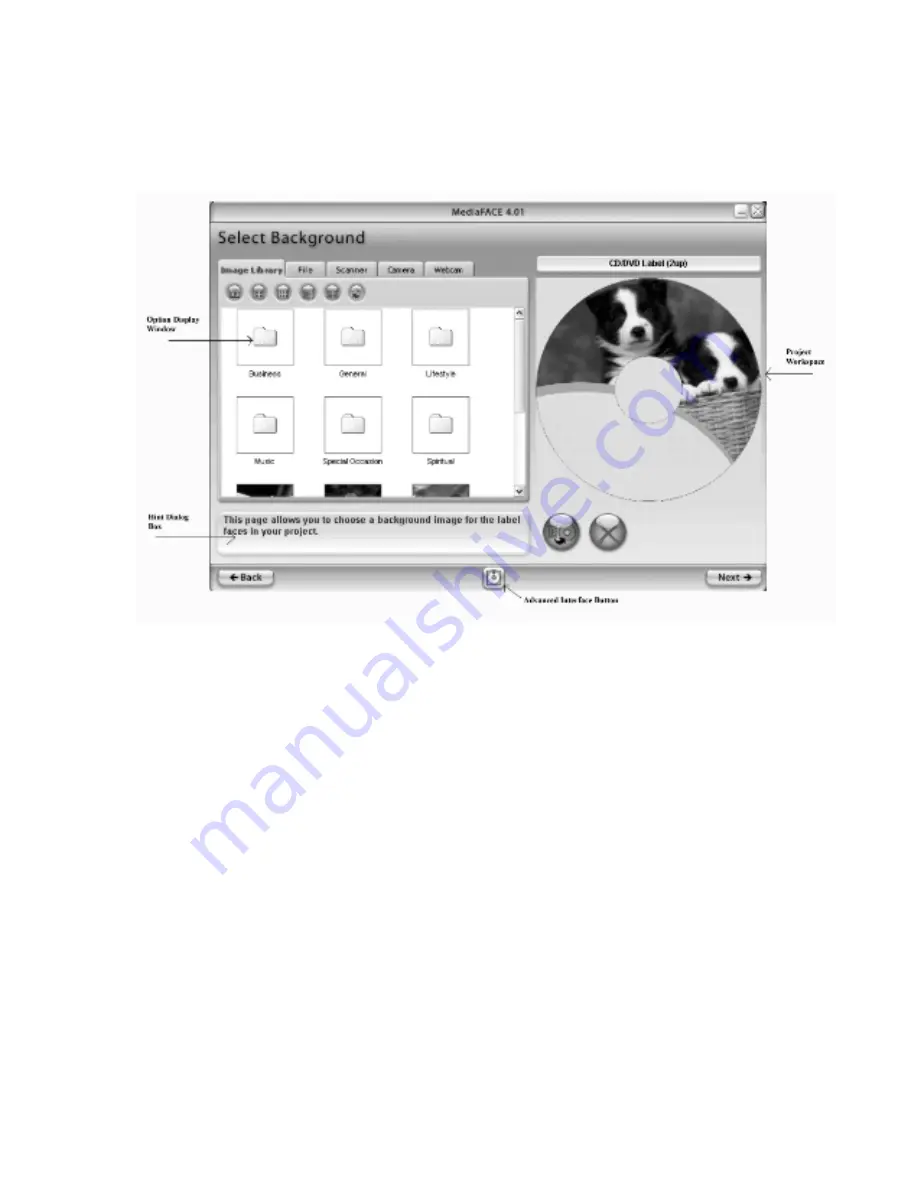
shown in the diagram below and discussed in detail.
Figure 2.2 – The main work area in the Design Wizard
Option Display Window
– this is the large area on the left side of the screen. Custom
label design options, such as adding text and images, are selected or defined here. As
you navigate through each screen, you will notice that there are various option tabs
and a scroll bar for easy access to design options.
Hint Dialog Box
– this is a box located directly below the Option Display Window and
it does exactly what its name implies. Its sole purpose is to provide you with hints as
to how to proceed if you get stuck. It also provides definitions of buttons and tabs that
appear on that page. The best part about it is that it’s mouse-sensitive, so all you have
to do is drag your mouse over an object to find out more about that object. Think of it
as your own personal cheat sheet. Test it out by dragging your mouse across items on
this screen – buttons, tabs, folders – and seeing what pops up in the Hints box.
Project Workspace
– this is the area to the right of the Option Display Window.
Projects are designed, edited and viewed here.
Advanced Interface Button
– this button is present on each page of the Design Wizard.
It allows you to jump from Wizard mode to the MediaFACE® 4.01 Advanced
Interface. The Advanced Interface is a more powerful interface that you can use to


