56
!
"
#
$
/
%
&
*
!
"
#
Planer-Thicknesser
A 941 / AD 941 / AD 951
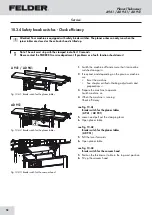
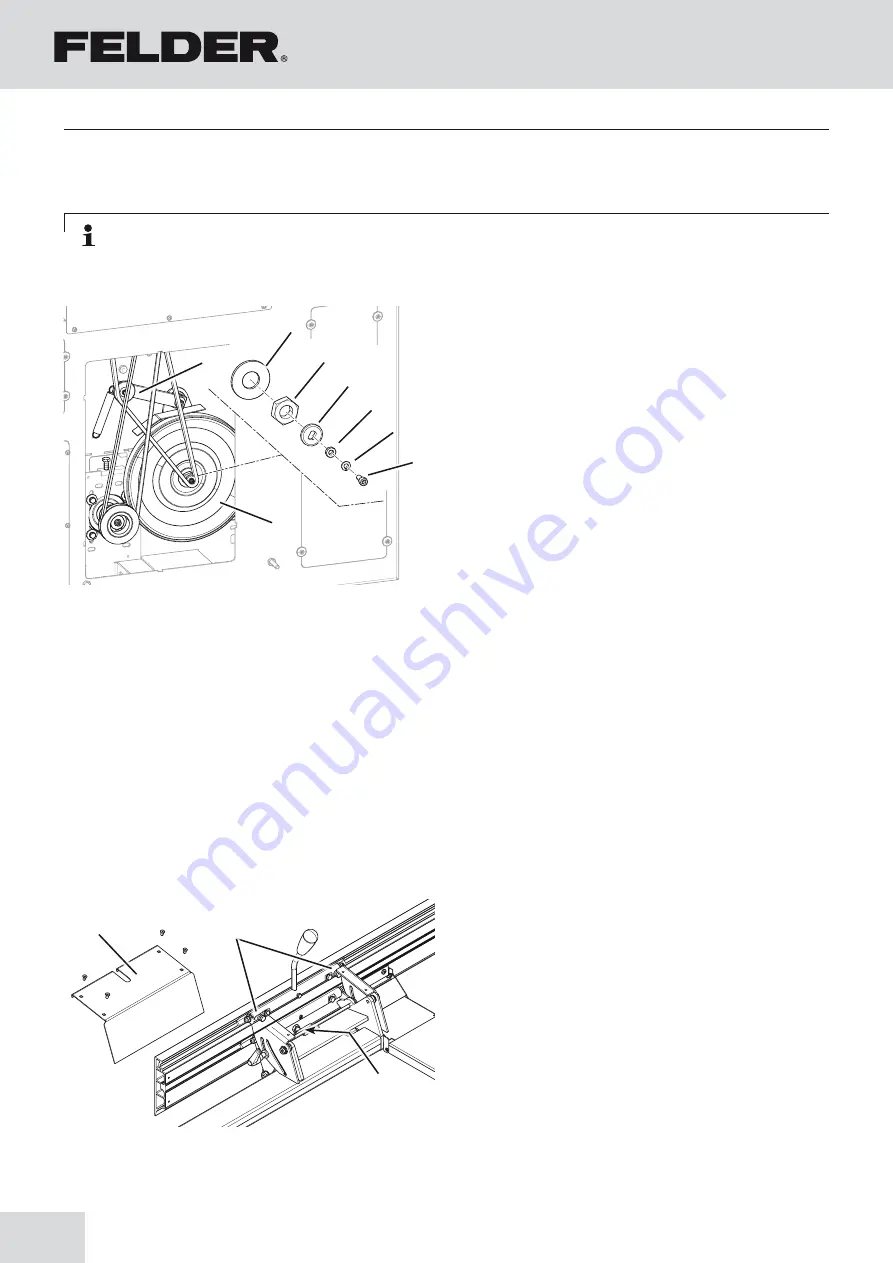
10.4.6 Checking/changing the friction wheel (transmission) (AD 941)
1.
Before beginning any maintenance work on the
machine, switch it off and secure it against acciden-
tally being switched on again
2.
Set the gear lever to the “0” setting.
3.
Remove the cover (see drive belt tighten/exchange).
4.
Engage the chain adjuster and hang chain.
5.
Loosen the screw/remove the spring washer.
6.
Remove clamping bush and chain wheel plate.
7.
Hold the friction gear fast/remove screw nut M 20.
8.
Screw nut M 20, remove the thrust plate.
9.
Replace the friction wheel.
10.
Place the thrust plate back on, Tighten the nut.
11.
Put on clamping bush and chain wheel plate.
12.
Screw the spring washer on
13.
Hang the chain and check running (turn at the friction
wheel).
14.
Screw tight cover hood.
Fig. 10-8: Friction wheel: check/replace
!
Chain tensioner
"
screw
$
Clamping bush
%
Chain wheel plate
&
Nut M 20
/
Pressure disk
(
Friction wheel
Service
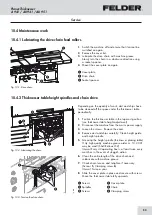
10.4.7 Correcting the angle of the planing fence
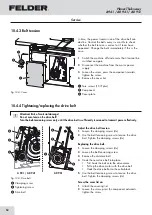
Fig. 10-9: Planer fence
!
Cover
"
Setscrews 0°
#
Adjustment screws 45°
An exact angle between the fence guide bar and table is
very important when jointing and beveling.
Angle correction:
1.
Take off the covering lid
2.
The 0° and 45° angles can be adjusted with the set-
screws once the lock nuts are open.
Note: The friction wheel is subject to wear. Should the examination reveal a heavily damaged or worn
surface, then the friction wheel must be replaced.
Содержание AD 941
Страница 13: ...13 Planer Thicknesser A 941 AD 941 AD 951 Safety...
Страница 67: ...67 Planer Thicknesser A 941 AD 941 AD 951 Faults...
Страница 69: ...69 Planer Thicknesser A 941 AD 941 AD 951 Annex...
Страница 70: ......
Страница 71: ......


