DEFIBRILLATOR MONITOR
Mod. 3850B-BIPHASIC - USER MANUAL
Page 26 of 63
3. USE MODE
3.1. DEFIBRILLATOR USE
Before you begin
Perform all operational checks described in chapter MAINTAINING THE EQUIPMENT every day or every turn.
These operational checks are intended to ensure that the equipment works properly and that necessary supplies and accessories are
present and ready to use.
Turn the selector switch located to the right of the device, indicated with “1” until desired energy value.
WARNING! Discharging a defibrillator directly to a healthy person’s chest can be lethal.
WARNING! This equipment is protected against the effects of defibrillation.
WARNING! Make sure you know where and how to position the paddles for monitoring and defibrillation. See section External paddles
positioning.
WARNING! Neonatal and pediatric defibrillation energy levels should be set based on the specific clinical protocols.
WARNING! In order to decrease the time pre-shock should follow the specific CPR protocols of the place.
When you turn on the defibrillator starts in asynchronous mode.
Prepare the paddles and position them on the patient. See section “EXTERNAL PADDLE POSITION”.
Then press the CHARGE button located below the selector switch and marked with the number “2”.
The defibrillator will start to charge energy; this is indicated with an intermittent sound and a flashing yellow light on the CHARGE key.
When charging is complete the alarm will sound continuously and the yellow led will be lit permanently until shock to the patient or
internally.
“Charge error” This message is displayed when, once started charge command, for some reason
and after a certain time the charged energy does not reach the energy value selected.
CAUTION! For safety reasons, after completion of the energy charge and elapsed the “automatic disarm time”, the defibrillator will
discharged the energy internally automatically. By default, the “automatic disarm time” is 60 seconds. For more information
on how to configure the “automatic disarm time” refer to SETUP MENU section.
To shock the patient will need to press the two buttons simultaneously, located one on each paddle marked with the number “3”. If you
do not press the two buttons at once, the discharge will not be made. You can also shock the patient by pressing “3” on the front panel
of the device.
WARNING! When defibrillating with paddles, use your thumbs to operate the SHOCK buttons in order to avoid inadvertent operator
shock.
WARNING! Be especially careful to keep the paddles pressing firmly on the patient, since a poor contact with the patient’s skin may
cause interference (noise) resulting in a false triggering of the shock the patient and also could produce burns on the patient’s skin at the
shock time.
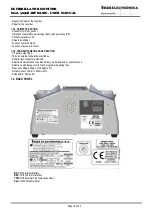
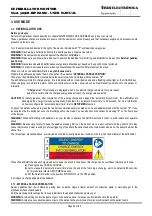
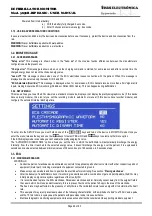
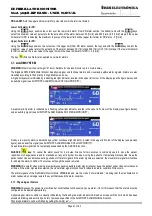
The three steps, mentioned above, are indicated on the label (see figure below) located on the top (front and middle) of the defibrillator.
When the defibrillator has been charged and not to apply the shock to the patient, this charge can be overridden internally as follows:
a)
Pressing the key CANCEL CHARGE.
b)
Let to elapse the “automatic disarm time” since the end of the full charge of energy, which by default is 60 seconds.
For more details refer to SETUP MENU section.
c)
Put the Selector Switch in the position “MONITOR” or in the OFF position.
In all cases no charge appears at the paddles.
3.1.1. EXTERNAL PADDLE PREPARATION
Remove paddles from their holders by pulling them upwards. Apply a liberal amount of conductive paste or electrolyte gel to the
electrode surface of each paddle.
Rub the electrode surfaces together to evenly distribute the applied conductive paste or gel.
WARNING! Avoid spilling conductive paste or gel on the handles since it may cause electrical shock to the operator.
WARNING! Avoid excess conductive paste or gel on the patient’s chest, which can form an electrical path on the patient’s skin.


