


February 2017
www.farmscanag.com
AM-74V1-4
62
Tank Setup
5.
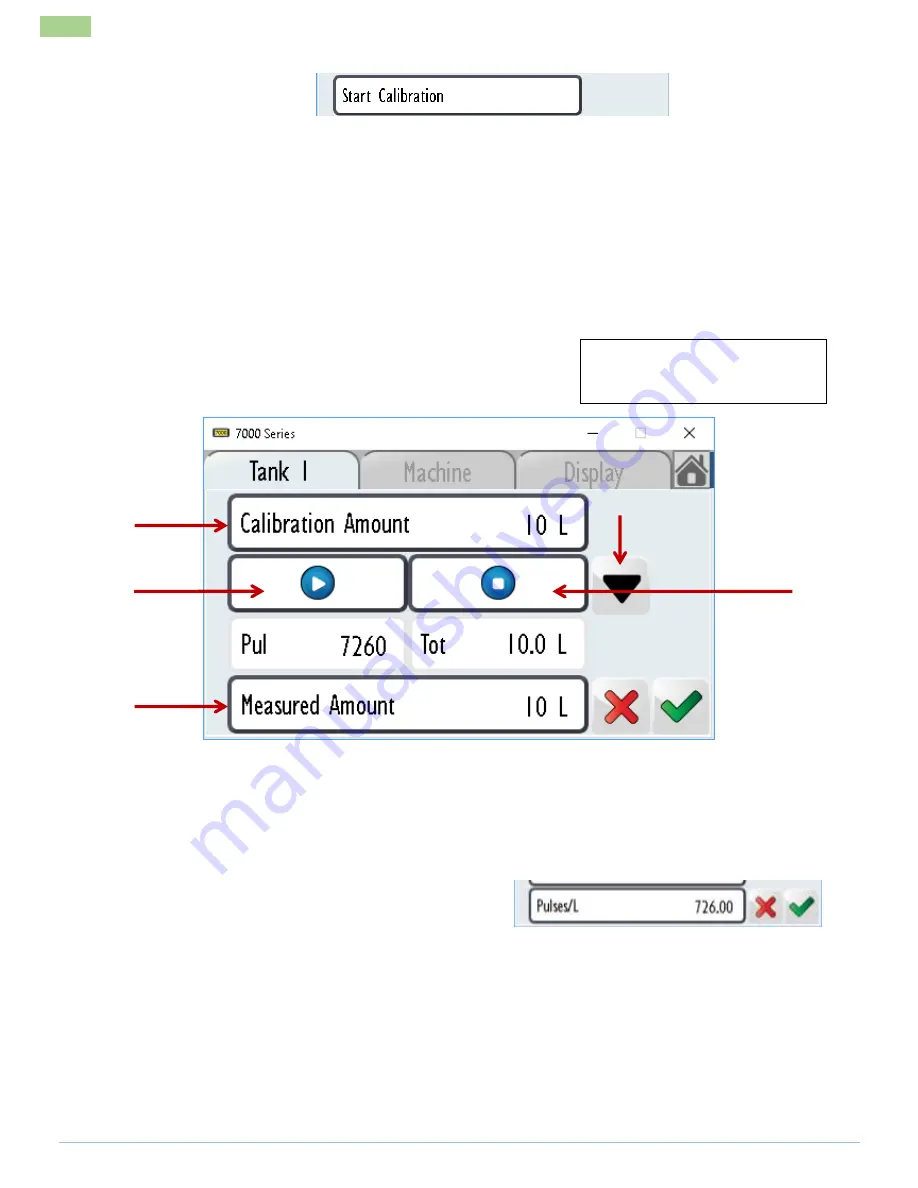
Select Start Calibration.
6.
Select Calibration Amount.
a.
If calibrating by Time, enter the number of seconds to run the calibration for. (e.g. 30)
b.
If calibrating by Volume, enter the catching amount of the container - e.g. 10 if catching into
a 10L container.
7.
Direct a hose from the SECTION 1 valve into the marked/calibration bucket, measuring jug or
similar.
8.
Prime the lines by pressing Play or Turning the MASTER switch & Section 1 on the Smart Switch
WARNING: This will turn on the output of the tank selected
.
9.
Select Stop when product appears in bucket.
10.
Return product in bucket back to tank or discard.
11.
Select the STOP button to restart the counter.
12.
Select the Play or Turning the MASTER switch & Section 1 on the Smart Switch.
13.
Wait as the container fills up with product to the desired measure mark. If it looks like it will
overflow, select the Stop or the MASTER switch OFF before this happens.
14.
Select the Measured Amount button and enter the amount of product discharged.
15.
Press the down arrow to view the new Pulses/L factor
16.
Select the green Tick button to accept the new factor and accept the changes.
NOTES:
If you have previously calibrated this product for this tank, selecting the Pulses/L button will allow
you to manually enter a calibration value. Alternatively, enter the calibration value using the
known PPL Method.
If the calculated FLOW CAL (Pulses/L) differs greatly from the sensor calibration tag attached to the
flow meter, repeat the test. Sometimes it’s best to do this 3 times to obtain a better average.
8/12
9/11/13
6
14
15
PLAY & STOP WILL BE DISBALED ON
SCREEN WHEN SMART SWITCH IS
CONNECTED