background image

Safety Instructions

Safety Instructions • English

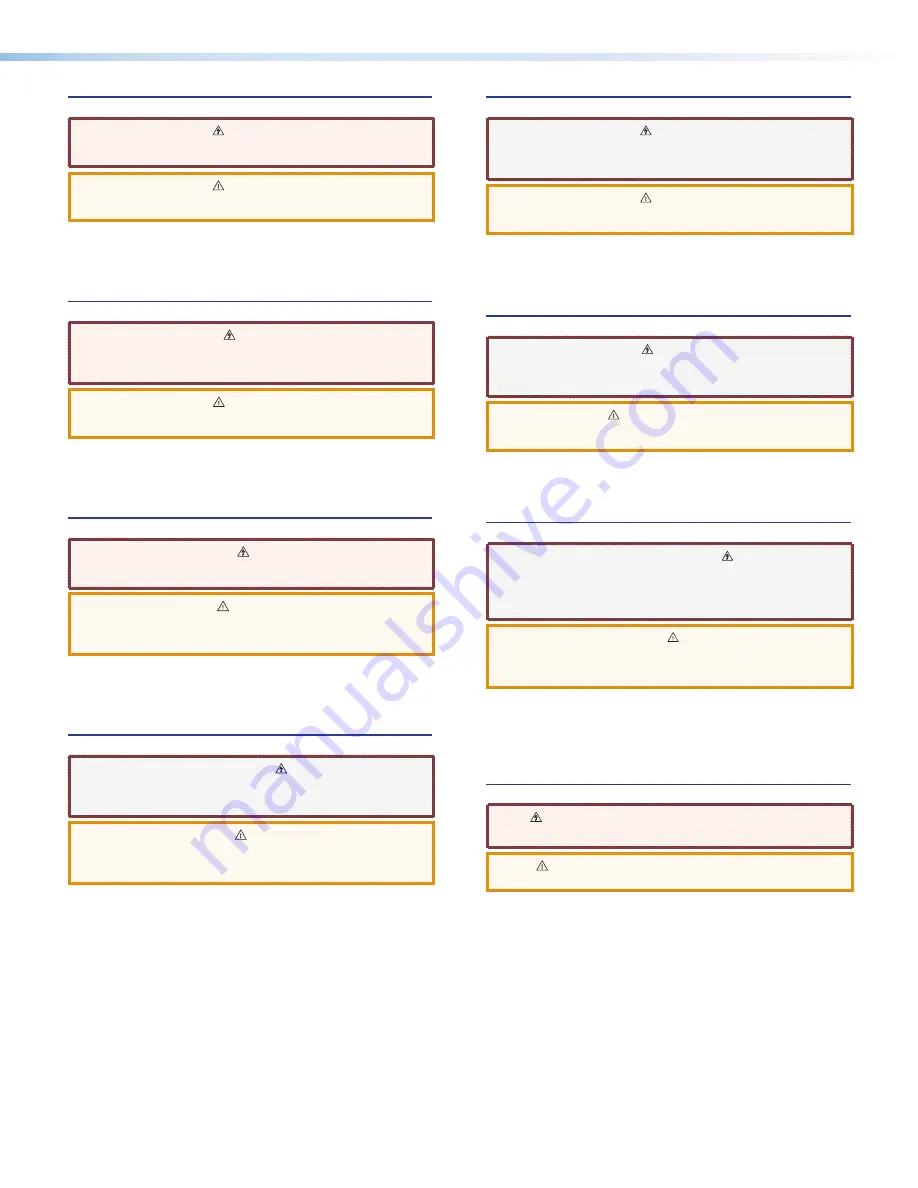
WARNING:


This symbol, 

, when used on the product, is intended to 

alert the user of the presence of uninsulated dangerous voltage within 
the product’s enclosure that may present a risk of electric shock.

ATTENTION:

  This symbol, 

, when used on the product, is intended 

to alert the user of important operating and maintenance (servicing) 
instructions in the literature provided with the equipment.

For information on safety guidelines, regulatory compliances, EMI/EMF 

compatibility, accessibility, and related topics, see the Extron Safety and 

Regulatory Compliance Guide, part number 68-290-01, on the Extron 

website, 

www.extron.com.

Sicherheitsanweisungen • Deutsch

WARNUNG:

  Dieses Symbol 

 auf dem Produkt soll den Benutzer 

darauf aufmerksam machen, dass im Inneren des Gehäuses dieses 
Produktes gefährliche Spannungen herrschen, die nicht isoliert sind und 
die einen elektrischen Schlag verursachen können.

VORSICHT:

  Dieses Symbol 

 auf dem Produkt soll dem Benutzer in 

der im Lieferumfang enthaltenen Dokumentation besonders wichtige 
Hinweise zur Bedienung und Wartung (Instandhaltung) geben.

Weitere Informationen über die Sicherheitsrichtlinien, Produkthandhabung,  

EMI/EMF-Kompatibilität, Zugänglichkeit und verwandte Themen finden Sie in 

den Extron-Richtlinien für Sicherheit und Handhabung  (Artikelnummer  

68-290-01) auf der Extron-Website, 

www.extron.com

.

Instrucciones de seguridad • Español

ADVERTENCIA:

  Este símbolo, 

, cuando se utiliza en el producto, 

avisa al usuario de la presencia de voltaje peligroso sin aislar dentro del 
producto, lo que puede representar un riesgo de descarga eléctrica.

ATENCIÓN:


Este símbolo, 

, cuando se utiliza en el producto, avisa 

al usuario de la presencia de importantes instrucciones de uso y 
mantenimiento recogidas en la documentación proporcionada con el 
equipo.

Para obtener información sobre directrices de seguridad, cumplimiento 

de normativas,  compatibilidad electromagnética, accesibilidad y temas 

relacionados, consulte la  Guía de cumplimiento de normativas y seguridad 

de Extron, referencia 68-290-01, en el sitio Web de Extron, 

www.extron.com

.

Instructions de sécurité • Français

AVERTISSEMENT :


Ce pictogramme, 

, lorsqu’il est utilisé sur le 

produit, signale à l’utilisateur la présence à l’intérieur du boîtier du 
produit d’une tension électrique dangereuse susceptible de provoquer 
un choc électrique.

ATTENTION :

  Ce pictogramme, 

, lorsqu’il est utilisé sur le produit, 

signale à l’utilisateur des instructions d’utilisation ou de maintenance 
importantes qui se trouvent dans la documentation fournie avec le 
matériel.

Pour en savoir plus sur les règles de sécurité, la conformité à la 

réglementation, la compatibilité EMI/EMF, l’accessibilité, et autres sujets 

connexes, lisez les informations de sécurité et de conformité Extron, réf. 

68-290-01, sur le site Extron, 

www.extron.com

.

Istruzioni di sicurezza • Italiano 

AVVERTENZA:


Il simbolo, 

, se usato sul prodotto, serve ad 

avvertire l’utente della presenza di tensione non isolata pericolosa 
all’interno del contenitore del prodotto che può costituire un rischio di 
scosse elettriche.

ATTENTZIONE:


Il simbolo, 

, se usato sul prodotto, serve ad 

avvertire l’utente della presenza di importanti istruzioni di funzionamento 
e manutenzione nella documentazione fornita con l’apparecchio.

Per informazioni su parametri di sicurezza, conformità alle normative, 
compatibilità EMI/EMF, accessibilità e argomenti simili, fare riferimento 
alla Guida alla conformità normativa e di sicurezza di Extron, cod. articolo 
68-290-01, sul sito web di Extron, 

www.extron.com

.

Instrukcje bezpieczeństwa • Polska  

OSTRZEŻENIE

Ten symbol,


,

 gdy używany na produkt, ma na celu 

poinformować użytkownika o obecności izolowanego i niebezpiecznego 

napięcia wewnątrz obudowy produktu, który może stanowić zagrożenie 

porażenia prądem elektrycznym.

UWAGI: 

Ten symbol, 

, gdy używany na produkt, jest przeznaczony do 

ostrzegania użytkownika ważne operacyjne oraz instrukcje konserwacji 

(obsługi) w literaturze, wyposażone w sprzęt.

Informacji na temat wytycznych w sprawie bezpieczeństwa, regulacji 

wzajemnej zgodności, zgodność EMI/EMF, dostępności i Tematy pokrewne, 

zobacz Extron bezpieczeństwa i regulacyjnego zgodności przewodnik, część 

numer 68-290-01, na stronie internetowej Extron, 

www.extron.com

.

Инструкция по технике безопасности 

 Русский

ПРЕДУПРЕЖДЕНИЕ: 

Данный символ, 

, если указан 

на продукте, предупреждает пользователя о наличии 
неизолированного опасного напряжения внутри корпуса 
продукта, которое может привести к поражению электрическим 
током.

ВНИМАНИЕ:   Данный символ, 

, если указан на продукте, 

предупреждает пользователя о наличии важных инструкций 
по эксплуатации и обслуживанию в руководстве, 
прилагаемом к данному оборудованию.

Для получения информации о правилах техники безопасности, 
соблюдении нормативных требований, электромагнитной 
совместимости (ЭМП/ЭДС), возможности доступа и других 
вопросах см. руководство по безопасности и соблюдению 
нормативных требований Extron на сайте Extron: 

,  

www.extron.com

, номер по каталогу - 68-290-01.

安全说明


简体中文


警告

产品上的这个标志意在警告用户该产品机壳内有暴露的危险 电压,

有触电危险。

注 意

产 品 上 的 这个 标 志 意 在 提 示 用 户 设 备 随 附 的 用 户 手 册 中 有 

重要的操作和维护(维修)说明。

关于我们产品的安全指南、遵循的规范、EMI/EMF 的兼容性、无障碍 
使用的特性等相关内容,敬请访问 

Extron 

网站 

www.extron.com

,参见 

Extron

 安全规范指南,产品编号 

68-290-01

Содержание DVS 304 Series

Страница 1: ...User Guide DVS 304 Series Scalers and Scan Converters Video and RGB Scalers 68 1039 01 Rev E 04 17...

Страница 2: ...encia 68 290 01 en el sitio Web de Extron www extron com Instructions de s curit Fran ais AVERTISSEMENT Ce pictogramme lorsqu il est utilis sur le produit signale l utilisateur la pr sence l int rieur...

Страница 3: ...Inline IP Intercom IP Link Key Minder LinkLicense LockIt MediaLink MediaPort NetPA PlenumVault PoleVault PowerCage PURE3 Quantum SoundField SpeedMount SpeedSwitch System INTEGRATOR TeamWork TouchLink...

Страница 4: ...as tested with shielded I O cables on the peripheral devices Shielded cables must be used to ensure compliance with FCC emissions limits For more information on safety guidelines regulatory compliance...

Страница 5: ...uter or device responses used in this guide the character 0 Extron Mono font Regular is used for the number zero and O is the capital letter o Computer responses and directory paths that do not have v...

Страница 6: ...the DVS is Synchronized to the Matrix Switcher 28 Removing the Sync to Matrix Script 28 Minimizing Synchronization Problems Without Using the Sync to Matrix Feature 29 SIS Communication and Control 30...

Страница 7: ...Menu 76 Audio Configuration Menu 76 Memory Preset Menu 76 IP Configuration Menu 77 Advanced Configuration Menu 77 Exit Menu 77 Executive Mode Menu 78 Mounting 79 Tabletop Placement 79 Rack Mounting 7...

Страница 8: ...l and staging applications The DVS 304 series scales from composite video S video component Y R Y B Y video and RGB video to computer video RGBHV RGBS RGsB or HD component The four inputs of all DVS m...

Страница 9: ...o input 1 2 3 or 4 the default is none RGB and video scaling Provides a high performance scaling engine with the capacity to scale standard definition video high definition video and computer video si...

Страница 10: ...frame rate has to be matched to the video frame rate in a process called 3 2 pull down Jaggies and other image artifacts can result if conventional de interlacing techniques are used on film source v...

Страница 11: ...0 495 01 is an infrared remote control that replicates most of the front panel controls of the digital video scaler except the Menu and Next buttons SDI input card Serial digital interface SDI input c...

Страница 12: ...I P U T N O T P U T U 4 Y VID R R Y G Y B B Y RS 232 LAN RESET SDI B Y C RGB R Y Y B Y YC VID 100 240V 3A I N P U T O U T P U T VID 50 60 Hz 1 2 3 R Y H HV V ACT LINK DVI I YC DVS 304 D DVS 304 DVI D...

Страница 13: ...put can be assigned to one of the other unused inputs F Video input 2 Composite S video Component Connect composite video S video and component video signals Connect cables for the appropriate signal...

Страница 14: ...d RBG or component video digital and analog outputs J Reset button and LED Using an Extron Tweeker pointed stylus or ballpoint pen press this recessed button for manual resets The unit has four modes...

Страница 15: ...put 1 Contact closure 2 Tx Transmit data 3 Rx Receive data 4 Input 2 Contact closure 5 Ground Signal ground 6 Input 3 Contact closure 7 Input 4 Contact closure 8 No connection 9 Reserved Figure 7 RS 2...

Страница 16: ...rough YUVi YUVp HDTV S video and composite video NOTE RGB pass through signals at native rate without additional processing are available on analog outputs only The DVI output is disabled for pass thr...

Страница 17: ...menu options and to make adjustment selections Refer to the flowcharts in this chapter and to specific sections for explanations on knob adjustments Menu Overview The Default Cycle appears on the LCD...

Страница 18: ...LECTRONICS 2 sec DVS 304 xxx xx Displays specific model name for example DVS 304 DVI AD Displays specific model part number for example 60 1027 04 Figure 10 Main Menu To return to the default cycle al...

Страница 19: ...Displays only when applicable NEXT DVS 304 DVI models only Displays only on Input 4 NEXT Select video format Composite S video YUVi YUVp HDTV YUV Auto Assign SDI to Input 1 2 3 4 none Select video fo...

Страница 20: ...video format composite S video RGBcvS YUV YUVp HDTV RGB scaled RGB pass through Auto detect NOTE RGB pass through signals at the native rate without additional processing are available on analog outpu...

Страница 21: ...the zoomed image horizontally or vertically Available only when zoom is set over 100 Horizontal sizing Adjust horizontal image sizing Vertical sizing Adjust vertical image sizing Brightness Adjust ima...

Страница 22: ...5 x 1024 X X 1366 x 768 X X X 1400 x1050 X X 1600 x 1200 X X 480p X X 576p X X 720p X X X 1080i X X X 1080p X X X X 1440 x 900 X X 1680 x 1050 X 1280 x 800 X X 1080p Sharp X 1920x1200 X 1080p CVT X DV...

Страница 23: ...The following flowchart provides an overview of the Memory Preset submenus and the options for each setting NEXT IN1 SAVE N A 1 2 3 IN1 CLEAR N A 1 2 3 NEXT NEXT Saving SAVE memory presets Save the cu...

Страница 24: ...g a preset press Menu Recalling a preset Recalling a saved preset requires that the desired input be currently selected and that the input button be pressed successively to activate each saved preset...

Страница 25: ...iguration submenus and the options for each setting Figure 19 Advanced Configuration Menu Auto imaging When auto image is on the unit automatically sizes and centers each new input Blue mode When set...

Страница 26: ...up the color and tint level on a scaler To use this feature set this submenu to On so that only sync and blue video signals will be passed to the display Use either the Adjust horizontal or Adjust ve...

Страница 27: ...ed to calibrate color settings on the display and to confirm proper system wiring Enhance mode When the Enhance mode is set to On automatic gain control of the low resolution input signal is enabled I...

Страница 28: ...tected Off Off Each change in input sync causes default values to be applied to the rate Any manual changes made to the image and picture controls are lost when a new rate is applied Auto Memory 16 pe...

Страница 29: ...ON The parameters of the PIP window are adjustable from the front panel or by SIS commands only Any change in configuration except positioning of the PIP window is saved to that input even after the P...

Страница 30: ...Menu From this submenu press the Menu button to return to the Start Auto Image menu cycle or press the Next button to return to the default cycle START AUTO IMAGE ON IN1 MENU MENU INPUT CONFIG MEMORY...

Страница 31: ...set Use the 0Q SIS command to confirm that the factory default firmware is no longer running look for asterisks following the version number NOTE User defined Web pages may not work correctly if using...

Страница 32: ...s not see the IR 902 Infrared Remote Control User Manual on the Extron website for information When executive mode 1 is active all functions and adjustments can still be made through RS 232 control Fo...

Страница 33: ...ONT COL T NT SIZE CENT ER MENU NEXT ADJU ST IR 1 DVS 304 DIGIT AL VIDEO SCAL ER 2 3 4 BRT C ONT COL T NT SIZE CENT ER MENU NEXT ADJU ST IR Figure 25 DVS 304 Devices Connected to a Matrix Switcher To...

Страница 34: ...e saved with the same number as the input on the matrix switcher For example input 24 on the matrix will be associated with the input preset 24 on the DVS e Repeat steps 2 and 3 for each input on the...

Страница 35: ...ed to minimize the appearance of a glitch in the output while the DVS locks onto the new signal The DVS senses when the matrix switcher changes input ties and the DVS recalls the matching input preset...

Страница 36: ...the Sync to Matrix feature has been previously used first see Removing the Sync to Matrix Script section on the previous page 1 While setting up the switcher and the DVS to work together set the RGB...

Страница 37: ...ector has the following pin assignments Pin RS 232 Function Description 1 Input 1 Contact closure 2 Tx Transmit data 3 Rx Receive data 4 Input 2 Contact closure 5 Gnd Signal ground 6 Input 3 Contact c...

Страница 38: ...rd has been set Password Information The Password prompt requires a password administrator level or user level followed by a carriage return The prompt is repeated if the correct password is not enter...

Страница 39: ...a comma would be represented as 2C Telnet Web Browser Escape Hex 1B W must not be encoded Carriage Return Hex 0D Pipe Character must not be encoded When SIS commands are used through a Web browser th...

Страница 40: ...sable 1 on enable X1 Version number listed to 2 decimal places X1 Name is a text string of up to 24 characters drawn from the alphabet A Z digits 0 9 and the minus sign hyphen The first character must...

Страница 41: ...b bit B byte 8 bits S short 16 bits L long 32 bits NOTE This parameter is case sensitive X3 Event data to write X4 Reading password RS 232 connections responds with password IP connections responds wi...

Страница 42: ...nd YUVp HDTV inputs X7 Pixel phase 1 to 31 X7 Total pixels 512 of the default value for RGB fixed for video X7 Active pixels 512 of the default value for RGB 100 for video X7 Active lines 256 of the d...

Страница 43: ...splay device defaults to 1024x768 60 if display cannot be read 2 custom EDID 3 custom EDID 4 custom EDID For variables 10 78 see the table below SIS variables for EDID resolution refresh rate combinat...

Страница 44: ...cal location of first active line in active window Increment value VstX7 Increment to a higher vertical start position Decrement value VstX7 Decrement to a lower vertical start position View X7 Show v...

Страница 45: ...put aspect ratio to 4 3 View 9 X8 View the input aspect ratio 1 16 9 0 4 3 Video mute Enable mute 1B Vmt1 Blank selected input Disable mute 0B Vmt0 Display selected input View B X View the mute status...

Страница 46: ...alue X8 Y BrtX8 Set brightness level to X8 Increment up Y BrtX8 Increment brightness level Increment down Y BrtX8 Decrement brightness level View Y X8 View current setting Detail filter Set detail lev...

Страница 47: ...ht 1 HpnX8 Left 1 HpnX8 Up 2 VpnX8 Down 2 VpnX8 Output scaler rate Set output rate X9 X9 RteX9 X9 Select output resolution and refresh rate View output rate X9 X9 Show selected output rate Output sync...

Страница 48: ...se sensitive The increment decrement and view commands are not Add a leading 0 when it is a single digit value Set gain X10 G AudX10 Set gain to X10 dB Set attenuation X10 g AudX10 Set attenuation to...

Страница 49: ...w the current blue screen status 0 off 1 on Auto Image Enable 55 1 Img1 Activate Auto Image for all inputs Disable 55 0 Img0 Turn Auto Image off View 55 X8 View Auto Image setting 0 disabled 1 enabled...

Страница 50: ...on Query part number N n 60 1027 01 02 03 04 View the part number View internal temperature 20S X8 View internal temp in degrees Celsius Front panel security lockout Executive Mode Enable 1X Exe1 Allo...

Страница 51: ...nabled default 1 disabled Auto memory Enable 1M Aut1 Disable 0M Aut0 View status M X 0 disabled 1 enabled default Aspect mode Enable Fill mode 99 1 Ful1 Starts Fill mode Enable Follow mode 99 0 Ful0 S...

Страница 52: ...version of the user updatable firmware Query verbose version information 0Q 0Q All responses from 2Q 3Q 4Q Show bootstrap factory installed and updated firmware versions See 2Q 3Q and 4Q below Example...

Страница 53: ...X5 of a specific section of a memory buffer for event number X3 Write event to memory buffer 24 27 EX3 X3 X3 X3 X3 E W X3 2C X3 2C X3 2C X3 2C X3 E Ewr X3 X3 Write event X3 to buffer X3 offset by X3...

Страница 54: ...name consists of up to 24 alphanumeric characters and the minus signs The first character must be a letter the last character cannot be a minus sign hyphen Case does not matter NOTE X1 Name is a text...

Страница 55: ...ylight saving time 24 EX3 CX W X3 CX Ipx X3 X3 is the daylight savings time of day Daylight savings time DST is a 1 hour offset that is observed in the USA and parts of Europe and Brazil Read daylight...

Страница 56: ...assword is case sensitive Special characters spaces or symbols are not allowed Clear administrator password 24 E CA W 20CA Ipa Clear remove all passwords administrator and user NOTE A user password ca...

Страница 57: ...essor connected via Ethernet this mode must be set to On each time you reconnect to the processor Read verbose mode E CV WCV X2 Read security level of connection E CK WCK X5 Re map port designations S...

Страница 58: ...file n 1 space remaining Bytes left Stream files via port 80 Load file to user flash memory Use a POST command on port 80 followed by the delimited data to be written to the flash file memory Retriev...

Страница 59: ...28 E EF W 2FEF Ddl Erase current directory and subdirectories 24 28 E EF W 2F 2FEF Ddl Reset ZAP erase commands Erase flash memory 24 E ZFFF WZFFF Zpf Reset all device settings to factory default 24 E...

Страница 60: ...indows XP The Signal Processing Products Control Program and updates can be downloaded from the Extron Website www extron com NOTE The control program requires approximately 32 MB of hard disk space I...

Страница 61: ...selected TCP IP tab in step 2 the TCP IP Connection window appears a Examine the IP Address field which displays the last IP address entered or the drop down box which lists the most recently used IP...

Страница 62: ...tion Restore Configuration File Manager and Exit Connect Select this to reconnect the DVS or connect a new device when it has been disconnected from the Signal Processing Products Control Program Foll...

Страница 63: ...display any operation errors on the status bar at the bottom of the window Tools menu Click on this to open a drop down box displaying nine selectable options Data View Trace Window Sync Scaler to Ma...

Страница 64: ...the DVS Click Refresh Status to update the status of the matrix switcher Refreshing the status returns updated information about which scaler input is tied to a particular matrix output If the sync t...

Страница 65: ...n the device to their factory defaults including all video and audio settings and clears all configuration files from the device Select any reset option as desired Update Firmware Selecting this opens...

Страница 66: ...ed Devices A dialog box opens to enable a search for the device specific firmware file with the file extension S19 that has been downloaded to the connected PC Figure 32 Firmware Loader Window 3 In th...

Страница 67: ...tents section at the left side of the window Figure 35 The Main Window of the Control Program Help File Extron Home Page Select this to open the Extron Website www extron com home page From this link...

Страница 68: ...ut and PIP Input The current active input signal video audio or both is shown yellow Select a desired input signal and then an input button to change to that input Click on a PIP input to swap it with...

Страница 69: ...Select this to mute or unmute the audio When selected the button text turns red Freeze Select this to freeze an image for use as a logo or for annotation Auto Image Select this to perform an auto imag...

Страница 70: ...to aid setting up an output display device A small thumbnail of the pattern is shown on the tab Select Off where a test pattern is not needed RGB Delay Adjust this slider to set RGB delay from 0 to 5...

Страница 71: ...ddress of the unit in the Address field of the browser NOTE If the local system administrators have not changed the value the factory specified default 192 168 254 254 is the correct value for this fi...

Страница 72: ...so known as the System Status page Navigating the Default Web Pages The DVS 304 default Web pages include four tabs Status Configuration File Management and Control for easy navigation of several admi...

Страница 73: ...of the settings on this page click Submit Explanations for some of these fields follow Unit Name This name field can be changed to any valid name up to 12 alphanumeric characters NOTE The following ch...

Страница 74: ...ard or click in another field to exit the IP Address field 4 Click on the Submit button to make the address change take effect Gateway IP Address The Gateway IP Address field identifies the address of...

Страница 75: ...e location of the DVS NOTE The Zone field identifies the standard time zone selected and displays the amount of time in hours and minutes that the local time varies from the GMT international time ref...

Страница 76: ...protected connections allow two levels of protection administrator and user Administrators have full access to all DVS 304 switching capabilities and editing functions Figure 42 Passwords Page Please...

Страница 77: ...e file for download 3 Note the folder to which you save the firmware file 4 Connect the PC to the DVS 304 scaler via the Ethernet porton the scaler 5 Access the DVS 304 scaler using the on board Web s...

Страница 78: ...Upload File button to upload the file 4 The file will be added to the list of files under the Files column After ten files have been loaded additional file management pages will appear in the page nav...

Страница 79: ...re 45 User Control Page The aspects of each input 1 4 can be controlled independently Click on the appropriate input number to immediately change its on screen attributes Video audio breakaway Audio m...

Страница 80: ...Configuration tab click the Scaler Setting link at the left side 2 Select the desired input format for input 4 3 Click the User Control link on the left side of the page The User Control page appears...

Страница 81: ...fault Cycle 2 sec Main Menu START AUTO IMAGE ON IN1 MENU MENU INPUT CONFIG MENU PICTURE CONTROL MENU OUTPUT CONFIG MENU AUDIO CONFIG MENU NEXT MENU MEMORY PRESETS Power on EXTRON DVS 304 2 sec INPUT 1...

Страница 82: ...ces SDI De interlacing options Field Standard Field Flip VGA EDID 1024x768 60 EDID Emulation Specify the resolution and refresh rate NOTE Input 1 can only accept composite video Input 3 can only accep...

Страница 83: ...level Adjust the input gain attenuation from 15dB to 9dB of the selected input MENU audio models only AUDIO CONFIG OUTPUT CONFIG Memory Preset Menu NEXT IN1 SAVE N A 1 2 3 IN1 CLEAR N A 1 2 3 NEXT NEX...

Страница 84: ...CONFIG MENU NEXT AUTO IMAGE OFF ON AUTO SWITCH OFF ON NEXT NEXT NEXT RGB DELAY 0 0 sec NEXT OSD LABEL 2 sec BLUE MODE OFF ON Test patterns Off Crop Alternating pixels Color bars NEXT TEST PATTERN OFF...

Страница 85: ...xecutive Mode 10 sec timeout EXE MODE DISABLED Disable Executive Mode 2 sec INPUT 1 COMPOSITE OUTPUT 1024 x 768 60 Default Cycle 2 sec Menu Press for 2 seconds Next 10 sec timeout 2 sec INPUT 1 COMPOS...

Страница 86: ...may be greater than room ambient temperature Therefore install the device in an environment compatible with the maximum ambient temperature Tma 122 F 50 C specified by Extron 2 Reduced air flow Insta...

Страница 87: ...desk mounting use an optional MBU 149 mounting kit see figure 48 left or a UTM 100 mounting kit see figure 48 right 8 Screw 4 Places Each Side MBU 149 Mounting Bracket Mounting Screws 2 Places Each Si...

Страница 88: ...pe Hanzeboulevard 10 3825 PH Amersfoort The Netherlands China Extron China 686 Ronghua Road Songjiang District Shanghai 201611 China Asia Extron Asia Pte Ltd 135 Joo Seng Road 04 01 PM Industrial Bldg...

Отзывы: