54
Addressable Fire Panel MAGPRO96
- Installation and Programming Manual
4.8.2 Zone disabling
The user/installer could first look at the current status of the loop devices by choosing “
View
” button situated next to the
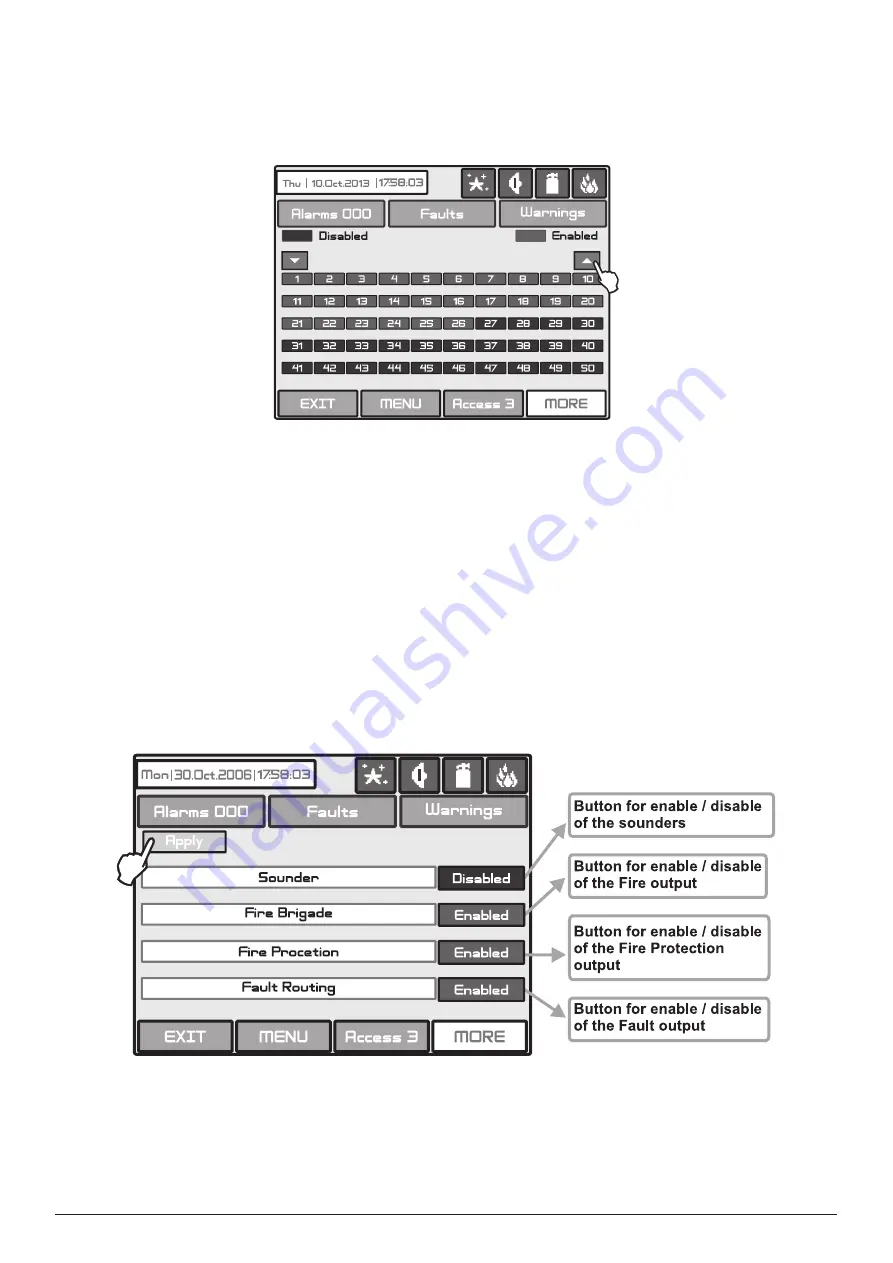
“Zones” button - see Fig. Screen 35. The current status of the zones in the system are displayed on the screen (see part
Programming, item 3.3 Zones) - Fig. Screen 37. In the case of a disabled zone, the panel generates a “
Zone Disabled
”
error message and the “
Disable
” and “
General Fault
” LEDs on the control panel are activated.
Fig. Screen 37.
From the screen for the current status of the zones the user/installer can introduce new settings as choose the button
with the number of zone 1,2,3…96. With the buttons ▼▲ is possible to be viewed all zones in the configuration of the
system. By choosing a button with a zone number the user/installer moves to menu for setting of the parameters of the
respective zone - see Fig. Screen 13, part
Programming
.
Note: From the disabling menu you can directly enter in the loop devices configuration menu (Fig. Screen 8) /
zone configuration menu (Fig. Screen 13) as choose “Loop Devices” / “Zones” button (Fig. Screen 35).
4.8.3 Outputs disabling
From the menu for disabling introduction - Fig. Screen 35, the user/installer can disable or enable the monitored outputs
of the MAGPRO96 fire panel -
Sounder
,
Fire Brigade
,
Fire Protection
and
Fire Routing
- Fig. Screen 38. Use the
APPLY
button to confirm your choice.
In the case of disabled output, the panel generates an error for the respective output and the “
Disable
” and “
General
Fault
” LEDs are activated. The output is not activated by the activating event.
Fig. Screen 38.
4.9 Software version
By choosing “
Software Rev”
button from the general
Maintenance Menu
, in a separate screen you can see the last
version of the used software.


