Note:
Leave these options turned on when you print on Epson Iron-on Cool Peel Transfer paper, if
available for your product.
Parent topic:
Solving Page Layout and Content Problems
Related tasks
Selecting Additional Layout and Print Options - Windows
Selecting Basic Print Settings - Mac OS X 10.5/10.6/10.7
Selecting Basic Print Settings - Mac OS X 10.4
Too Many Copies Print
Make sure that the
Copies
setting in your printing program or printer software is not set for multiple
copies.
Parent topic:
Solving Page Layout and Content Problems
Related tasks
Selecting Basic Print Settings - Windows
Selecting Basic Print Settings - Mac OS X 10.5/10.6/10.7
Selecting Basic Print Settings - Mac OS X 10.4
Blank Pages Print
If blank pages print unexpectedly, try these solutions:
• Make sure you selected the correct paper size settings in your printing program and printer software.
• If a blank page exists in a document you are printing and you want to skip printing it, select the
Skip
Blank Page
setting in your printer software.
• Run a print head nozzle check to see if any of the nozzles are clogged. Then clean the print head, if
necessary.
• Make sure your product is selected as the printer in your printing program.
Parent topic:
Solving Page Layout and Content Problems
Related concepts
Print Head Nozzle Check
Print Head Cleaning
Related tasks
Selecting Basic Print Settings - Windows
296
Содержание WorkForce 545
Страница 1: ...WorkForce 545 645 Series User s Guide ...
Страница 2: ......
Страница 13: ...WorkForce 545 645 Series User s Guide Welcome to the WorkForce 545 645 Series User s Guide 13 ...
Страница 29: ...4 Slide the edge guide shown below to your paper size 29 ...
Страница 34: ...2 Pull out the paper cassette 3 Slide the edge guides outward 34 ...
Страница 39: ...2 Pull out the paper cassette 3 Slide the edge guides outward 39 ...
Страница 52: ...Parent topic Placing Originals on the Product Related topics Copying Scanning 52 ...
Страница 112: ... Normal preview Click the Auto Locate icon to create a marquee dotted line on the preview image 112 ...
Страница 116: ...3 Adjust the scan area as necessary 116 ...
Страница 123: ...123 ...
Страница 131: ...3 Adjust the scan area as necessary 131 ...
Страница 164: ...You see this window 5 Select Fax Settings for Printer You see this window 164 ...
Страница 175: ...5 Select Fax Settings for Printer You see this window 175 ...
Страница 176: ...6 Select your product if necessary 7 Select Speed Dial Group Dial List You see this window 176 ...
Страница 193: ...2 Insert your memory card into the correct slot making sure the card is oriented correctly 193 ...
Страница 249: ...249 ...
Страница 254: ...254 ...
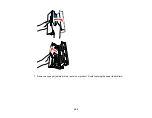
Страница 281: ...5 Remove any jammed paper from the rear cover 6 Open the rear cover and remove any additional jammed paper 281 ...
Страница 282: ...7 Remove any paper jammed in the rear of your product Avoid touching the paper feed rollers 282 ...
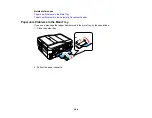
Страница 285: ...3 Remove any jammed paper inside the cassette 4 Remove any paper jammed inside the paper cassette slot 285 ...
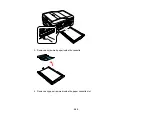
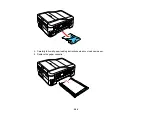
Страница 286: ...5 Carefully follow all paper loading instructions when you load new paper 6 Replace the paper cassette 286 ...
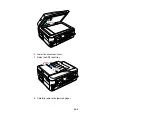
Страница 290: ...6 Lower the document cover 7 Raise the ADF input tray 8 Carefully remove the jammed paper 290 ...

