


Noise After Ink Installation
If you hear noises from your product after installing ink, try these solutions:
• The first time you install ink cartridges, the product must prime its print head. Wait until priming
finishes before you turn off the product, or it may prime improperly and use excess ink the next time
you turn it on. Your product is finished priming the print head when the On light stops flashing.
• If the product's print head stops moving or making noise, and the charging process has not finished
after 5 minutes, turn off your product. Turn it back on and check to see if charging is still in progress. If
it is still in progress, contact Epson for help.
Parent topic:
Related topics
Software Installation Problems
If you have problems while installing your product software, try these solutions:
• Make sure your product is turned on and the USB cable or network cable is securely connected at
both ends. If you still have problems installing software, disconnect the cable and carefully follow the
instructions on the
Start Here
sheet. Also make sure your system meets the requirements for your
operating system.
• Close any other programs, including screen savers and virus protection software, and install your
product software again.
• In Windows, make sure your product is selected as the default printer and the correct port is shown in
the printer properties.
• If you see any error message or your software does not install correctly in Windows, you may not have
software installation privileges. Contact your System Administrator.
Parent topic:
Related concepts
When to Uninstall Your Product Software
Related references
Windows System Requirements
Mac System Requirements
273
Содержание WorkForce 545
Страница 1: ...WorkForce 545 645 Series User s Guide ...
Страница 2: ......
Страница 13: ...WorkForce 545 645 Series User s Guide Welcome to the WorkForce 545 645 Series User s Guide 13 ...
Страница 29: ...4 Slide the edge guide shown below to your paper size 29 ...
Страница 34: ...2 Pull out the paper cassette 3 Slide the edge guides outward 34 ...
Страница 39: ...2 Pull out the paper cassette 3 Slide the edge guides outward 39 ...
Страница 52: ...Parent topic Placing Originals on the Product Related topics Copying Scanning 52 ...
Страница 112: ... Normal preview Click the Auto Locate icon to create a marquee dotted line on the preview image 112 ...
Страница 116: ...3 Adjust the scan area as necessary 116 ...
Страница 123: ...123 ...
Страница 131: ...3 Adjust the scan area as necessary 131 ...
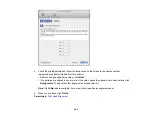
Страница 164: ...You see this window 5 Select Fax Settings for Printer You see this window 164 ...
Страница 175: ...5 Select Fax Settings for Printer You see this window 175 ...
Страница 176: ...6 Select your product if necessary 7 Select Speed Dial Group Dial List You see this window 176 ...
Страница 193: ...2 Insert your memory card into the correct slot making sure the card is oriented correctly 193 ...
Страница 249: ...249 ...
Страница 254: ...254 ...
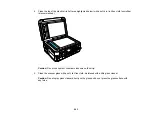
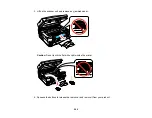
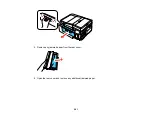
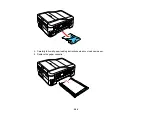
Страница 281: ...5 Remove any jammed paper from the rear cover 6 Open the rear cover and remove any additional jammed paper 281 ...
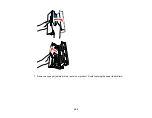
Страница 282: ...7 Remove any paper jammed in the rear of your product Avoid touching the paper feed rollers 282 ...
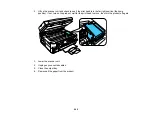
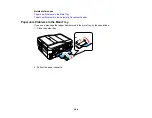
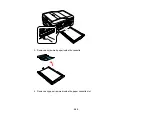
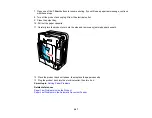
Страница 285: ...3 Remove any jammed paper inside the cassette 4 Remove any paper jammed inside the paper cassette slot 285 ...
Страница 286: ...5 Carefully follow all paper loading instructions when you load new paper 6 Replace the paper cassette 286 ...
Страница 290: ...6 Lower the document cover 7 Raise the ADF input tray 8 Carefully remove the jammed paper 290 ...