52
10. Click
OK
. You return to the Page Setup dialog box.
11. Click
OK
again. You return to the Print dialog box.
12. Click
OK
. Your banner prints with 0.12-inch (3 mm) margins on each side.
Follow the steps on page 56 to remove and store your banner.
The spaces between pages or print jobs on roll paper may vary,
depending on the application you’re using and the way you create
your document.
If you select Save Roll Paper when printing 4
×
6-inch images, you
may create a space between each print job.
Macintosh Instructions
1. Start Photoshop. To do this, open the
Adobe Photoshop 5.0 LE
folder and
double-click the
Adobe Photoshop 5.0 LE
icon. You see the Photoshop main
screen.
2. Open your panoramic picture or banner document, or create a new one with
Photoshop. (See Photoshop Help for instructions.)
3. Size your panoramic or banner as necessary. If you want white borders on the top
and bottom of your image, make your Canvas Size larger than your Image Size.
(See Photoshop Help for instructions.)
4. Select
Page Setup
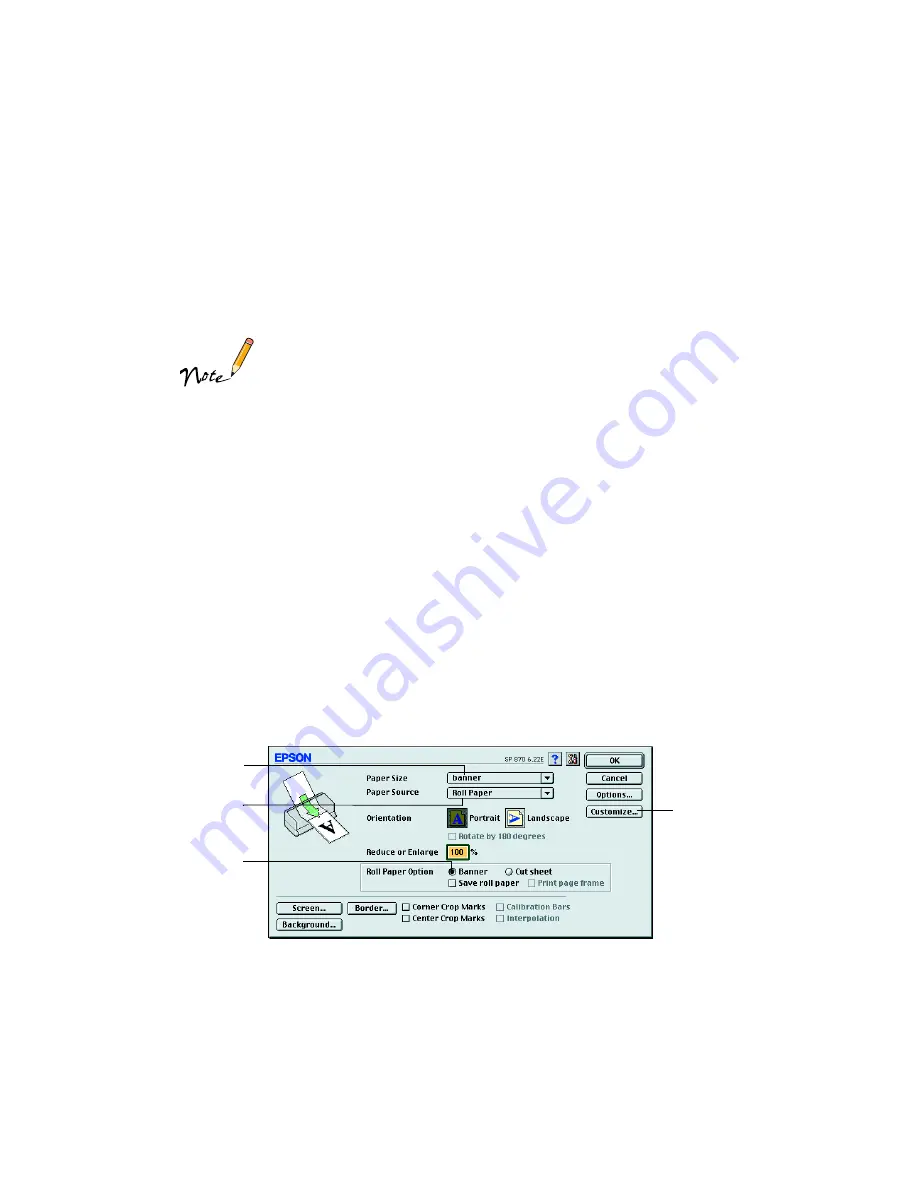
from the File menu. You see your Page Setup dialog box:
Select
Roll Paper
Select your
custom size
Select
Banner
Click
Customize to
create a
custom size
for your
document


