38
2. Import a picture file or select the roll of film containing the picture(s) you want to
print. (See Film Factory Help if you need assistance.)
3. Click the picture(s) you want to print; the background is highlighted.
4. If you want to retouch your photos before you print, click the
Standard Prints
button on the left. You see the Standard Prints screen. Select the retouching
option you want to use. (See Film Factory Help for assistance.)
If you don’t need to retouch your photos before printing, click the
Duplicate
Prints
button on the left. You see the Duplicate Prints screen. Click the number
of copies on each photo you selected, then click the
+
or
-
button to select the
number of copies you want to print.
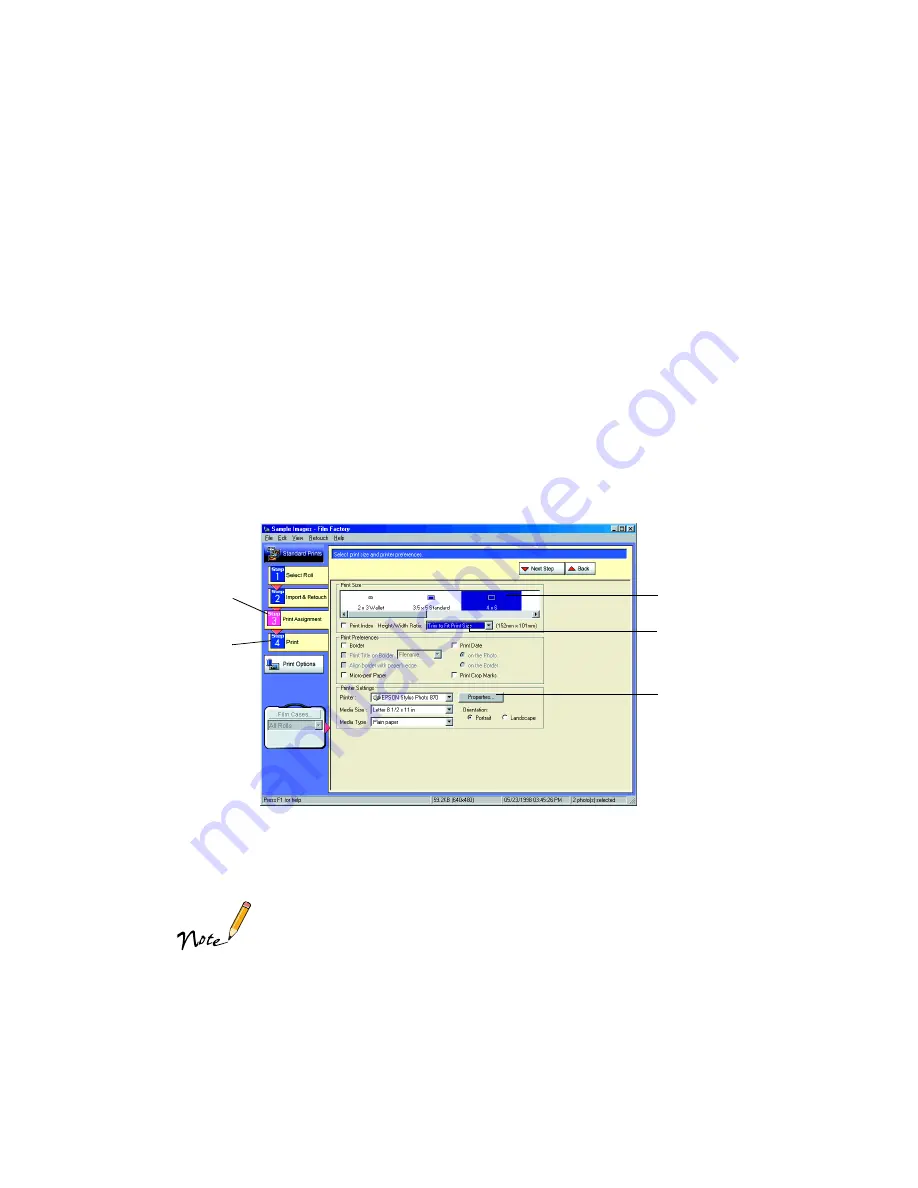
5. When you’re ready to print, click the
Print Assignment
button. You see various
printing options:
6. Click the
4
×
6
icon as the Print Size option.
7. Select
Trim to Fit Print Size
from the Height/Width Ratio pull-down menu.
Similar to traditional photo finishing, Film Factory may not print your
entire image within the 4
×
6-inch print area. This is because your
image’s width/height (or aspect) ratio may not match the ratio for a
true 4
×
6-inch print. Film Factory will trim larger images or enlarge
and trim smaller images to fit the 4
×
6-inch print area.
8. Click the
Properties
button. You see your printer settings dialog box.
Print
Assignment
button
Print button
Click 4
×
6
Select Trim to Fit
Print Size from
the pull-down
menu
Click Properties


