Backward : The roll is taken up with the printable
side in.
Forward
: The roll is taken up with the printable
side out.
Off
: The auto take-up reel unit does not
take up paper.
C
Manual switch
Selects the manual take-up direction.
The selected option takes effect when the Auto
switch is in the Off position.
Backward : The roll is taken up with the printable
side in.
The speed will increase after the button
is pressed for more than three seconds.
Forward
: The roll is taken up with the printable
side out.
The speed will increase after the button
is pressed for more than three seconds.
Attaching the Paper
This section describes how to attach roll paper to the
auto take-up reel unit roll core.
The procedure varies with the take-up direction.
c
Important:
Before proceeding, select
Off
for
Auto Cut
. Using the
auto take-up reel unit when
On
is selected will cause
errors.
U
“Cutting the roll paper” on page 31
Taking Up the Paper Printable Side
Out
For information on installing the roll core, see the
Setup
Guide
for the optional auto take-up reel unit.
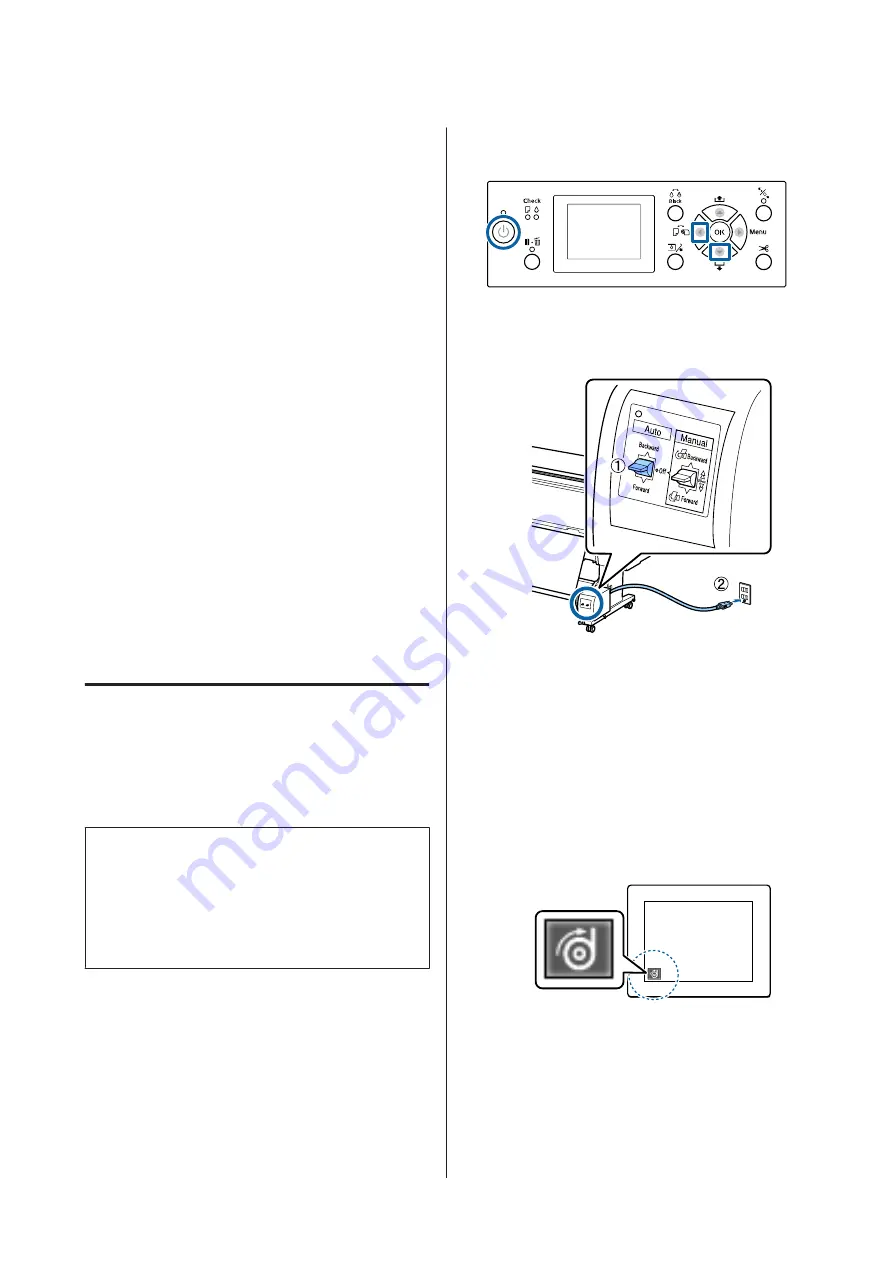
Buttons that are used in the following settings
A
Set the auto take-up reel unit Auto switch to Off.
Plug the power cord into an outlet and confirm
that the power lamp lights.
B
Press the
P
button to turn on the printer.
C
Check that the roll paper is correctly loaded in the
printer.
D
Check that the auto take-up reel unit icon is
displayed on the printer's screen.
If the icon is not displayed, check that the auto
take-up reel unit is connected correctly and is
turned on.
E
Press the
l
button on the printer, and then select
Roll Paper
from the Paper Source menu.
F
Keep the
d
button on the printer pressed until
the end of the roll reaches the roll core.
SC-P9000 Series/SC-P7000 Series/SC-P8000 Series/SC-P6000 Series User's Guide
Basic Operations
44
Содержание SC-P6000 Series
Страница 1: ...User s Guide CMP0044 01 EN ...


