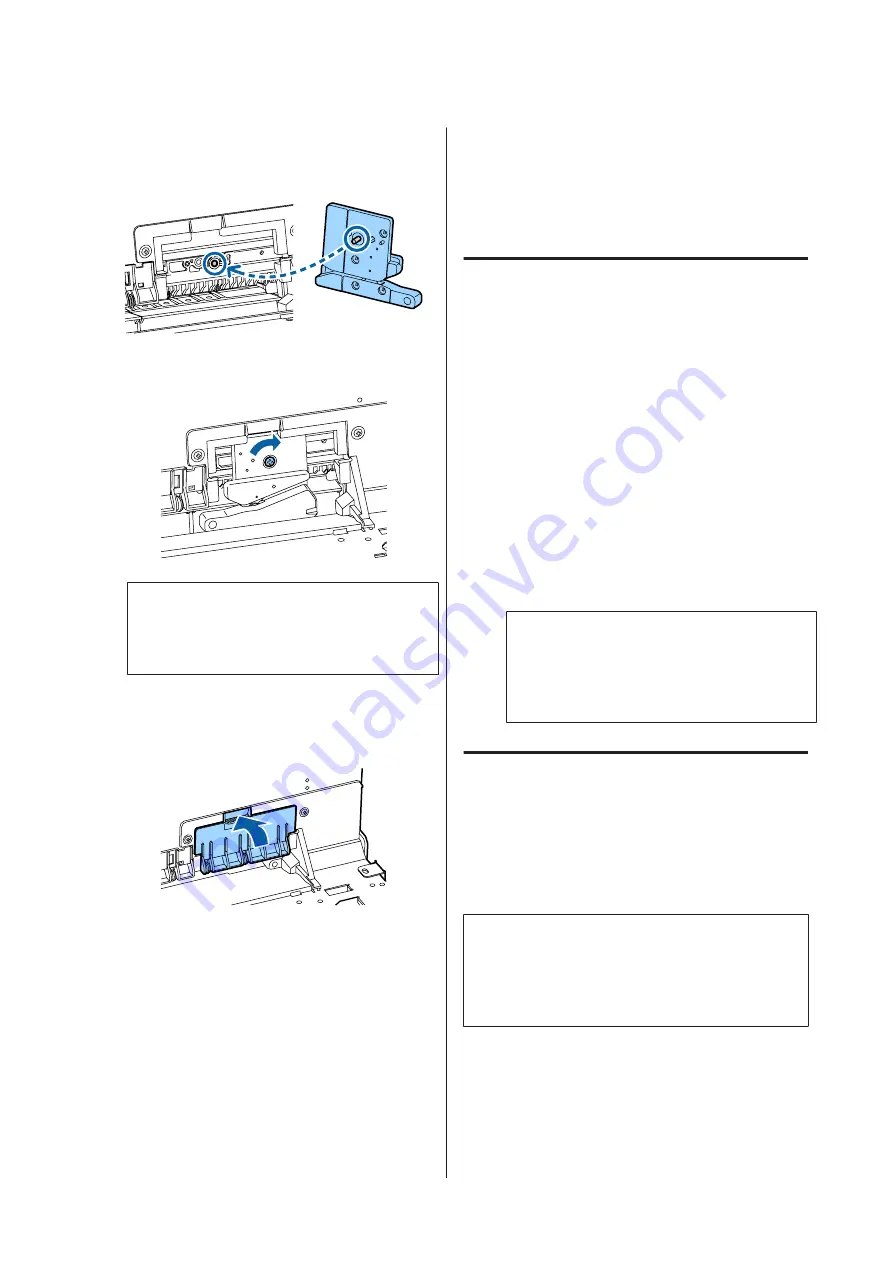
J
Install the new cutter.
Insert a screw into the cutter side of the hole on
the printer.
K
Tighten the screw with a cross-head screwdriver
to secure the cutter.
c
Important:
Screw the cutter firmly, otherwise the cut
position may be slightly shifted or skewed.
L
Insert the base of the cutter replacement cover in
the correct place, and push in the top part.
Push until you hear it click into place.
M
After replacing the cutter, press the
Z
button.
The cutter will return to its original position.
Cutter replacement is complete when the screen
on the control panel returns to the screen
displayed before you started replacement.
Cleaning the Printer
To keep your printer in optimum operating condition,
clean it regularly (about once a month).
Cleaning the outside
A
Remove any paper from the printer.
B
Make sure the printer is turned off and the screen
has turned off, and then unplug the power cable
from the outlet.
C
Use a soft, clean cloth to carefully remove any
dust or dirt.
If the printer is particularly dirty, dampen the
cloth with water containing a small amount of
neutral detergent, and then firmly wring the
cloth dry before using it to wipe the printer's
surface. Next, use a dry cloth to wipe away any
remaining moisture.
c
Important:
Never use benzene, thinners, or alcohol to
clean the printer. They could cause
discoloration and deformities.
Cleaning the inside
Clean the pressure rollers if prints are smudged or
soiled.
Ink and particles of paper adhering to the platen should
be removed, as they may otherwise soil the paper.
c
Important:
Failure to remove dust and particles of paper from
the platen could result in clogged nozzles or damage
to the print head.
Cleaning the roller
Follow the steps below to clean the roller by feeding
plain paper.
SC-P9000 Series/SC-P7000 Series/SC-P8000 Series/SC-P6000 Series User's Guide
Maintenance
137
Содержание SC-P6000 Series
Страница 1: ...User s Guide CMP0044 01 EN ...


