Then go to step 13.
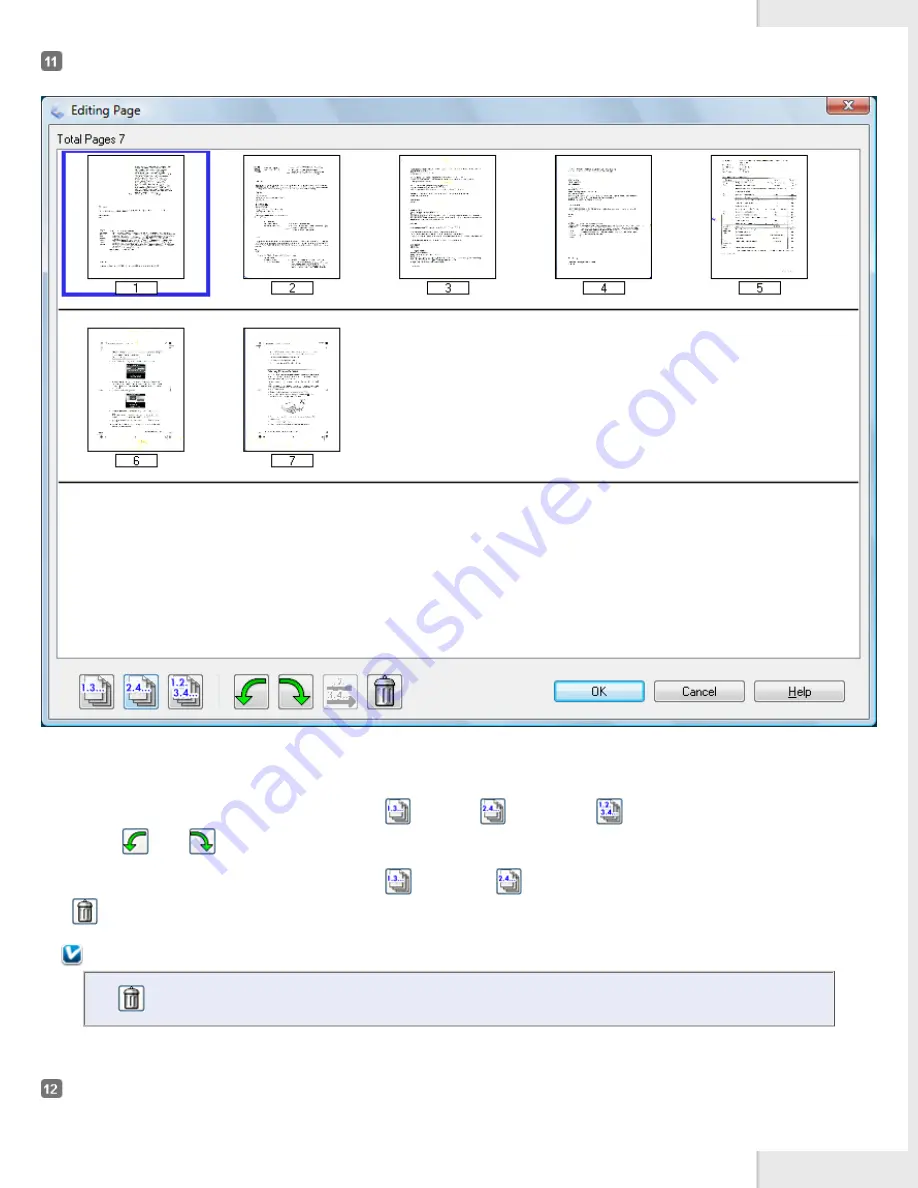
You see the Editing Page window displaying thumbnail images of each scanned page.
Use the tools at the bottom of the Editing Page window to select, rotate, reorder, and delete pages.
If you want to include all the document pages in your PDF files as they currently look, click
OK
.
If you want to rotate pages, click the pages, or use the
odd pages,
even pages, or
all pages icon to select the pages, then
click the
left or
right rotate icon to rotate them.
If you want to delete pages, click the pages, or use the
odd pages, or
even pages icon to select the pages, then click the
delete icon to delete them.
Note:
The
delete icon is not available when all pages are selected.
For further details on the tools in the Editing Page window, see Epson Scan Help.
When you have finished editing your pages, click
OK
. The pages are saved in one PDF file in Pictures, My Pictures, or the location you selected
in the File Save Settings window, and you return to the Epson Scan window.
Содержание Pro GT-S80
Страница 20: ...a Power switch b DC inlet c USB interface connector d security slot User Replacable Parts a paper feed roller ...
Страница 21: ...b separation pad Top ...
Страница 32: ...Caution Do not load business cards or plastic cards in landscape orientation ...
Страница 45: ...Click OK ...
Страница 60: ...Click Close to exit Epson Scan Top ...
Страница 86: ...Press the hook on the separation pad then remove the installed separation pad ...
Страница 88: ...Slide and remove the installed paper feed roller Caution ...
Страница 90: ...Click OK ...
Страница 96: ...Remove the jammed paper Note ...


