50
Parent topic:
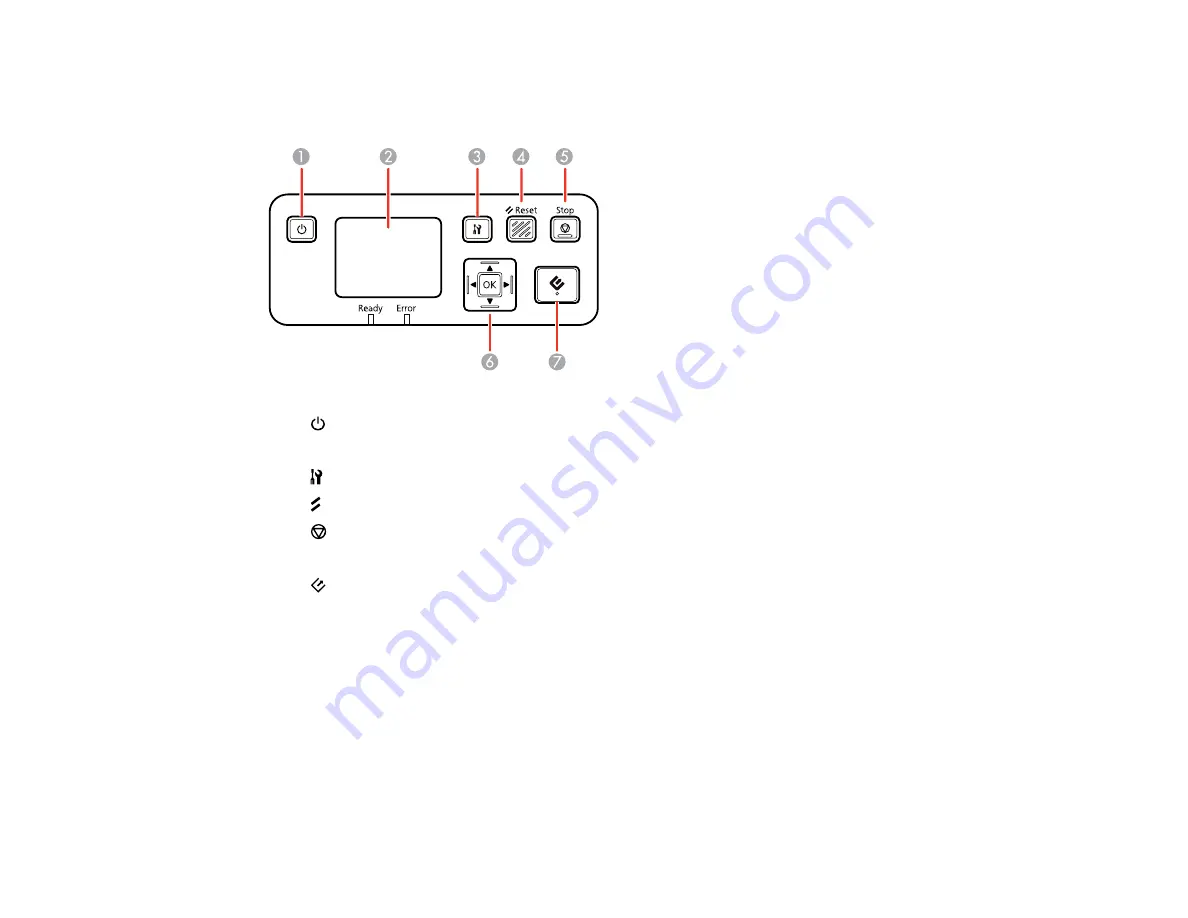
Network Interface Unit Control Panel
1
power button (turns the unit on and off)
2
LCD screen (displays status, operations, and error messages)
3
settings button (selects product settings, network settings, and maintenance options)
4
Reset
button (returns the LCD to the default screen)
5
Stop
button (cancels scanning)
6
OK
button and arrows (use the arrows to highlight an option and the
OK
button to select it)
7
start button (starts scanning when networking is enabled)
Parent topic:
Using the Network Interface Unit
Connecting the Network Interface Unit
See the documentation that came with the optional Epson Network Interface Unit for instructions on
connecting it to your scanner.
After connecting the Epson Network Interface Unit, you need to set up your scanner for network
scanning. See the link below.
Parent topic:
Содержание ES-400
Страница 1: ...ES 400 ES 500W ES 500WR User s Guide ...
Страница 2: ......
Страница 10: ...10 3 Power inlet 1 Cover open lever 2 Scanner cover 3 Pickup rollers 4 Separation rollers 1 AC adapter ...
Страница 21: ...21 ...
Страница 32: ...32 Note Do not load plastic cards vertically ...
Страница 38: ...38 6 Load the carrier sheet in the input tray as shown until it meets resistance Folded original ...
Страница 59: ...59 You see an Epson Scan 2 window like this ...
Страница 61: ...61 You see an Epson Scan 2 window like this ...
Страница 72: ...72 You see this window ...
Страница 85: ...85 You see an Epson Scan 2 window like this ...
Страница 108: ...108 2 Open the flatbed scanner cover ...
Страница 125: ...125 5 Press down on the pickup roller cover latch and pull up the cover to remove it ...
Страница 160: ...160 Parent topic Technical Specifications ...


