Installing the Control Pad
74
Warning
If any of the following problems occur, immediately turn off the power and unplug the AC
adapter and the power plug from the outlet. Next, contact your local dealer or the nearest
Epson service call center.
You notice smoke, strange odors, or strange sounds
Water or foreign material gets inside the control pad
The control pad was dropped or the case was damaged
Do not spill tea, coffee, juice or any other drinks on the AC adapter, or expose it to pesticides.
Failure to do so may cause a malfunction, a fire, or electric shock. If drinks or so on are spilled on
the AC adapter, turn off the power, unplug the AC adapter from the power outlet, and contact your
local dealer. Continuing to use it in this condition could cause a fire or an electric shock.
Do not install the AC adapter in a confined location or cover it with a cloth and so on except
for the AC adapter holder supplied.
Otherwise, the AC adapter may become hot and cause burns or unexpected accidents.
Do not wrap the power cable around the AC adapter.
Failure to do so may cause it to disconnect or overheat.
Do not disassemble or remodel the control pad.
Before cleaning, make sure you unplug the AC adapter and the power plug from the power
outlet and check that all of the wiring has been disconnected.
If it is not cleaned for a long time, dust may accumulate and cause a fire or electric shock.
Make sure you clean it regularly.
Caution
Do not disassemble the Control Pad when disposing of it.
Dispose according to your local or national laws and regulations.
In North America, interface cables that pass through walls require a flame resistant rating of CL2. Use interface
cables that comply with NFPA70 regulations. Use at least two screws to attach to wood.
This product is also designed for IT power distribution system with phase-to-phase voltage 230V.
Содержание ELPHD02
Страница 1: ...Installation Guide ...
Страница 18: ...Introduction 17 Max 5m Max 5m ...
Страница 29: ...Installing the Wall mount 28 Horizontal slide 45 45 Forward backward slide 0 383 ...
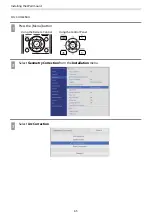
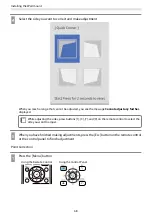
Страница 68: ...Installing the Wall mount 67 b Select Geometry Correction from the Installation menu c Select Quick Corner ...
Страница 77: ...Installing the Control Pad 76 For Canadian Users ...
Страница 79: ...Installing the Control Pad 78 ...
Страница 96: ...Installing the Touch Unit 95 Wavelength 932 to 952 nm ...
Страница 99: ...Installing the Touch Unit 98 Adjustment range 79 5 140 5 15 76 ...
Страница 138: ...Setting the Projector 137 c Select EDID from the Signal I O menu d Select 3240x1080 60Hz ...

