Installing the Wall mount
23
Caution
When installing two or more projectors in parallel, leave a gap of at least 1,200 mm between
the projectors.
1200mm
If you cannot secure a gap of approx. 1,200 mm, install a partition to block the heat vented from
the projector's air exhaust vent.
The partitions should be larger than the exhaust vent (approx. 20 mm in all directions), and installed
approximately 400 mm from the exhaust vent and 200 mm from the intake vents.
400mm
200mm
Install the projector so that it is tilted at an angle of no more than +3 degrees or -3 degrees
vertically and horizontally in relation to the screen.
When using interactive functions, install the projector so that the projected image is within
reach.
It is recommended to keep connection cable length less than 20 meters to reduce external
noise.
We recommend using stick-on screens or board screens.
Содержание ELPHD02
Страница 1: ...Installation Guide ...
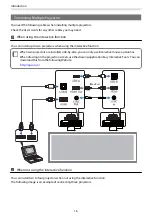
Страница 18: ...Introduction 17 Max 5m Max 5m ...
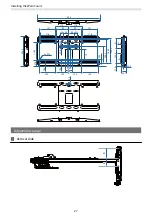
Страница 29: ...Installing the Wall mount 28 Horizontal slide 45 45 Forward backward slide 0 383 ...
Страница 68: ...Installing the Wall mount 67 b Select Geometry Correction from the Installation menu c Select Quick Corner ...
Страница 77: ...Installing the Control Pad 76 For Canadian Users ...
Страница 79: ...Installing the Control Pad 78 ...
Страница 96: ...Installing the Touch Unit 95 Wavelength 932 to 952 nm ...
Страница 99: ...Installing the Touch Unit 98 Adjustment range 79 5 140 5 15 76 ...
Страница 138: ...Setting the Projector 137 c Select EDID from the Signal I O menu d Select 3240x1080 60Hz ...

