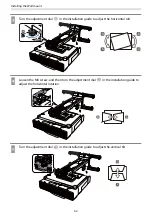
Installing the Wall mount
57
b
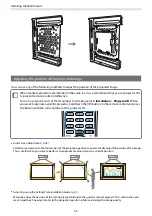
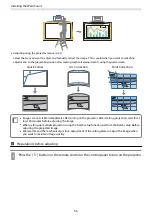
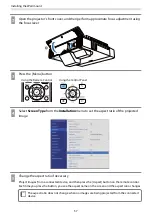
Open the projector’s front cover, and then perform approximate focus adjustment using
the focus lever
c
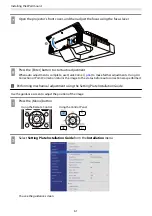
Press the [Menu] button
Using the Remote Control
Using the Control Panel
d
Select
Screen Type
from the
Installation
menu to set the aspect ratio of the projected
image
e
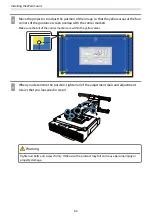
Change the aspect ratio if necessary
Project images from a connected device, and then press the [Aspect] button on the remote control.
Each time you press the button, you see the aspect name on the screen and the aspect ratio changes.
c
The aspect ratio does not change when no images are being projected from the connected
device.
Содержание ELPHD02
Страница 1: ...Installation Guide ...
Страница 18: ...Introduction 17 Max 5m Max 5m ...
Страница 29: ...Installing the Wall mount 28 Horizontal slide 45 45 Forward backward slide 0 383 ...
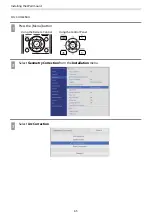
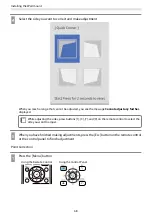
Страница 68: ...Installing the Wall mount 67 b Select Geometry Correction from the Installation menu c Select Quick Corner ...
Страница 77: ...Installing the Control Pad 76 For Canadian Users ...
Страница 79: ...Installing the Control Pad 78 ...
Страница 96: ...Installing the Touch Unit 95 Wavelength 932 to 952 nm ...
Страница 99: ...Installing the Touch Unit 98 Adjustment range 79 5 140 5 15 76 ...
Страница 138: ...Setting the Projector 137 c Select EDID from the Signal I O menu d Select 3240x1080 60Hz ...

