


Installing the Wall mount
47
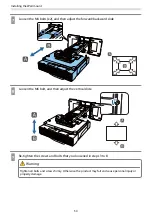
f
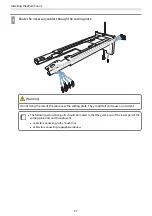
When you determine the position, tighten all of the adjustment dials and adjustment
screws that you loosened in step 4
Warning
Tighten all bolts and screws firmly. Otherwise, the product may fall and cause personal injury or
property damage.
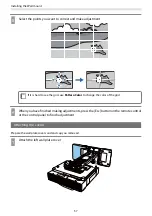
g
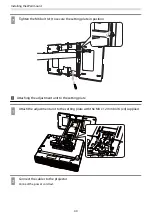
Open the projector’s front cover, and then adjust the focus using the focus lever
h
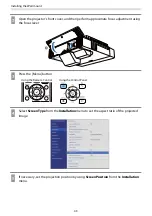
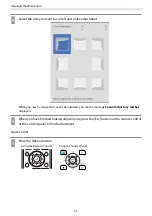
Press the [Enter] button to start auto adjustment
When auto adjustment is complete, use Quick Corner (
) to make further adjustments. Using Arc
Correction or Point Correction returns the image to the status before auto correction was performed.
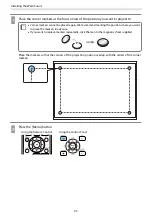
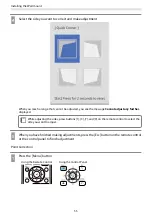
Performing mechanical adjustment using the Setting Plate Installation Guide
Use the guidance screen to adjust the position of the image.
Содержание EB-1480Fi
Страница 1: ...Installation Guide ...
Страница 53: ...Installing the Wall mount 52 b Select Geometry Correction from the Installation menu c Select Arc Correction ...
Страница 55: ...Installing the Wall mount 54 b Select Geometry Correction from the Installation menu c Select Quick Corner ...
Страница 65: ...Installing the pen stand 64 b Attach the cover c Store the interactive pens ...
Страница 75: ...Installing the Touch Unit 74 Wavelength 932 to 952 nm ...
Страница 78: ...Installing the Touch Unit 77 Adjustment range 79 5 140 5 15 76 ...


