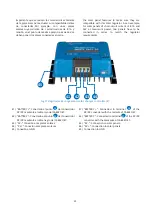


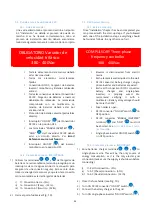
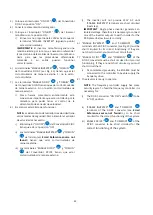

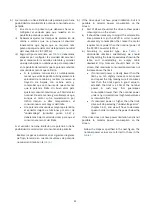


39
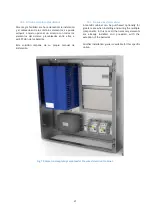
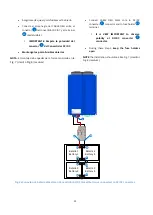
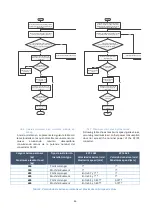
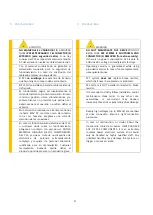
A la izquierda se puede observar la imagen referente al
bastidor de baterías Small. El proceso de cierre del
bastidor consiste en introducir la chapa en el interior de
la bandeja inferior del bastidor. Posteriormente se debe
introducir la pestaña doblada de la chapa en la pletina
situada debajo del portafusibles para que la chapa no se
mueva. Por último, introducir dos tornillos M4 en los
agujeros mostrados en la imagen.
A la derecha se muestra una imagen similar, referente al
bastidor de baterías Médium. El proceso de cierre del
bastidor es el mismo, pero en este caso hay dos pletinas
situadas en las dos esquinas superiores del bastidor.
Por último, introducir dos tornillos M4 en los agujeros
mostrados en la imagen.
In the left-hand picture you can see the image
regarding the Small battery rack. To close the rack
insert the sheet into the internal bottom tray of the
rack. Next, insert the folding part of the sheet into the
metal plate placed below the fuse holder. As a final
step, put the M4 screws in the holes of the picture
below.
In the right-hand picture there is a similar image,
isntead showing the Medium battery rack. The rack
closing process is the same as in the previous case, but
now, there are two metal plates in the top corners. As
in the previous case, put the M4 screws into the holes
pictured.
Fig. 30. Montaje chapa de cierre bastidor Small/
Assembly of the Small rack closing sheet.
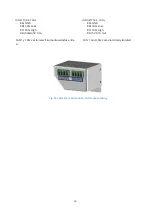
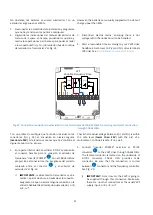
Además, para la disposición del portafusibles, en el caso del
bastidor Small hay que introducirlo en el carril DIN que se
encuentra fijado a la parte superior del bastidor. En cambio,
para el bastidor médium hay que realizar un par de pasos
más.
En primer lugar, atornillar la chapa metálica negra al bastidor
sirviéndose de un tornillo M5. Ésta chapa será el soporte
sobre el que se atornillará el carril DIN mediante dos
tornillos M4. Por último, introducir el portafusibles sobre el
carril DIN en la posición en la que se ve en la imagen.
Fig. 31. Montaje chapa de cierre bastidor Medium/
Assembly of the Medium rack closing sheet.
In addition, to place the fuse holder in the Small battery
rack, insert into the DIN rail that is fixed at the top side of
the rack. To place the fuse holder in the Medium batteries
rack, you must follow two extra steps.
Firstly, the black metal sheet must be screwed to the rack
using a M5 screw. This sheet will support the DIN rail, which
will be screwed using two M4 screws. Secondly, the fuse
holder must be inserted into the DIN rail as shown in the
picture below.
If you need indications to carry out the assembly of the
Large battery rack, contact
epic power
.
Содержание P2S Series
Страница 1: ...1 Manual de instalaci n Installation guide P2S Series plug single phase P2S powered by...
Страница 2: ...2 Versi n 4 6 June 2018 Epic Power Converters S L...
Страница 9: ...9 Fig 3 Convertidor DC DC 5k5 5k5 DC DC Converter 0 1 2 3 4 6 10 9 7 8 5...
Страница 55: ...55 Dimensiones EPCL 5K5 EPCL 5k5 dimensions...
Страница 56: ...56 6 6 Dimensiones del cargador de bater as 6 6 Battery charger dimensions...
Страница 57: ...57 6 7 Dimensiones del inversor monof sico 6 7 Single phase inverter dimensions Inversor TS 400 TS 400 Inverter...
Страница 58: ...58 Inversor TS 700 TS 700 Inverter...
Страница 59: ...59 6 8 Dimensiones del Controlador de carga solar 6 8 Solar charge controller dimensions...
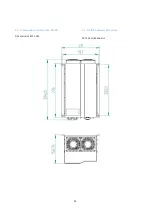
Страница 61: ...61 6 9 2 Bastidor bater as Small 4x1 6 9 2 Small batteries rack 4x1...
Страница 62: ...62 6 9 3 Bastidor bater as Medium 6 9 3 Medium batteries rack...


