12
Chapter2
|
Installation
Tabletop
• Complete the camera assembly. Find a secure location where the monitored space is within the camera view range and adjust
the camera angle focusing on the target area or object.
• Plug in the power adapter to the wall outlet once ready.
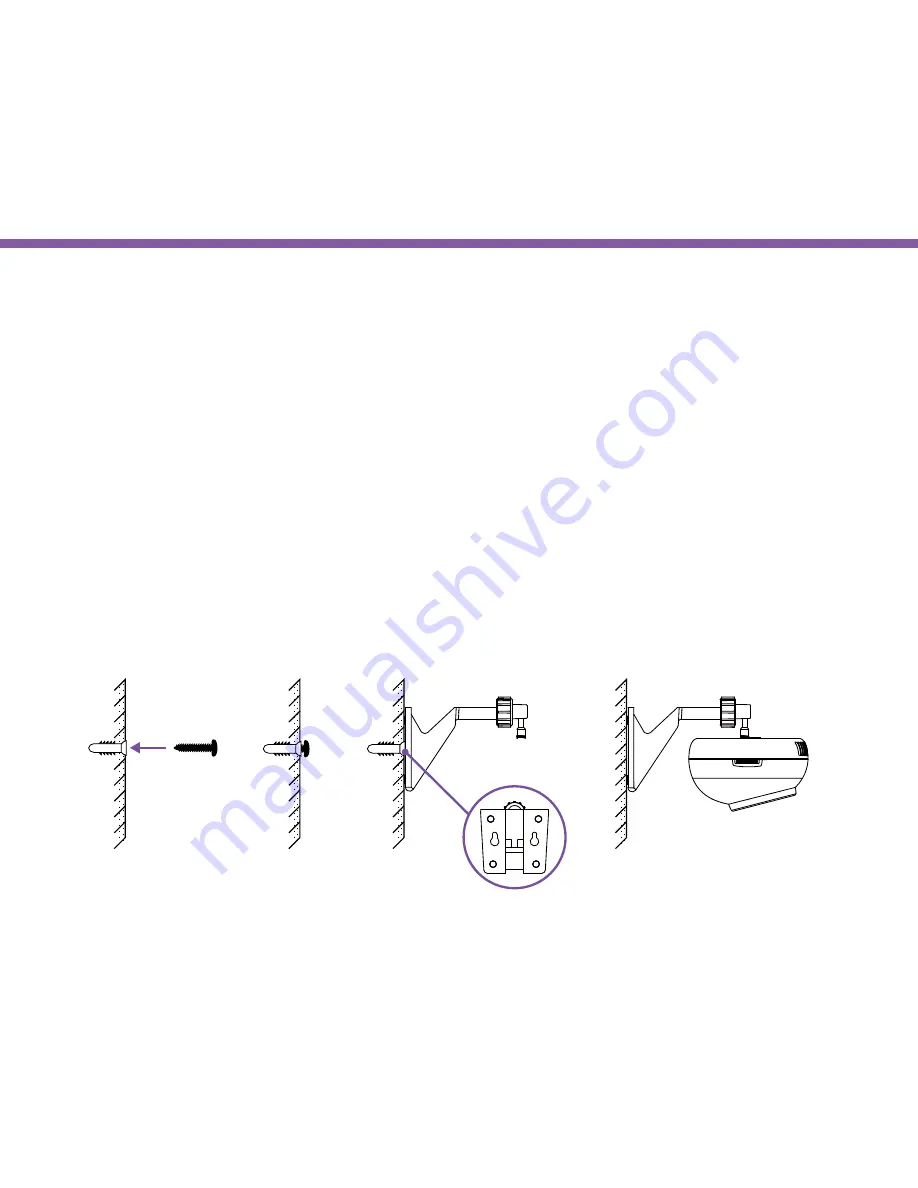
Wall-mount
• Detach the camera from the stand for easily installation.
• Find a proper place on the wall where camera is able to aim at the monitored space.
• Once location is determined, mark and drill two pilot holes aligning to the screw holes at the bottom of the camera stand. Once
aligned, put wall anchors into the holes and insert screws into the wall anchor. Screw and secure the stand in place.
• Now, you can attach the camera to the stand. Then, plug in the power adapter to the wall outlet to complete the installation.
Содержание EDS1130
Страница 1: ...Intelligent IP Camera User Manual EDS1130 HOME Guardian ...
Страница 5: ...Chapter 1 Product Overview ...
Страница 10: ...Chapter 2 Installation ...
Страница 16: ...Chapter 3 Accessing the Camera after Installation ...
Страница 20: ...20 Chapter3 Accessing the Camera after Installation EnViewer Finder Network ...
Страница 23: ...23 Chapter3 Accessing the Camera after Installation EnViewer Finder EnGenius Cloud Service ...
Страница 25: ...25 Chapter3 Accessing the Camera after Installation EnViewer Finder Config ...
Страница 34: ...Chapter 4 Basic Settings ...
Страница 45: ...Chapter 5 User Interface ...
Страница 118: ...Chapter 6 Camera Connecting to EnGenius Gateway Router ...
Страница 133: ...Chapter 7 Camera Connecting to Other Router ...
Страница 135: ...Chapter 8 EnViewer APP ...
Страница 160: ...Chapter 9 Application Guide ...
Страница 170: ...170 Chapter9 Application Guide Step 5 Setting EnViewer Notification Set Push Message ON and enter the device name ...
Страница 172: ...172 Chapter9 Application Guide Step 1 Disable Alarm Disable Event Alarm so that Schedule Recording can be configured ...
Страница 176: ...Chapter 10 Troubleshooting ...
Страница 182: ...Appendix ...


