


158
|
Reference: Connector-specific configuration information
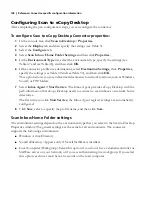
Configuring Scan to eCopy Desktop
After completing the pre-configuration steps, you can configure the connector.
To configure Scan to eCopy Desktop Connector properties:
1
In the console tree, click
Scan to Desktop
>
Properties
.
2
Select the
Display
tab and then specify the settings (see Table
9
).
3
Select the
Configure
tab.
4
Select
Scan Inbox
/
Home Folder Settings
and then click
Properties
.
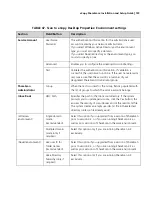
5
In the
Environment Type
list, select the environment type, specify the settings (see
Table
47
and see Table
48
), and then click
OK
.
6
If the connector profile uses destinations, select
Destination Settings
, click
Properties
,
specify the settings (see Table
49
and see Table
50
), and then click
OK
.
This option allows you to send scanned documents to network locations, such as Windows,
Novell, or FTP folders.
7
Select
Inbox Agent > Start Service
. The Inbox Agent provides eCopy Desktop with the
path information that eCopy Desktop needs to connect to scan inboxes or network home
directories.
The first time you click
Start Service
, the Inbox Agent registry settings are automatically
configured.
8
Click
Save
, select or specify the profile name, and then click
Save
.
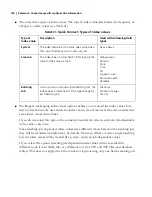
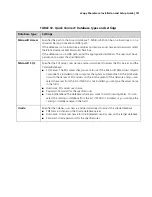
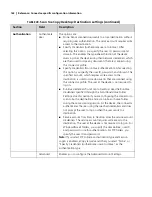
Scan Inbox/Home Folder settings
The environment settings depend on the environment type that you select in the Scan to Desktop
Properties window. The general settings are the same for all environments. The connector
supports the following environments:
■
Windows Active Directory
■
Novell eDirectory: Appears only if Novell NetWare is installed.
■
Local Computer (Workgroup): Select this option if you do not have a domain controller or
NetWare server on your network, or if you are authenticating in a workgroup. If you select
this option, each user must have an account on the local computer.


