


eCopy ShareScan
®
Installation and Setup Guide
|
109
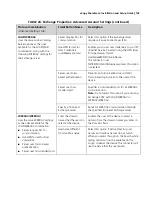
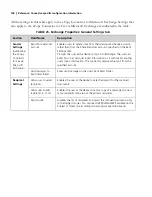
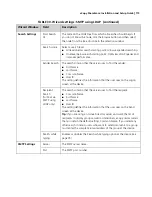
To configure eCopy Connector for Fax via Microsoft Exchange properties:
eCopy recommends that you use the Wizard to initially configure a connector profile. Use the
Properties button on the Configure tab only if you need to make custom modifications after the
initial configuration.
1
In the console tree, select
Fax via Exchange
>
Properties
.
2
Select the
Display
tab and then specify the settings (see Table 9).
3
Select the
Configure
tab.
The
Configure
tab displays a summary of the settings that you specify using the
Wizard
or
the
Properties
window (see page 99).
4
Use the connector
Wizard
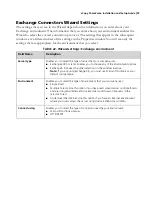
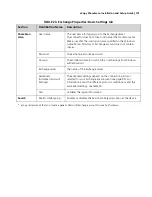
to specify the basic settings (see Table 22).
This includes specifying the Fax Format (see page 78).
5
If you are configuring a connector profile for an environment that uses an External
Associated Account (EAA) and contains multiple forests, and you want to add additional
forests (see page 98).
6
Select the
Local
Address Book
tab and then specify the settings (see Table 15 and see
Table 16).
7
Select the
Content
tab and then specify the settings (see Table 10).
8
Select the
Express
tab and then specify the settings (see Table 11).
9
Click
Save
, select or specify the profile name, and then click
Save
.
To configure eCopy Connector for Fax via Microsoft Exchange services:
1
In the console tree, select
Fax via Exchange
>
Services
.
The
Services
pane appears.
2
Configure the connector services (see page 85).
3
Click
Save
, select the profile name, and then click
Save
.


