3 Installation
3.6 Electrical Installation
74
DC1-S…20…, DC1-S…OE1 Variable Frequency Drives
05/21 MN040058EN
www.eaton.com
3.6.2 Connection on control section
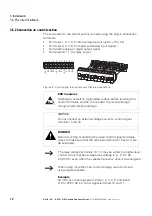
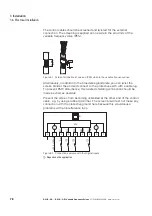
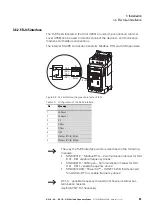
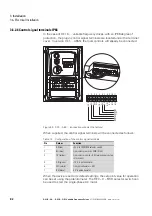
The connection to the control section is made using the plug-in connection
terminals:
•
Terminals 1, 5, 7, 9: Control voltage output (+24V, +10V, 0V),
•
Terminals 2, 3, 4, 6: for digital and analog input signals
•
Terminal 8: analog or digital output signal
•
Terminals 10, 11: dry relay output
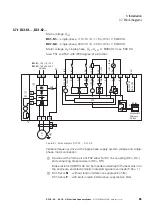
Figure 48: Control signal terminal layout and factory designations
ESD measures
Discharge yourself on a grounded surface before touching the
control terminals and the circuit board to prevent damage
through electrostatic discharge.
NOTICE
Do not connect an external voltage source to control signal
terminal 1 (+24 V)!
DANGER
Before touching or handling the wired control signal terminals,
check to make sure that the terminals (terminals 10 and 11) are
de-energized.
→
The relay contact (terminals 10, 11) may be wired to a higher-level
control circuit that has a dangerous voltage (e.g., 110 V AC,
230 V AC) even when the variable frequency drive is de-energized.
→
When using more than one control voltage, we recommend
using separate cables.
Example
24 V DC at control signal terminals 1, 2, 3, 4, 6, and 8 and
110 or 230 V AC at control signal terminals 10 and 11.
1 2 3 4 5 6 7 8 9 10 11
+24 V
DI1
AI1
0 V
DI2
DI3
AO1
0 V
K13
K14
+10 V
1 2 3 4 5 6 7 8 9 10 11
Содержание DC1-S1011NB-A20CE1 1
Страница 4: ......
Страница 124: ...5 Operation 5 7 Handling the keypad 120 DC1 S 20 DC1 S OE1 Variable Frequency Drives 05 21 MN040058EN www eaton com...
Страница 160: ...6 Parameter structure 6 7 Fault messages 156 DC1 S 20 DC1 S OE1 Variable Frequency Drives 05 21 MN040058EN www eaton com...
Страница 170: ...7 Technical Data 7 3 Dimensions 166 DC1 S 20 DC1 S OE1 Variable Frequency Drives 05 21 MN040058EN www eaton com...

