background image


24 

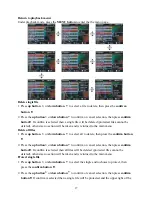
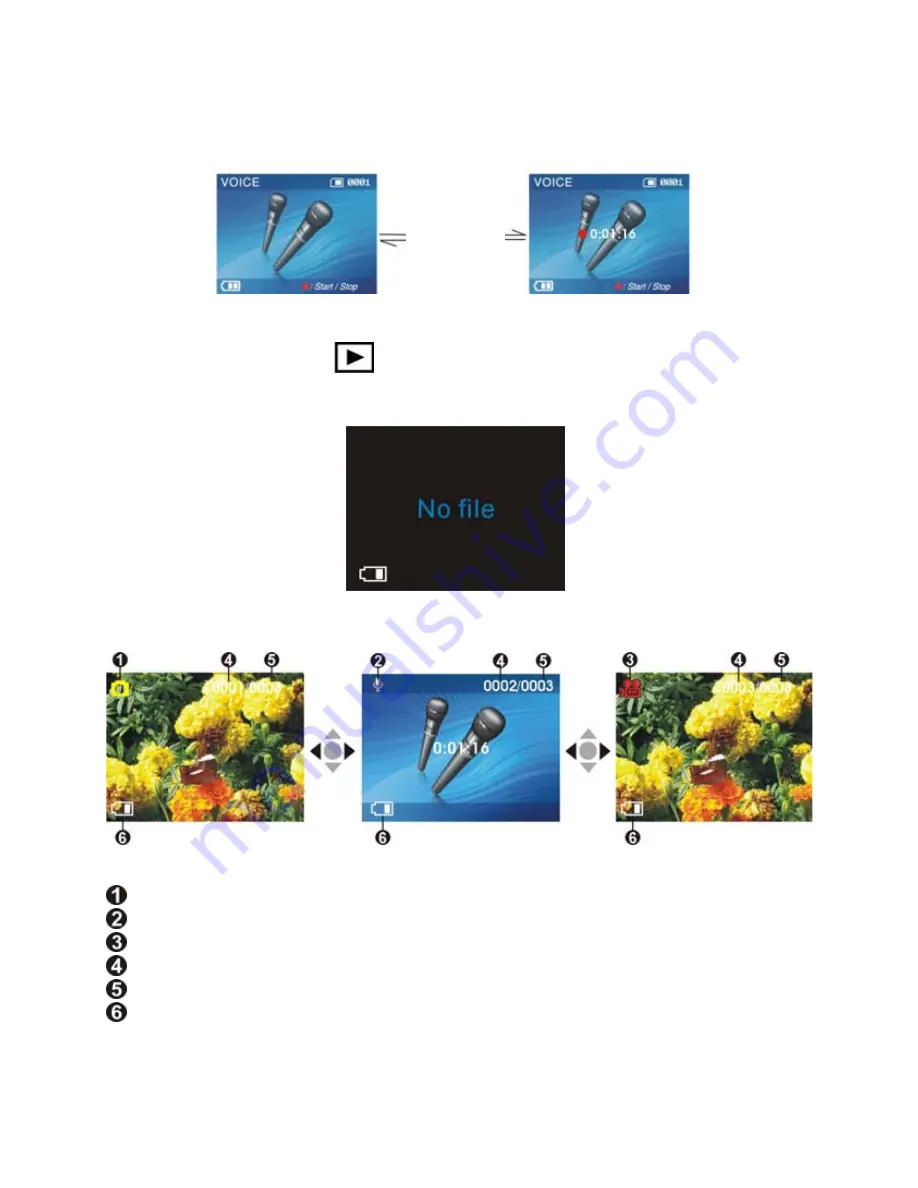
Begin recording: 


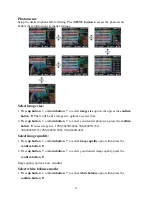
Under audio mode, press the shutter to begin recording, then press the shutter to stop recording.   


Press shutter


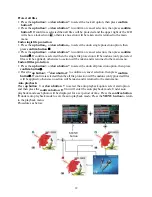
Playback mode


Press the 

playback button     

    to enter the playback mode


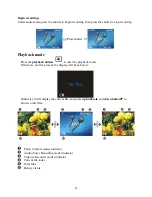
If there are no files present, the display will be as below:   


Otherwise it will display the current file, and press 

up button


 and 

down button

 to 

browse other files.   


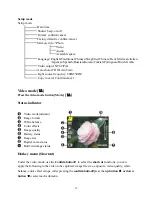
Photo (Camera mode) indicator 


Audio (Voice Recording mode) indicator 


Video (Camcorder mode) indicator 


Current file index 


Total files 

  Battery status


Содержание DXG-572V

Страница 1: ...h friends and family This digital video camera is also able to record audio Plus you can connect to a computer to function as a webcam This manual will introduce you to using your digital video camera...

Страница 2: ...8 Preparations before operation 8 4 Using the digital video camera 9 Function list 9 Video mode 11 Status indicator 11 Hotkey menu 11 Vi d eo me n u 1 3 Video size 13 I ma g e q u a l i t y 1 3 White...

Страница 3: ...ction 23 Automatic playback 23 DPOF 23 Direct to print DPS 24 Exit from playback menu 25 Setup mode 26 Options setup 26 Date time 26 Sounds 27 Format 27 Factory default 27 Memory information 27 Langua...

Страница 4: ...unless authorized by the rights holder shall not violate copyright laws In addition if filming is prohibited for live performances and exhibitions even if just for personal use filming is not allowed...

Страница 5: ...4 3 If liquid crystal is swallowed please wash mouth cavity drink large amounts of water and induce vomiting then seek medical attention immediately...

Страница 6: ...t open the battery lid If water gets inside the digital video camera interior immediately turn off power and remove the battery Care and handling of digital video camera 1 If the lens LCD screen surfa...

Страница 7: ...k mode increase the volume during playback of video and audio 3 Confirm button mainly used to confirm an action and to call out the shortcut menu 4 Zoom IN button digital zoom in 5 Down button select...

Страница 8: ...tton fast rewind during video playback 2 Play stop button start or stop playback of video or audio under playback mode 3 Forward button fast forward during video playback 4 Display Set button switches...

Страница 9: ...ry cover out to open the battery compartment cover 2 Battery compartment 3 SD MMC card slot 4 Battery cover Battery status indicator 1 Battery cover latch 4 Battery cover 2 Battery compart 3 SD MMC ca...

Страница 10: ...ow into the memory card slot To remove the memory card lightly press the memory card the memory card will automatically pop up 3 Before using the Digital Video Camera Note When inserting the memory ca...

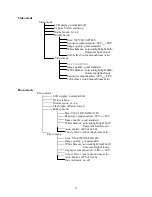
Страница 11: ...ng the digital video camera Step one Press the Power switch button and the power indicator light will automatically light up When the power indicator light is lit release the power switch button Funct...

Страница 12: ...ize VGA QVGA Color effect color monochrome retro Photo mode Photo mode Picture taking LCD display normal all off Digital zoom 1x 4x Hotkey menu Flash light off auto forced Exposure compensation 2EV 2E...

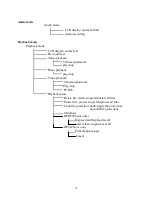
Страница 13: ...olume adjustment Play stop FF RW Photo playback Video playback Playback menu Delete file delete single file delete all files Protect file protect single file protect all files Undo file protection und...

Страница 14: ...y 60HZ 50HZ Copy to card Confirm cancel Video mode Press the video mode button Movie Status indicator Video mode indicator Image format White balance Color effects Image quality Battery status Image s...

Страница 15: ...14 The control procedures are on the next page...

Страница 16: ...15...

Страница 17: ...the size option and press the confirm button 2 Use the up button or down button to select your desired image size and press the confirm button Image size options VGA 640X480 QVGA 320X240 The control p...

Страница 18: ...17 2 Use the up button or down button to select your desired image quality and press the confirm button Image quality options Best standard...

Страница 19: ...utton or down button to select your desired exposure level and press the confirm button There will be 13 levels of exposure compensation to select from Select color effects 1 Press the up button or do...

Страница 20: ...lly stop recording when memory is full Photo mode Press mode button STILL to enter photo mode Status indicator Photo mode indicator Flash mode White balance status Color effects File quality Battery s...

Страница 21: ...ut functions you can apply the following to the image to be captured image size exposure image quality white balance auto timer color effect setup etc After pressing the confirm button press the up bu...

Страница 22: ...or down button to select your desired photo size press the confirm button to set image size 12M 4048X3040 5M 2608X1952 3M 2048X1536 2M 1600X1200 VGA 640X480 Select image quality 1 Press up button or d...

Страница 23: ...d auto shutter count down time press the confirm button The available timer options are off 5 sec 10 sec 30 sec Select date indicator 1 Press up button or down button to select date indicator option t...

Страница 24: ...23 Battery status Memory status...

Страница 25: ...the playback button to enter the playback mode If there are no files present the display will be as below Otherwise it will display the current file and press up button and down button to browse other...

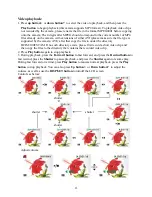
Страница 26: ...o under the directory DCIM 100FSCAM If no such directory exists please first record a short video clip and then copy the files to the directory that contains the recorded video clip 2 Press Play butto...

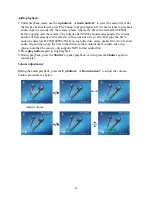
Страница 27: ...he camera with extensions of wav after that copy the file to under the directory DCIM 100FSCAM If no such directory exists please first record a short audeo clip and then copy the files to the directo...

Страница 28: ...lete all files 1 Press up button or down button to select all to delete then press the confirm button 2 Press the up button or down button to confirm or cancel selection then press confirm button If c...

Страница 29: ...28 LCD will show a locked icon otherwise no action will be taken and is returned to the main menu...

Страница 30: ...iles will be applied otherwise no action will be taken and is returned to the main menu Undo all files protection 1 Press the up button or down button to select the undo all protection option then pre...

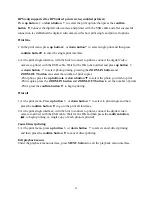
Страница 31: ...wn button to set the all option then press the confirm button to set to print one single copy of all photos DPOF cancel all 1 Press up button or down button to select the DPOF option then press the co...

Страница 32: ...ZOOM OUT button can select the number of print copies Print photo press the up button or down button to select the photo you wish to print Print copies press the ZOOM IN button and ZOOM OUT button to...

Страница 33: ...odify the followng options 1 Date time 2 Button beep 3 Format 4 Factory defaults 5 Memory info 6 Language 7 Video output 8 Auto shutoff 9 Light source frequency 10 Copy to card Setup options Under the...

Страница 34: ...tput Set the video signal format NTSC PAL Controls are similar to Sounds setup Auto shutoff Set the auto shutdown timer with the following options Off no auto shutdown 1 min automatically shutdown aft...

Страница 35: ...the audio input of the TV port and the black plug to the back of the audio in out port on the digital video camera Step three Switch the TV to the correct channel If the TV standard is not correct yo...

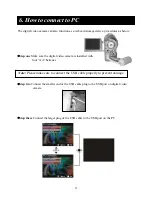
Страница 36: ...al video camera is installed with four AA batteries Step two Connect the smaller end of the USB cable plug to the USB port on digital video camera Note Please make sure to connect the USB cable proper...

Страница 37: ...l video camera We strongly suggest you operate the digital video camera on higher level PC equipment for even greater performance The digital video camera minimum system requirements are as below Syst...

Страница 38: ...37 Note When playing back video on the PC make sure the PC has DirectX8 0 or newer versions and is supported...

Страница 39: ...e already installed and connected to the camera the camera built in memory and the SD memory card will be shown in Windows My Computer as removable storage Drag and drop files normally as you would fo...

Страница 40: ...use Windows file manager to run the executable InstallMgr exe under the root directory on the CD 3 Press the install button and follow the on screen instructions After application is started you can...

Страница 41: ...screen will be shown please press Next to continue 4 At the EULA screen please select I accept the agreement and then press Next to continue 5 Please follow the instructions and use Browse to choose t...

Страница 42: ...ase choose the name of the folder to install program press Next to continue 7 At the install additional tasks screen press Next to continue 8 At the ready to install screen press Install to begin inst...

Страница 43: ...42 9 Install in progress To stop installation please press Cancel 10 The screen below will be shown after installation is complete press Finish to end program installation...

Страница 44: ...atible slot maximum supported 2GB File format Still image JPEG video MPEG 4 AVI audio recording WAV Image resolution 12M 4048x 3040 firmware interpolation 5M 2608x1952 3M 2048 x 1536 2M 1600 x 1200 VG...

Страница 45: ...44...

Страница 46: ...n for repair Error message when entering direct printing service For error messages appearing when entering direct printing service you should remove the USB plug from the digital video camera and che...

Страница 47: ...w dxgusa com for any product updates or special announcements You can also check out our online support desk where you can register your product send emails to our technical support and find a list of...

Отзывы: