ALL ABOUT IMAGE RECOGNITION & PROCESSING
ALL ABOUT IMAGE RECOGNITION & PROCESSING
7. Manual for Remote
viewer software
4. Installation
Procedure
Procedure
c) When it arrives at DHCP SETUP, it first display “SEARCHING” until DVMR unit gets IP information and
connects to the network, and then finally changes to “OK”.
If DHCP SETUP is completed and “OK” is displayed, DVMR unit successfully connected to the network.
Then enter into SYSTEM SETUP/ TCPIP SETUP/IP ADDRESS. You will see DVMR unit already got IP
ADDRESS automatically assigned by DHCP server, Cable modem, IP sharer of ADSL modem. Write
down this IP address and port number, and enter them into System Setting of Remote viewer program
to be installed into client PC. Port number is set at 80 automatically by DVMR system. If your network is
protected by firewall, and port number 80 is protected by firewall, change port number from 80 to other
number not protected by firewall
Notice :
If IP DETECT MODE is set at MANUAL, DVMR unit does not get IP information automatically
during the process of booting, and you have to get IP information manually as descried in
following process.
If you set at Factory default in SETUP menu, IP DETECT MODE is MANUAL.
2) Manual assignment
If automatic assignment is not done successfully or if you set IP DETECT MODE at MANUAL in the
DHCP SETUP, you have to get IP information of DVMR unit as following process in the client PC
from which you want to access to DVMR unit via IP network.
If you connect DVMR unit to leased line with static IP already known, it is not necessary to follow
following process to get IP informaiton.
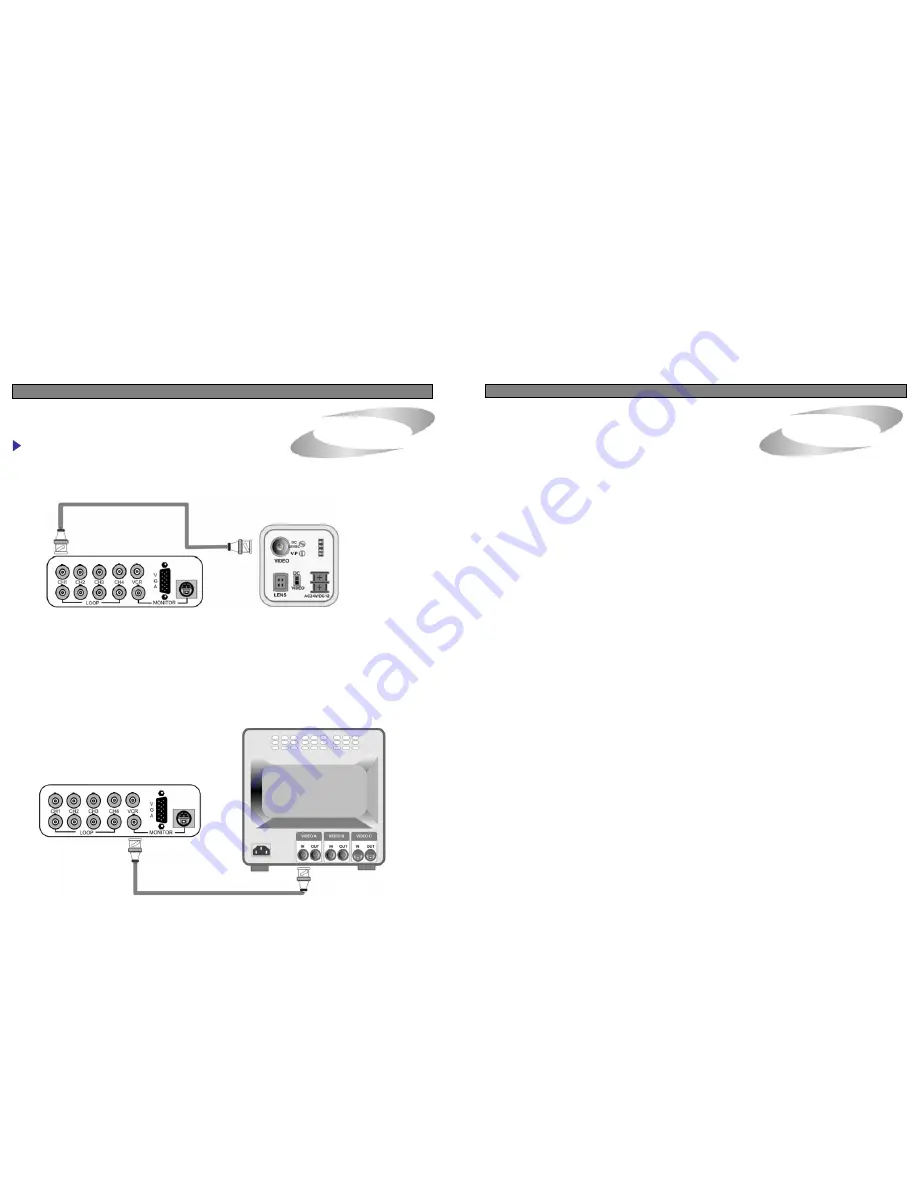
1) Camera Connection
Connect the camera to the CAMERA INPUT on the Rear Panel of the system.
Rear part of CAMERA
Notice :
This DVMR system automatically detects video system of camera you connected to the unit when
you boot DVMR system first. It is not necessary to set video system separately, and DVMR
system set at NTSC or PAL system automatically when you boot the system.
2) Monitor Connection (Composite Connection Method)
Connect the monitor to the MONITOR OUT on the Rear Panel of the system
a) “ipconfig” or “winipcfg”
Execute “ipconfig” command in the client PC with Windows 2000 and Windows XP, and “winicfg”
command in the client PC with Windows 98 and ME, and you will get IP information, that are IP Address,
Gateway, Subnet Mask. Write down those numbers and input into DVMR unit to which you are going to
access via IP network. As far as DVMR is in operation without turning off, it is considered that this IP
Address is assigned just to this DVMR unit.
Then, restart client PC to get different dynamic IP address for client PC after you get IP information for
DVMR unit.
Detail procedure to get IP information in different Windows is as follows.
Notice :
Connect camera or monitor to DVMR unit while DC power switch on the front panel is off.
5
34


