ALL ABOUT IMAGE RECOGNITION & PROCESSING
ALL ABOUT IMAGE RECOGNITION & PROCESSING
7. Manual for Remote
viewer software
4. Installation
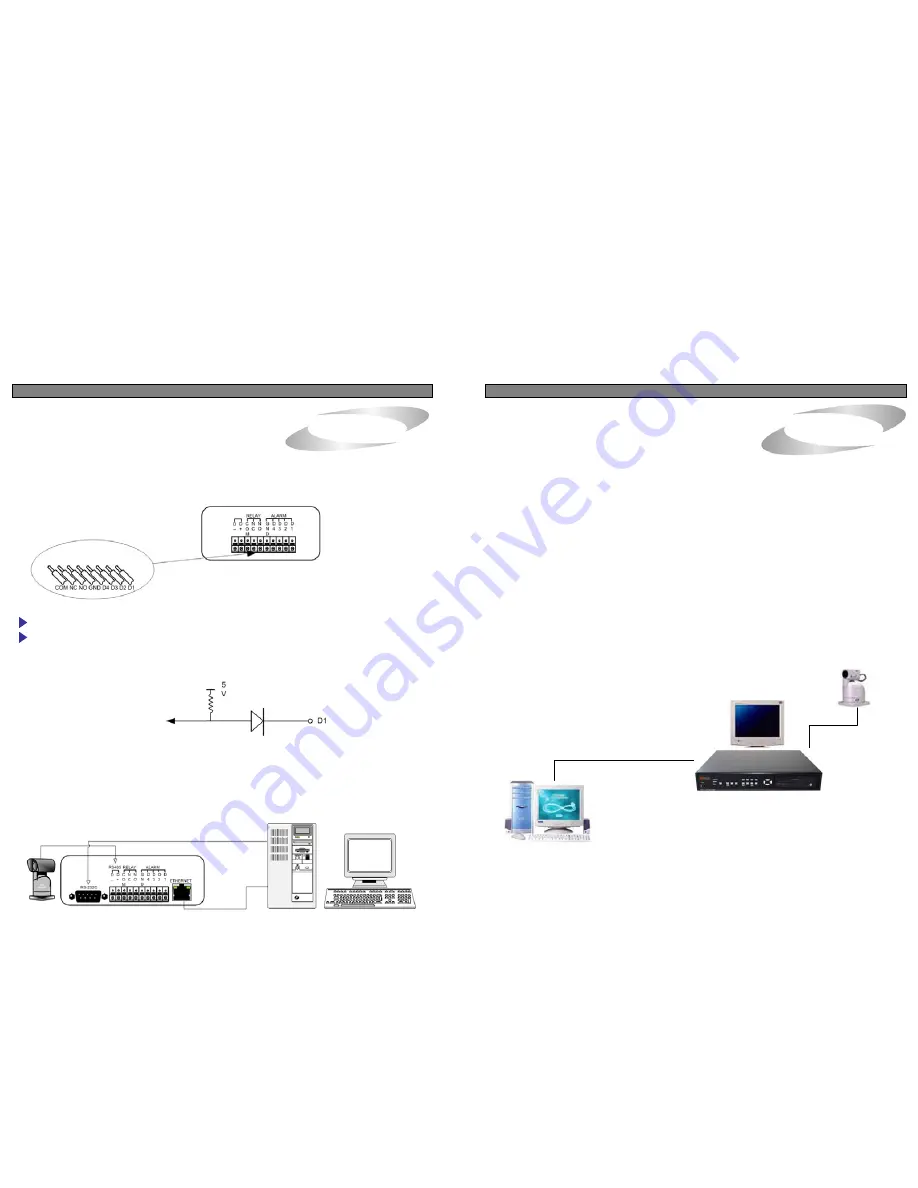
5) Sensor Connection
Connect the Sensor to the SENSOR INPUT/OUTPUT on the Rear Panel of the system
7. Manual for Remote Viewer Software (TCP/IP)
Terminal block
Pin 1 Alarm1
Pin 2 Alarm2
Pin 3 Alarm3
Pin 4 Alarm4
Pin 5 GND
Pin 6 NO( Normal Open )
Pin 7 NC( Normal Close)
Pin 8 COM
General description :
TCP/IP option of 1 channel , 4channel and 16channel DVMR enables users to view live
pictures, search recorded pictures, or control PTZ camera via Internet line, far apart
from the DVMR unit, and users can store selected recorded pictures on HDD of client
PC. Our stand-alone DVMR does not include web server for access to DVMR unit via
Internet line, and you must install Remote Viewer software included in the package on
client PC before you try to access to DVMR unit over IP network.
We provide purchasers of our stand-alone DVMRs, 1channel, 4channel and 16channel, including
TCP/IP option with Remote Viewer Software free of charge, and even open source program for professional
customers who want to upgrade our remote viewer program to include special functions for own use in addition
to basic functions of live viewing, searching, storing selected pictures on client PC, and PTZ control.
1. TCP/IP SETUP in DVMR unit
Before you install Remote Viewer software, be sure to input IP address and others in TCP/
IP SETUP of DVMR unit. Then, execute
SETUP.exe
on Remote Viewer software CD
included in the package of stand-alone DVMR with TCP/IP option.
Relay output : COM+NC, COM+NO OR COM+NC+NO
Alarm input : Short-circuit between Alarm1, Alarm2, Alarm3 or Alarm4 and GND is recognized as alarm.
NOTICE : Sensor input is RECOGNIZED as LOW when alarm signal is on a level with GND,
and it is recognized as HIGH when alarm signal is FLOATING or 5V. Following is internal circuit.
Internal Circuit
PTZ
Thus, there is a danger of damage, when the sensor input goes to a Negative level or voltage higher
than 5V.
LAN, Internet
6) Network Connection
DVMR
RS-232C : Connect to PC to operate DVMR
RS 485 : Connect to PTZ camera
RJ-45 (ETHERNET) : Connect to LAN, WAN or Internet
Install client software(Remote viewer) to DVMR unit via internet line!
2. Conditions of IP network
To access to our DVMR unit via IP network, you have to connect DVMR unit to IP network as one of
followings and assign IP address, Subnet mask, and Gateway to our DVMR unit. Our DVMR unit accepts
static IP and also supports dynamic IP with restrictive conditions,
but accessing to our DVMR unit is more stale when static IP is assigned to DVMR unit than
dynamic IP. We recommend our users to connect both DVMR unit and client PC in the same LAN network
under DHCP server of IP sharer (Intranet) for better performance.
For more details, refer to arrangements RS-232c pins in page 32.
7
32


