


www.dfi.com
16
Chapter 3 Installing the Devices
Chapter 3
Installing a CPU
1. Make sure the system and all other peripheral devices connected to it have been powered-off.
2. Disconnect all power cords and cables.
3.
Before installing the Intel CPU, remove the 8 mounting screws on the top of the
system unit and put them in a safe place for later use.
4. The system board is equipped with a surface mount LGA 1151 socket. This socket is ex-
clusively designed for installing a LGA 1151 packaged Intel CPU.
Important:
1. Before you proceed, make sure (1) the LGA 1151 socket comes with a protec-
tive cap, (2) the cap is not damaged and (3) the socket’s contact pins are not
bent. If the cap is missing or the cap or contact pins are damaged, contact
your dealer immediately.
2. Keep the protective cap. RMA requests will be accepted and processed only if
the LGA 1151 socket comes with the protective cap.
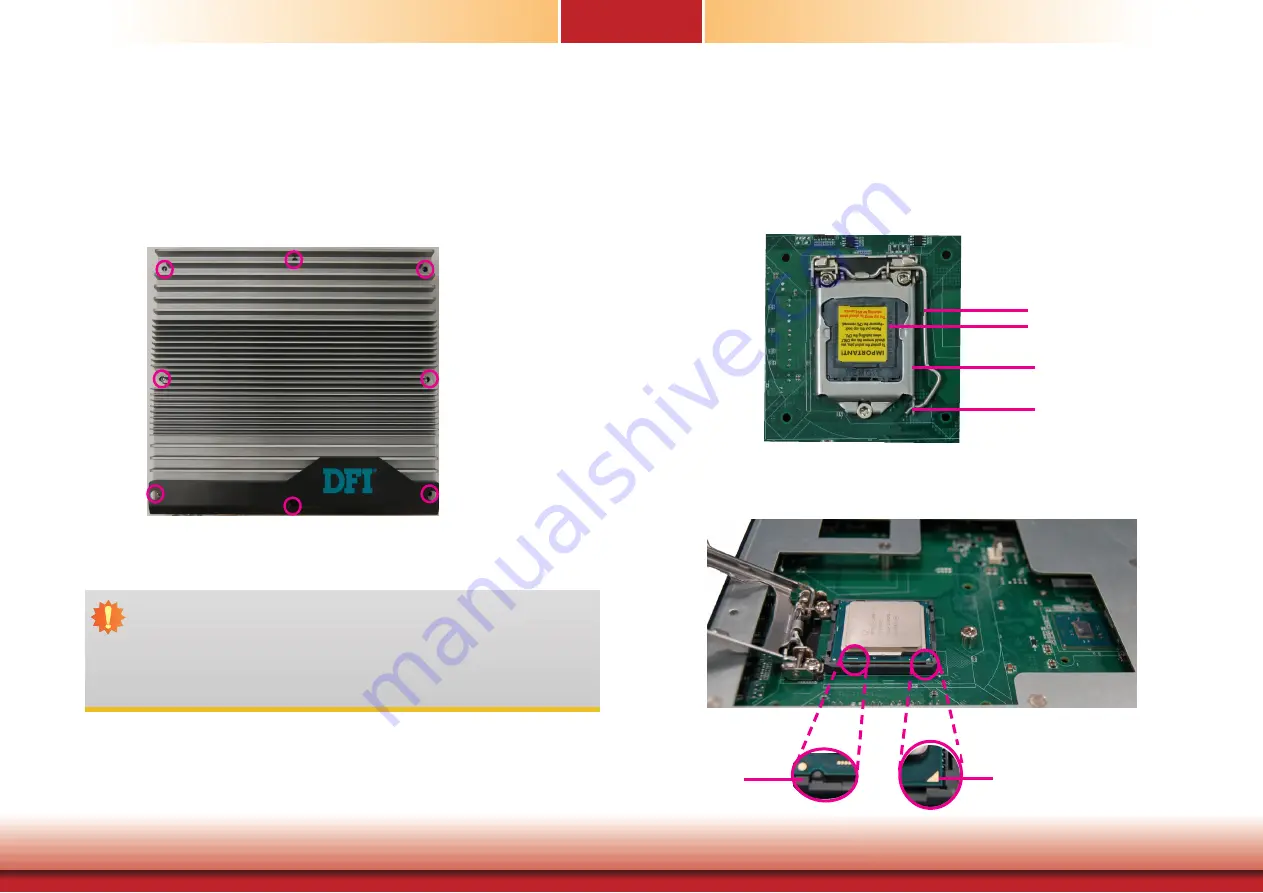
5. Unlock the socket by pushing the load lever down, move it sideways until it is released
from the retention tab, and then lift the load lever up.
6. Remove the protective cap from the CPU socket. The cap is used to protect the CPU sock-
et against dust and harmful particles. Remove the protective cap only to install the CPU.
7. Insert the CPU into the socket. The gold triangular mark on the CPU must align with the
corner of the CPU socket as the photo shown below.
8. Unlock the socket by pushing the load lever down and moving it sideways until it is re-
leased from the retention tab and then lift the load lever up.
Retention tab
Protective
cap
Load lever
Load plate
9. Insert the CPU into the socket. The gold triangular mark on the CPU must align with the
corner of the CPU socket as shown below. The CPU’s notch will at the same time fit into
the socket’s alignment key.
Alignment key
Gold triangular mark


