


Dentsply Sirona
Operating Instructions Xios AE Sensor USB interface and sensors
6 Edit exposures
6.1 Edit exposures in X-ray series
67 29 433 D3780
D3780.201.01.01.02 09.2019
65
6.1.3
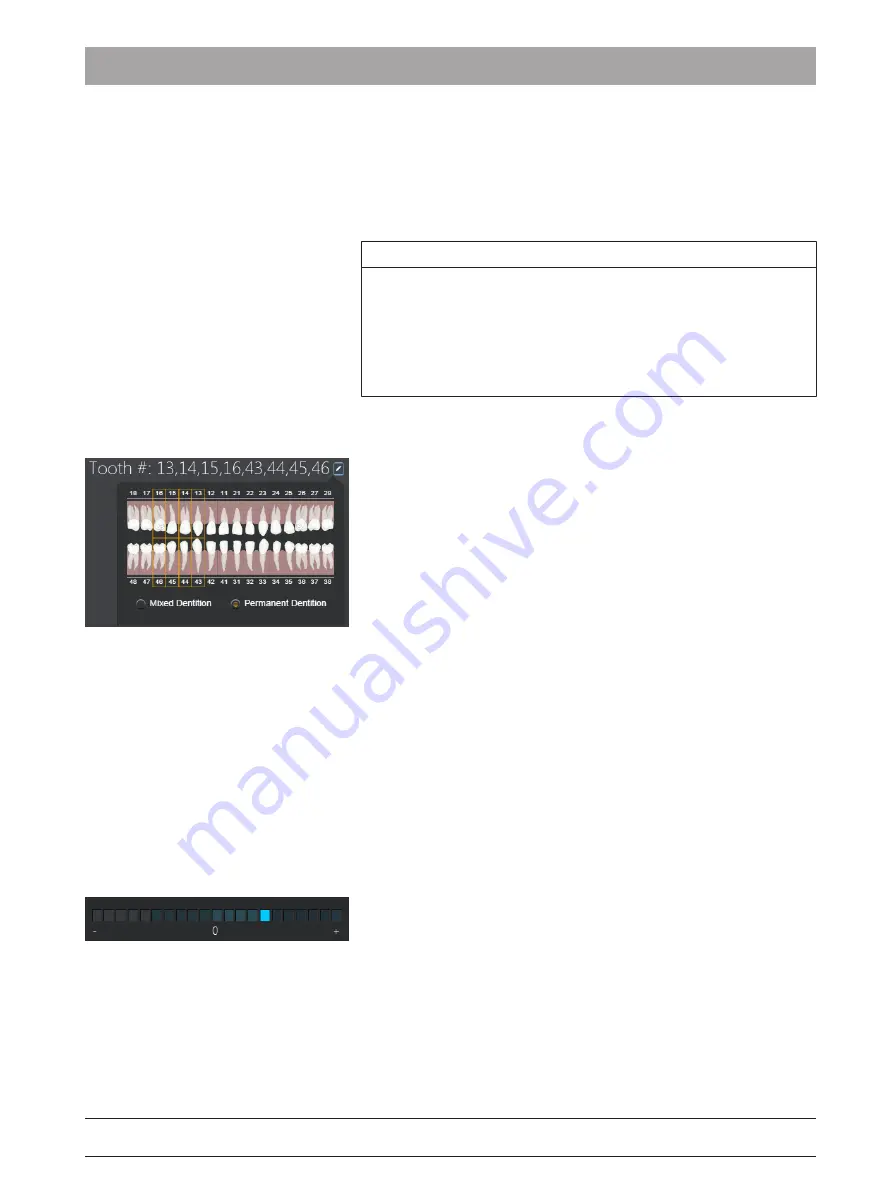
Changing tooth numbers
Changing tooth numbers — a feature also available in the
"Light Box"
— is possible using the edit button located after any
Tooth #
assignments. It is also possible to assign new tooth numbers, to change
the dentition, and to clear any currently assigned tooth numbers.
IMPORTANT
The odontogram located above the
Selected Image will add, change,
or remove dental notations for the teeth in the current series only.
This is the odontogram described in the following procedure. In
contrast, the odontogram located below the exposure windows
reflects the choices and dental notations made on the previous
screen, the Indications screen, and indicates the teeth intended for
exposure.
To change tooth numbers, please perform the following steps:
ü
There is at least one image in the series.
1.
Locate the edit button (after
Tooth #) and click on it.
Ä
When the odontogram is displayed, any currently assigned
tooth numbers will be highlighted.
2.
Click on any currently assigned tooth number to de-select it. As
tooth numbers are de-selected, the
Tooth # list is updated.
Ä
To clear all currently assigned tooth numbers in one action,
hover the mouse over the odontogram, and when the clear
selection button appears, click on it to remove all currently
assigned tooth numbers.
3.
Click on any tooth number currently unassigned to add it to the
Tooth #” list. As tooth numbers are added, the
Tooth # list is
updated.
4.
Change the dentition by clicking on the appropriate button or text
label. The standard tooth numbering for the selected dentition is
changed automatically.
5.
Perform other actions in Acquisition view, if any, then click the
"Finish" button to continue to the "Light Box" .
6.1.4
Checking exposure quality
The exposure meter — a feature also available in the
"Light Box" — is
designed to convey exposure quality. Exposure quality is an
assessment of an image in a range where exposure is considered
optimal.
To understand the results from the exposure meter, please refer to the
following:
● The middle of the meter (“0”) indicates that the image has been
exposed optimally for the technique factors that were used.
● At one end of the meter (“-”) indicates that the image was
underexposed. Adjusting technique factors would improve image
quality.
● At the other end of the meter (“+”) indicates is that the image was
overexposed. Adjusting technique factors would reduce patient dose
without reducing image quality.


