246
Adding and Replacing Parts
10
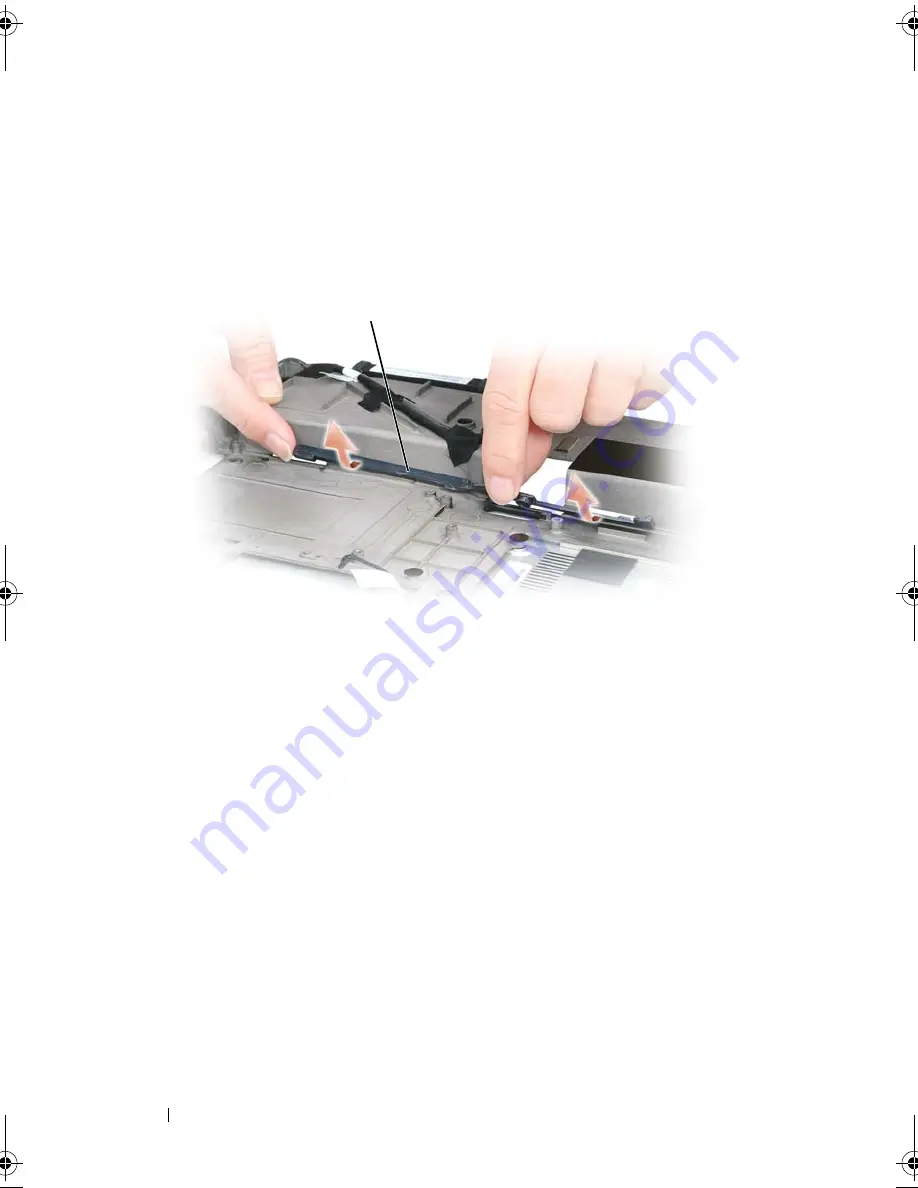
Remove the plastic battery-latch assembly by twisting the assembly
slightly and lifting it out of the channel and away from the computer base.
Replacing the Battery Latch Assembly
1
Insert the latch assembly into the channel on the computer base, and press
it into place.
2
Using a small screwdriver, hook the spring over the hook on the computer
base.
3
Place the battery latch release under the computer base, line it up with the
hole in the base, and then replace the screw in the assembly.
Ensure that the newly installed latch moves smoothly and freely when
pushed and released.
4
Replace the hard drive bay and reinsert the four M2 x 3-mm screws.
5
Replace the system board and the four M2.5 x 5 screws.
1
hook
2
spring
1
battery latch assembly
1
book.book Page 246 Tuesday, August 28, 2007 10:20 AM
Содержание Precision M6300
Страница 1: ...Dell Precision Mobile Workstation M6300 User s Guide ...
Страница 14: ...14 Contents ...
Страница 22: ...22 Finding Information ...
Страница 23: ...Finding Information 23 ...
Страница 24: ...24 Finding Information ...
Страница 25: ...Finding Information 25 ...
Страница 26: ...26 Finding Information ...
Страница 27: ...Finding Information 27 ...
Страница 28: ...28 Finding Information ...
Страница 29: ...Finding Information 29 ...
Страница 30: ...30 Finding Information ...
Страница 31: ...Finding Information 31 ...
Страница 32: ...32 Finding Information ...
Страница 51: ...Setting Up Your Computer 51 ...
Страница 52: ...52 Setting Up Your Computer ...
Страница 62: ...62 Using a Battery ...
Страница 63: ...Using a Battery 63 ...
Страница 64: ...64 Using a Battery ...
Страница 65: ...Using a Battery 65 ...
Страница 66: ...66 Using a Battery ...
Страница 67: ...Using a Battery 67 ...
Страница 68: ...68 Using a Battery ...
Страница 69: ...Using a Battery 69 ...
Страница 70: ...70 Using a Battery ...
Страница 71: ...Using a Battery 71 ...
Страница 72: ...72 Using a Battery ...
Страница 73: ...Using a Battery 73 ...
Страница 74: ...74 Using a Battery ...
Страница 84: ...84 Using the Display ...
Страница 104: ...104 Using Multimedia Component Video and S PDIF Digital Audio 1 S video TV out connector 2 component video adapter 1 2 ...
Страница 109: ...Using Multimedia 109 ...
Страница 110: ...110 Using Multimedia ...
Страница 122: ...122 Setting Up and Using Networks ...
Страница 128: ...128 Using Cards 1 smart card slot 2 smart card 3 ExpressCard slot 1 2 3 ...
Страница 152: ...152 Troubleshooting RUN THE HARDWARE TROUBLESHOOTER See Troubleshooting Software and Hardware Problems on page 169 ...
Страница 160: ...160 Troubleshooting ...
Страница 193: ...Adding and Replacing Parts 193 1 securing clips 2 2 mini card 2 1 ...
Страница 204: ...204 Adding and Replacing Parts 2 Align the display assembly over the screw holes in the base of the computer ...
Страница 238: ...238 Adding and Replacing Parts 1 ExpressCard connector 2 ExpressCard connector on system board 1 2 ...
Страница 250: ...250 Adding and Replacing Parts ...
Страница 252: ...252 Dell QuickSet ...
Страница 256: ...256 Traveling With Your Computer ...
Страница 264: ...264 Getting Help ...
Страница 291: ...Glossary 291 ...
Страница 292: ...292 Glossary ...


